
Una hoja de sierra circular sin filo convierte un simple corte en una lucha. Desgarra la madera, forza la sierra y aumenta el riesgo de lesiones. Las investigaciones indican que el uso de hojas sin filo se asocia con aproximadamente el 30 % de los accidentes de taller. Afilar la hoja soluciona estos problemas, ahorra dinero y permite cortes más limpios. Esta guía le guía paso a paso por el proceso. Aprenderá a detectar una hoja sin filo, afilarla en casa y mantenerla en óptimas condiciones. Con un poco de esfuerzo y la técnica adecuada, su sierra puede producir resultados significativamente mejores.
1. ¿Por qué es importante afilar la hoja de sierra circular?
Afilar ahorra dinero y tiempo
Una hoja afilada reduce la tensión en el motor de la sierra. Esto es clave para modelos eficientes sin escobillas como la sierra circular inalámbrica ONEVAN , ya que puede ayudar a prolongar la vida útil del motor.
Riesgos de una cuchilla desafilada
Las hojas sin filo hacen que los cortes sean lentos. Consumen más energía, lo que aumenta la factura de la luz entre un 10 % y un 20 % en trabajos pesados. Se ven bordes ásperos, marcas de quemaduras o madera astillada, lo que puede arruinar una lámina de roble de $50. El motor rechina bajo tensión adicional, acortando su vida útil en meses o años. Peor aún, una hoja sin filo puede retroceder (cuando la sierra salta hacia usted), causando cortes o magulladuras. Afilar la hoja regularmente previene estos problemas antes de que aparezcan.
Comparación de costos
Una hoja nueva de 7-1/4 pulgadas cuesta $20 para las de acero básico o $100 para los modelos premium con punta de carburo. El afilado se realiza con una lima o piedra de diamante, una compra única de entre $10 y $30. Estas herramientas eléctricas permiten docenas de afilados. Los talleres profesionales cobran entre $0.50 y $1.00 por diente. Afilar profesionalmente una hoja de 24 dientes suele costar entre $12 y $24. Compare eso con reemplazar una hoja de $60 tres veces al año. Afilar, ya sea por cuenta propia o profesional, ahorra mucho dinero.
Impacto ambiental
Desechar cuchillas desafiladas y otras herramientas y equipos desechados contribuye a la acumulación de residuos metálicos en los vertederos. Por ejemplo, una sola cuchilla pesa alrededor de medio kilo y se desechan millones cada año. Si se afilan a tiempo, se puede prolongar la vida útil de la cuchilla de dos a cinco años, dependiendo de la frecuencia de uso. Esto reduce el desperdicio de acero y la búsqueda de cuchillas nuevas. Es una decisión sencilla con un gran impacto, especialmente si se afilan varias herramientas.

2. 5 señales de que la hoja de su sierra circular necesita afilarse
Revisa estas cinco señales para saber cuándo tu cuchilla necesita ser afilada.
Inspección visual: ¿Dientes redondeados o con muescas?
Usa una lupa o la lente macro de tu teléfono para inspeccionar los dientes de cerca. Los dientes afilados tienen puntas afiladas y definidas. Los que no están afilados se ven redondeados, con muescas o astillados. Revísalos con buena luz; la luz natural o una luz LED brillante funcionan mejor. Incluso las muescas más pequeñas, como las astillas de 1/16 de pulgada, afectan el rendimiento. Detecta estas a tiempo para evitar daños mayores.
Rendimiento de corte: ¿esforzarse o ver humo?
Una hoja afilada se desliza por la madera. Si presiona con fuerza para cortar un trozo de madera de 2x4, la hoja se desafila. Las marcas de humo o quemaduras en pino o contrachapado indican fricción, no corte. Podría oler a madera quemada o ver vetas oscuras. Estas señales indican que la hoja está rasgando en lugar de cortar. Afílela para proteger sus brazos y su proyecto. La sierra circular inalámbrica sin escobillas ONEVAN de 180 mm y 7 pulgadas cuenta con un motor sin escobillas de alta velocidad de 11 000 RPM. Impulsa sin esfuerzo su hoja de 180 mm a través de diversos materiales, desde madera maciza hasta baldosas de cerámica.
Señales auditivas: ¿rechinamiento o vibraciones?
Preste atención a su sierra circular. Una hoja afilada zumba suavemente, como un zumbido constante. Una hoja sin filo puede producir un chirrido, similar al roce de metal contra metal. Podría sentir vibraciones adicionales en el mango, que le traqueteen las manos. Estas señales indican que la hoja podría no estar funcionando de forma óptima. No las ignore: indican desgaste en su sierra circular y su hoja.
Pruebas de materiales: madera blanda vs. madera dura
Pruebe su hoja en un trozo de madera. Corte una tabla de pino de 2,5 cm y luego una de roble de 2,5 cm. Una hoja afilada corta ambas con facilidad, dejando bordes lisos. Si el pino corta bien, pero el roble se siente lento o deja astillas irregulares, la hoja está desafilada. La madera dura se desgasta más rápido porque es más densa. Esta prueba toma dos minutos y confirma si es necesario afilar.
Recomendaciones de herramientas
Por $5, una lupa de 10x muestra claramente los bordes de los dientes. La cámara de tu teléfono, en modo macro, funciona igual de bien. Para comprobar el equilibrio, cuelga la hoja por el orificio central y golpéala con un destornillador. Una hoja afilada suena como una campana. Una sin filo suena sordamente. Estas sencillas herramientas te ayudan a diagnosticar sin conjeturas.
3. Lista de verificación de herramientas y materiales para afilar una hoja de sierra circular
Afilar requiere equipo básico. Aquí tienes la lista de verificación.
Herramientas esenciales
- Lima de diamante o piedra de afilar : una lima de grano medio de 6 pulgadas ($10–$20) da forma a los dientes de acero o carburo con precisión.
- Tornillo de banco con mordazas : Un tornillo de banco de 10 cm (20 $) mantiene la hoja firme. Las mordazas evitan rayones.
- Buscador de ángulos o transportador : un transportador de $5 le asegura que coincidan los ángulos de los dientes.
- Marcador : Un marcador permanente ($2) marca los dientes afilados para evitar repeticiones.
Equipo opcional
Afilador de cuchillas eléctrico
Una máquina de $50 a $200, como la amoladora Work Sharp Blade o la Oregon 410-120, afila las cuchillas en 5 a 10 minutos. Es ideal si afila mensualmente o trabaja con varias cuchillas, como para enmarcar o ebanistería. Ajuste la configuración para que coincida con los ángulos de los dientes para obtener mejores resultados.
Herramienta de alineación láser
Los talleres industriales, como el sistema láser ALine (entre 100 y 300 dólares), los utilizan para ajustar ángulos dentados con una precisión de 0,1 grados. Los aficionados al bricolaje rara vez los necesitan, a menos que restauren hojas de carburo de alta gama para trabajos profesionales de carpintería . Un transportador es suficiente para la mayoría de los proyectos domésticos .
Equipo de seguridad
Guantes resistentes a cortes
Los guantes de nivel 5, como NoCry o DEX FIT (entre 10 y 15 dólares), protegen las manos de los dientes afilados durante el limado. Elija guantes ajustados para sujetar bien las herramientas. Lávelos con regularidad para eliminar el polvo metálico.
gafas de seguridad
Las gafas protectoras envolventes de $5, como las 3M Virtua o las DEWALT DPG82, bloquean las virutas de metal y el polvo. Asegúrese de que tengan la certificación ANSI Z87.1 de protección contra impactos. Limpie las lentes después de cada uso para una visión nítida.
Mascarilla antipolvo
Una mascarilla N95 de $3 a $5, como la 3M 8210, evita la inhalación de partículas metálicas finas. Para garantizar el flujo de aire, use una mascarilla nueva cada vez que afile. Si afila con frecuencia, opte por un respirador reutilizable de media cara ($20).

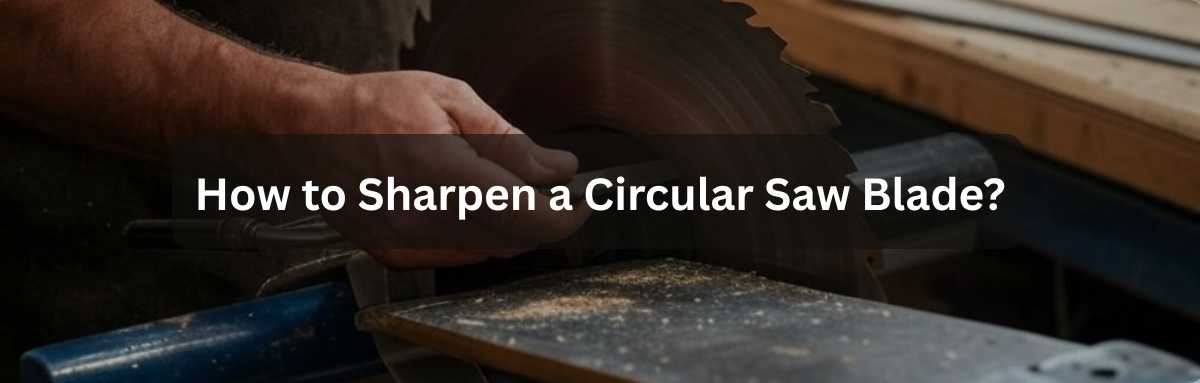
4. Guía paso a paso para afilar una hoja de sierra circular para principiantes
Afilar parece difícil, pero no lo es. Sigue estos pasos cuidadosamente y restaurarás tu cuchilla en menos de una hora.
Paso 1 – Limpiar la cuchilla
Comience con una hoja limpia. Vierta acetona o limpiador de hojas en una bandeja poco profunda. Sumerja la hoja durante 5 minutos para eliminar la resina, el serrín o la brea. Frote con un cepillo de alambre hasta que los dientes brillen. Séquela con un trapo. Una hoja limpia muestra claramente los daños y mantiene la lima afilada.
Paso 2 – Asegurar la cuchilla
Sujete la hoja en un tornillo de banco. Coloque mordazas de goma o madera a ambos lados para protegerla. Apriete hasta que esté firme, pero sin tensión. Compruebe que los dientes no toquen el tornillo. Una hoja bien sujeta se mantiene segura y permite limar uniformemente.
Paso 3 – Encuentra los ángulos originales de la hoja
Observa los dientes de la hoja. La mayoría tienen un ángulo de bisel de 10 a 20 grados. Si tienes las especificaciones del fabricante, consulta el ángulo exacto; de lo contrario, puedes medirlo con un medidor de ángulos. Si no tienes uno, usa un medidor de ángulos de $5 para medir la inclinación de un diente. Marca el primer diente con un marcador para seguir el progreso. Un ángulo igualado garantiza cortes suaves.
Paso 4 – Afilar la cuchilla a mano
Sujete la lima de diamante en el ángulo del diente. Lime en la dirección de corte, hacia la punta. Dé de 3 a 5 pasadas suaves por diente. No la fuerce; deje que la lima corte de forma natural. Afile cada dos dientes para mantener el patrón alternado (por ejemplo, primero a la izquierda y luego a la derecha). Lime un lado, invierta la hoja y luego el otro. Revise el marcador para evitar que se le escapen dientes.
Paso 5 – Verificar el equilibrio de la cuchilla
Una hoja desequilibrada se tambalea y arruina los cortes. Cuélguela de un clavo por el agujero central. Si se inclina, es necesario limar el lado pesado. Lime ligeramente dos dientes de ese lado y vuelva a comprobarlo. Repita hasta que quede nivelada. Una herramienta de equilibrio de $10 también funciona, pero un clavo es suficiente para uso doméstico. El equilibrio mantiene la sierra circular estable.
Paso 6 – Desbarbar la cuchilla
Afilar crea pequeñas rebabas en los dientes. Estas desgastan la hoja más rápido. Frote el borde de cada diente con una piedra de aceite o papel de lija de grano 600, igualando el ángulo. Dé de 2 a 3 pasadas suaves por diente. Limpie la hoja con un paño limpio para eliminar el polvo metálico. Desbarbar pule los dientes para obtener cortes más afilados y duraderos.
5. Afilado profesional vs. bricolaje: ¿cuál es mejor?
¿Debo afilar mi cuchilla yo mismo?
Afilado casero o profesional según tus necesidades. Aquí te explicamos cómo elegir.
Cuándo hacerlo usted mismo
Afilar en casa para desgastes leves, como dientes redondeados o acumulación de resina. Es económico (10 $ en herramientas) y toma 45 minutos. El bricolaje es ideal para aficionados o proyectos de fin de semana, como construir una estantería. Además, se adquiere una habilidad que ahorra dinero con el tiempo.
Beneficios del afilado profesional
Los profesionales utilizan amoladoras de precisión para garantizar que los ángulos de afilado coincidan con las especificaciones de la hoja y obtener un rendimiento óptimo. Reemplazan las puntas de carburo astilladas y aplican recubrimientos como el teflón para reducir la fricción. Muchos talleres profesionales pueden afilar una hoja de 40 dientes rápidamente, a menudo en 10 minutos, utilizando maquinaria de precisión. Esto es ideal para hojas costosas o para usuarios diarios como carpinteros que cortan estructuras de roble.
Costo del bricolaje vs. el profesional
El bricolaje cuesta entre $10 y $30 por herramientas que duran años. Un profesional cobra entre $0.50 y $1.00 por diente. Una hoja de 24 dientes cuesta entre $12 y $24. Una hoja de 40 dientes cuesta entre $20 y $40. Las hojas nuevas cuestan entre $20 y $100, así que ambas opciones ahorran dinero. El bricolaje es la opción más económica; los profesionales garantizan la precisión de las hojas de alta gama.
6. 5 consejos para prolongar la vida útil de la hoja de sierra circular
Afilar ayuda, pero estos hábitos prolongan aún más la vida útil de la hoja.
Consejo 1: Compruebe si hay clavos o residuos
Un clavo puede romper un diente. Inspeccione la madera antes de cortarla. Pase la mano sobre las tablas o use un detector de metales de $15 para madera recuperada. Revise las esquinas donde se esconden las grapas. Dos minutos de revisión evitan un reemplazo de cuchilla de $60.
Consejo 2: Evite el sobrecalentamiento
Las sesiones de corte prolongadas pueden generar calor, lo que puede reducir la eficacia de los dientes de la hoja. Durante un trabajo de 2 horas, haga una pausa cada 10 minutos. Deje la sierra circular en un lugar fresco y deje que la hoja se enfríe naturalmente. No la sumerja en agua, ya que deforma el acero. El enfriamiento preserva la dureza de los dientes.
Consejo 3: Adapte los dientes al material
Las hojas tienen diseños de dientes para trabajos específicos. Una hoja de bisel superior alterno (ATB) con dientes angulados corta la madera contrachapada con precisión, mientras que una hoja de amolado superior plano (FTG) con dientes planos corta mejor la madera dura. Consulte la etiqueta de su hoja para saber su tipo. Usar la hoja adecuada reduce el desgaste.
Consejo 4: Guarde las cuchillas de forma segura
No apile las hojas en un cajón. Guarde cada una en un estuche de plástico de $5 o en un portacuchillas de pared. Esto evita abolladuras, rayones o astillas. Etiquete los estuches por tipo de hoja (p. ej., "ATB 24 dientes") para acceder fácilmente. Un almacenamiento adecuado duplica la vida útil de la hoja.
Consejo 5: Utilice spray de silicona
El óxido corroe las cuchillas en garajes húmedos. Después de afilar, rocíe ligeramente lubricante de silicona sobre la cuchilla y limpie el exceso con un paño. Esto crea una barrera contra la humedad. Una cuchilla de $6 puede durar meses y mantener su cuchilla libre de óxido.
7. Cuándo reemplazar una hoja de sierra circular
Algunas cuchillas no se pueden afilar. Reemplácelas en estos casos.
Señales de daño crítico
Inspeccione si hay dientes agrietados, una placa doblada o picaduras de óxido de más de 1/16 de pulgada de profundidad. Esto hace que la cuchilla sea insegura. Las puntas de carburo con virutas de 1/8 de pulgada no se afilan bien, y una cuchilla deformada se tambalea al girar. Reemplace cualquier cuchilla con estos defectos para evitar accidentes.
Disminución del rendimiento
Las hojas se afilan de tres a cinco veces antes de que los dientes se reduzcan demasiado. Un diente de 6 mm es demasiado corto para un corte eficaz. Si los cortes quedan irregulares o astillados después del afilado, la hoja está gastada. Cámbiela por una nueva para que los cortes vuelvan a ser limpios.
Normas de seguridad
Las directrices de la OSHA recomiendan retirar las cuchillas con grietas, dientes faltantes o desgaste excesivo. Estas pueden romperse o retroceder, con el riesgo de cortes o algo peor. Revise su cuchilla mensualmente. Si presenta signos de daño que infrinjan las directrices de seguridad de la OSHA, reemplácela de inmediato. Priorizar la seguridad es esencial y debe prevalecer sobre el apego emocional a las herramientas.
8. Conclusión
Afilar la hoja de su sierra circular le ahorra tiempo, dinero y frustraciones. Hace que los cortes sean más suaves y su taller más seguro. Esté atento a las señales de una hoja desafilada: cortes ásperos, humo o ruidos de rechinamiento. Use esta guía para afilar en casa con una lima y un tornillo de banco. Si su hoja es compleja, un taller profesional es una buena opción. Combine el afilado con hábitos inteligentes: revise la madera en busca de clavos, enfríe la hoja y guárdela correctamente. Reemplace las hojas con grietas o mucho desgaste. Elija su lima de diamante y comience. Su sierra circular cortará mejor y sus proyectos destacarán.
9. Preguntas frecuentes
P1: ¿Puedo utilizar una amoladora angular para afilar mi hoja de sierra circular?
Una amoladora angular es demasiado agresiva y puede dañar los dientes. Lo mejor es usar una lima de diamante o una piedra de afilar para un afilado preciso y seguro. Siempre mantenga el ángulo original de la hoja.
P2: ¿Qué pasa si el revestimiento de carburo de mi hoja de sierra circular está dañado?
Las puntas de carburo dañadas requieren una reparación o un reemplazo profesional. Afilarlas usted mismo no reparará los recubrimientos; los profesionales pueden reaplicarlos. Si el daño es grave, reemplace la cuchilla.
P3: ¿Con qué frecuencia debo afilar mi hoja de sierra circular?
Afile cada 10 a 20 horas de uso, según el material. Revise mensualmente si los dientes están redondeados o si los cortes son ásperos. Las maderas duras o el uso frecuente requieren un mayor afilado.


