
If you want your saw to cut a log like a professional, continue reading this article. As you are aware, the cutting efficiency of a chainsaw depends on two key factors: the condition of the upper side and the sharpness of the teeth.
If you plan to sharpen your chainsaw in the forest, ensure you have all necessary tools and safety equipment ready . All the know-how of correct sharpening comes from the special files. We are mostly accustomed to sharpening with round files and are always dissatisfied with the expected effect when cutting firewood.
Today, various types of chainsaw vise are available, ranging from branded models to traditional methods still used in the field. Quite often, this is the only most reliable option. In addition to what file to use, you must know the sharpening angle of a chainsaw, when using a round file, the recommended sharpening angle is typically around 30 degrees.
Key Point we are going to discuss in this article:
- What are cordless chainsaws?
- Tools for Sharpening Chainsaws
- Step to Sharpen a Cordless Chainsaw Chain
- Tips for Maintaining a Sharp Chain
1. Understanding the Cordless Chainsaw Chain
While a cordless chainsaw chain may appear simple, it is a sophisticated tool with precision-engineered components. However, it is a complex system with highly precision-engineered components designed for seamless wood cutting. Below, we shall read the components and various types of chainsaw chains, highlighting their technical specifications and impact on cutting.
Recommended Cordless Chainsaw
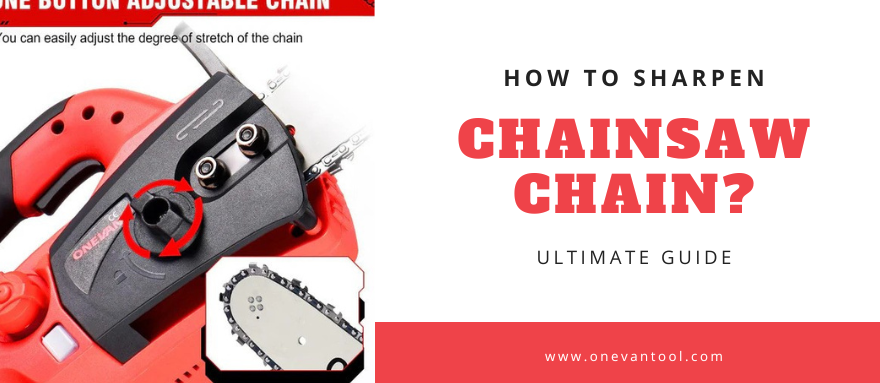
ONEVAN 12" Brushless Cordless Electric Chainsaw
|
Feature |
Description |
|
Motor |
Brushless motor with high load capacity |
|
Design |
Cordless, easy to carry and use |
|
Saw Chain |
Deep quenched, sharp teeth, wear-resistant, smooth cutting |
|
Cutting Speed |
Fast cutting speed, practical, low power consumption |
|
Battery Compatibility |
Suitable for Makita 18V Battery |
|
Power |
5000W |
|
Material |
ABS + Metal |
|
Motor Type |
Brushless Motor |
|
Guide Length |
12 inch |
|
Rotating Speed |
20000 rpm |
|
Chain Material |
High Carbon Steel |
Components of a Chainsaw Chain

- Drive Links (DL):
- Function: Provide continuous loop for chain rotation and transmit power from the engine to the cutting mechanism.
- Design: Two interlocking metal plates with a rounded profile that meshes with the drive sprocket.
- Specifications:
- Pitch: Distance between three consecutive rivets (typically 3/8" or .325" for cordless chainsaws).
- Gauge: Thickness of the drive link (commonly .044" or .050" for cordless chainsaws).
- Cutters:
- Function: Perform the actual wood severing operation.
- Subcomponents:
- Top Plate (TP): Flat surface making initial contact with wood.
- Specification: Height directly affects cutting depth and power requirements (higher TP = deeper cut, increased power demand).
- Cutting Corner (CC): Sharp, angled edge responsible for wood chip removal.
- Specification: Geometry determines chip size and cutting efficiency (e.g., full chisel for aggressive cutting, low-profile for reduced kickback).
- Side Plate (SP): Guides the cutter into the wood and prevents binding.
- Gullet (G): Space behind the CC for chip evacuation, preventing clogging.
- Depth Gauges (DG):
- Function: Maintain consistent cut depth by limiting cutter penetration.
- Design: Adjustable tabs located on the top plate of the drive link.
- Importance: Proper setting ensures safety and efficient cutting.
- Incorrect setting:
- Too high: Shallow cuts, reduced efficiency.
- Too low: Increased risk of kickback (dangerous chainsaw movement).
Impact of Components on Cutting Performance
- Drive Links: Chain rotation efficiency and power transmission directly influence cutting speed.
- Cutters: Cutting corner geometry determines chip size and rate of wood removal, impacting both cutting speed and chain wear. Top plate height affects cutting depth and power requirements.
- Depth Gauges: Maintaining proper cut depth allows for optimal chip removal and minimizes binding, ultimately affecting cutting efficiency and operator control.
Types of Chainsaw Chains and Sharpening
Cordless chainsaw chains have multiple configurations. Each comes with distinct cutting characteristics and sharpening requirements. Let’s dicuss common types:
Full Chisel (FC):- Specifications: Sharply angled cutting corner (highest cutting angle) for fastest cutting speed.
- Performance:
- Pros: Fastest cutting.
- Cons: It is vulnerable to dulling. For example, requires frequent sharpening, and also debris can damage it.
- Sharpening: It requires special technique to sustain aggressive cutting angle.
- Specifications: Slightly rounded cutting corner compared to FC for improved durability.
- Performance:
- Pros: Good balance of cutting speed and durability, stays sharper longer.
- Cons: Slower cutting speed than FC.
- Sharpening: Generally simpler due to the rounded profile.
- Specifications: Rounded cutting corner with the smallest cutting angle for minimal kickback.
- Performance:
- Pros: Safest option for beginners, low kickback, easiest to sharpen.
- Cons: Slower cutting speed.
- Sharpening: Simplest due to the rounded profile.
2. What Tools You Require to Sharpen Cordless Chainsaw Chain?
- Chainsaw File Gauge:
- Function: Measures the diameter of the round. Chainsaw chains have different pitches (e.g., 3/8" or .325").
- Round File:
- Function: Used to sharpen the cutting corner (CC) of the chain.
- Specifications:
- Material: Hardened steel.
- Diameter: Matches the chain pitch according to chainsaw file gauge (e.g., a 3/8" pitch chain requires a 7/32" diameter round file).
- Flat File:
- Function: Used to maintain the depth gauges (DG).
- Specifications:
- Material: Hardened steel.
Safety Equipment for Sharpening Cordless Chainsaw Chain
- Gloves:
- Function: Protect hands from cuts and abrasions.
- Specifications: Thick leather or puncture-resistant gloves.
- Safety Glasses:
- Function: Shield eyes from flying debris during filing.
- Specifications: ANSI Z87.1-compliant safety glasses with impact-resistant lenses.
- Hearing Protection:
- Function: Protect ears from the noise.
- Specifications: Earmuffs or earplugs with a Noise Reduction Rating (NRR) sufficient to dampen the noise level (typically above 85 dB).
- Chainsaw Protective Clothing:
- Function: Reduce the risk of injury.
- Specifications: Chainsaw chaps are made of special to prevent accidental contact.
3. Step-by-Step to Sharpen a Cordless Chainsaw Chain

Non-professionals definitely find it pretty complicated. However, sharpening a chainsaw chain is also challenging for many hobbyists. However, the process is not as complex as it may seem. You should have some basic understanding of:
- How a chain works?
- How it cuts?
- And how to sharpen it?
You can make even an old, ragged-out chain cut great. You will read everything you need to know about sharpening chainsaw chains.
Safety Precautions (Absolute Priority)
- Power Down and De-Energize: Before starting your work ensures the chainsaw is turned off and the battery is removed.
- Stable Work Platform: Secure the chainsaw on a stable workbench. It is to prevent movement during the sharpening process.
Preparing the Chain for Sharpening
- Chain Inspection (Visual and Tactile):
- Do a thorough visual inspection of the chain for excessive wear, cracks, or damage to the cutters or drive links.
- Run your fingers along the cutting edges. Dull cutters will feel blunt or rounded, while sharp cutters will have a crisp, defined edge.
- Identifying Cutters for Sharpening: Not all cutters require sharpening in every session. Focus on cutters that exhibit:
- Visible signs of wear or blunting on the cutting edge.
- A noticeable difference in sharpness compared to neighboring cutters.
Sharpening the Cutters
Step 1: Selecting the Correct Round File
- Chain Pitch and File Diameter Correlation: The diameter of the round file must precisely match the pitch of your chainsaw chain to ensure effective and safe sharpening; using a file with the wrong diameter can lead to improper sharpening and potential damage to the chain.
- Common cordless chainsaw chain pitches include 3/8" and .325".
- Example: A 3/8" pitch chain typically requires a 7/32" diameter round file, which ensures precise sharpening without damaging the cutting edge.
Step 2: File Guide Setup (Optional)
- Alignment and Stability: If using a file guide, ensure it is securely attached to the round file and properly aligned with the cutting edge of the chain.
Step 3: File Positioning and Sharpening Angle
- Sharpening Angle Reference: Consult the chainsaw manufacturer's recommendations for the optimal sharpening angle (e.g., full chisel, semi-chisel, low-profile). Common sharpening angles range from 60 to 65 degrees.
- File Position: Hold the round file at the recommended angle relative to the flat top plate of the cutter.
Step 4: Sharpening Each Cutter with Consistent Pressure
- Stroke Count Consistency: Apply firm, even pressure while pushing the file across the cutting edge. Aim for a consistent number of strokes (typically 2-4) for each cutter.
- Chain Rotation: After sharpening one cutter, rotate the chainsaw slightly to position the next cutter. Maintain a systematic approach so all cutters are addressed.
Technical Note: Avoid applying excessive pressure or strokes on each cutter. It will lead to an improperly shaped cutting edge.
Adjusting the Depth Gauges
Step 1: Identifying Depth Gauges
- Locate the small raised metal tabs. These are located on the top plate of each drive link. These are the depth gauges.
Step 2: Flat File Utilization
- Get a flat file specifically designed for chainsaw depth gauge sharpening. These files feature a pre-defined angle for proper filing.
- Hold the flat file parallel to the surface of the depth gauge and carefully file it downwards.
Step 3: Height Verification and Consistency
- Incorporate a depth gauge setting plate (provided by some chainsaw manufacturers) to ensure the final height.
Final Inspection and Cleanup
Step 1: Chain Sharpening Evaluation
- Check all sharpened cutters to confirm a defined cutting edge. You can also run your fingers along the cutting edges to feel for any irregular pattern.
Step 2: Chain Cleaning
- Use a brush to remove any metal filings or debris from the chain. Similarly, check the chainsaw bar groove.
Step 3: Chain Lubrication
Use a recommended chainsaw oil to the chain links and the bar groove. Proper lubrication prevents friction, reduces wear on the chain.
Test the Sharpness
Step 1: Performing a Test Cut
- With the chain re-installed on the chainsaw and properly tensioned, do a test cut on a scrap piece of wood.
Step 2: Refining Sharpening Technique
- A sharp chain should cut the wood smoothly without excessive pushing force, provided that the chain tension is properly adjusted. If the chain struggles you need to check:
- Insufficient sharpening (repeat sharpening steps as mentioned above).
- Improper depth gauge setting (re-evaluate depth gauge height).
4. Tips for Maintaining a Sharp Chain for Cordless Chainsaw
Regular Inspection
- Pre-Use Check: Before each use, visually inspect the chain for any signs of damage, excessive wear, or dullness. Look for:
- Cracks or breaks in the chain links.
- Significant wear on the cutting edges of the cutters.
- Rounded or blunt cutting edges compared to neighboring cutters.
- Addressing Minor Dullness: Before the chain becomes blunt, there is usually some mild dullness on some cutters which should be corrected by filing them a few times. Prevention is better than cure and this means that one does not have to sharpen the pencil to a great extent later on.
Proper Storage
- Dry Environment: When not in use, store your cordless chainsaw in a cool, dry location. Moisture can accelerate corrosion.
- Clean and Oiled: Before storing the chainsaw, clean the chain and bar groove thoroughly to remove any dirt, debris, or sap buildup.
Knowing When to Replace the Chain
Here are some signs that indicate a chain replacement is necessary:
- Excessive Wear on Drive Links
- Difficulty Sharpening
- Uneven Sharpening
Importance of Replacing a Worn Chain:
- Safety Risk: A worn chain is vulnerable to breakage. It will lead to serious injuries.
- Reduced Performance: A dull or damaged chain requires more force to cut. It will impact both; cutting results and tool wear
5. Conclusion
It is worth noting that sharpening the chainsaw saw chain is a good technique that can be useful for both hobbyists and homeowners. You may face this situation even in the field, so you must be ready to perform this task quickly and correctly. Now you know how to do it. But remember: one chain can be resharpened no more than 3 times. After this, you should replace it with a new one.
6. FAQ
1. How to sharpen a mini chainsaw chain?
Sharpening a mini chainsaw chain is pretty convinient. Becasue it is similar to sharpening a regular chainsaw chain. However, due to the smaller size, you require a specific file size. Read you manufacturer recommended sharpening tools manual.
2. How do you sharpen a chainsaw battery?
You might be referring to cordless chainsaw chains or battery-operated chainsaws. The method of sharpening battery chainsaws is the same as we have mentioned above in the article.
3. How to sharpen an electric saw?
Here are general steps to sharpen an electric chainsaw:
- Wear safety equipment
- Gather your tools
- Clean the blade
- Secure the blade
- Mark a reference tooth
- File at the correct angle
- Maintain equal pressure
- Sharpen each tooth
- Check for burrs
- Reassemble the saw
4. What is recommended angle for my electric chainsaw sharpener?
The sharpening angle depends on e.g., full chisel, semi-chisel, low-profile. A beginner should read chain manufacturer's recommendations for the best sharpening angle. Common sharpening angles range from 60 to 65 degrees..
5. How does an electric chainsaw sharpener work?
An electric chainsaw sharpener is a power tool which uses a grinding wheel. This wheel rotates at high speed. You position the chainsaw chain in the sharpener's guide and hold it against the grinding wheel. The grinding wheel removes metal from the cutting edges and carries on the sharpening process.
6. How do seasoned experts sharpen a chainsaw?
Professional chainsaw sharpeners incorporate special sharpening equipment. They also use grinding wheels with specific profiles. Simultaneously, they are seasoned and have expert level knowledge to ensure proper sharpening angles.
7. Is it ok to sharpen a chainsaw blade?
Firstly, chainsaws don't have blades. These are chains with cutters. Sharpening a chainsaw chain will enahnce your working. A dull chain will require more force which can also reduce the chain life.
8. How to sharpen a chainsaw cut straight?
Sharpening all the cutters is crucial for straight cutting. Below, read some practical tips for sharpening a chainsaw for straight cutting:
- Use a chainsaw file gauge.
- Maintain a consistent sharpening angle.
- Apply the same number of strokes with the file for each cutter.
- Consider using a file guide.
- Regularly check your sharpening technique.
- My chainsaw cut to the right after sharpening
9. Why does my chainsaw cut to the right after sharpening?
There are a couple of reasons:
- Uneven sharpening: When one part of the chain is sharpened and other left unattended, the chainsaw will attempt to drag towards the blunt part of the chain. Always make sure that all cutters are getting the same treatment.
- Damaged chain: A damaged chain link can force the chainsaw to pull in one direction. Therefore, keep an eye on your chainsaw. If it has excessive wear, better replace it.
- My chainsaw pull to one side when cutting
10. Why does my chainsaw pull to one side when cutting?
Similar to the previous question, an unevenly sharpened chain link can cause the chainsaw to pull to one side. Simultaneously, a worn bar can also be the reason of this issue.
- Check the chain tension and adjust it.
- Check the chainsaw bar for any wear or damage.


