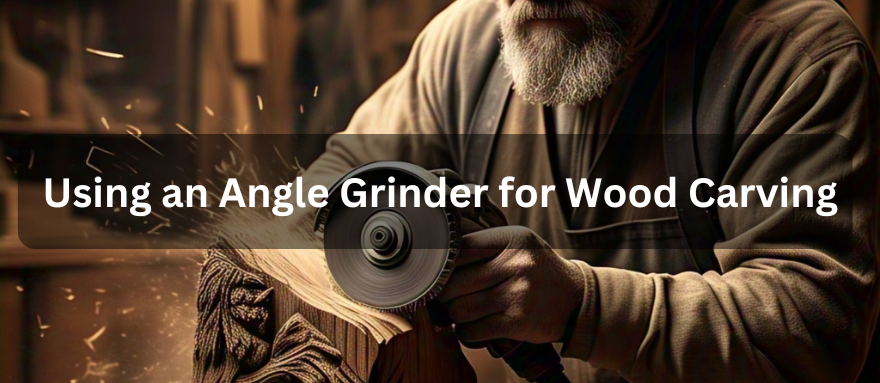
Many people think angle grinders are just for metal; however, they have other applications. These powerful tools are surprisingly adaptable. Attach the appropriate carving disc. You will have a powerful wood carving tool. Seriously, the possibilities are enormous. Want to create some cool wood art? An angle grinder can help. This guide is your starting point. We'll walk through everything you need to know, from staying safe (super important!) to picking the perfect carving discs. Subsequently, we'll cover the basic carving moves to get you started.
1. Understanding the Angle Grinder
Angle grinders are known for metalwork, but their high-speed rotating discs make them surprisingly capable carving tools. This section explores how different types of angle grinders—corded, cordless, and pneumatic—perform for carving. We'll then focus on why cordless angle grinder are often the best choice.
What is an Angle Grinder?
An angle grinder is a handheld power tool. Most people associate it with cutting and grinding metal. And it's great for that! But, as we've said, it's also a surprisingly capable carving tool. It spins a disc at high speed. Spinning power and the right disc make it so effective for carving.
Different Types of Angle Grinders: Which is Better for Carving?
Angle grinders are versatile tools available in three primary forms: corded, pneumatic, and cordless. While all three can technically be used for carving, their practical application and suitability for detailed work differ significantly.
Corded angle grinders offer a consistent and reliable power source, ideal for extended carving sessions. However, the attached cord can be a significant hindrance, restricting movement and making intricate maneuvers challenging. This limitation can make it difficult to achieve fine details and smooth lines often desired in carving projects.
Pneumatic (air-powered) angle grinders provide substantial power and excellent control, often favored by professionals. However, they require a separate air compressor, which can be bulky, noisy, and limit portability. While effective for carving, the need for additional equipment can make them less convenient for some users, especially for smaller projects or those working in a space without easy access to compressed air.
Cordless angle grinders offer the best compromise for carving, particularly for intricate work. The freedom of movement they provide is paramount, allowing the user to maneuver the tool with ease and achieve the desired level of detail. Without the constraint of a cord, carvers can explore different angles and positions, resulting in a more fluid and natural carving experience. This enhanced maneuverability translates to greater control and a more seamless carving process.
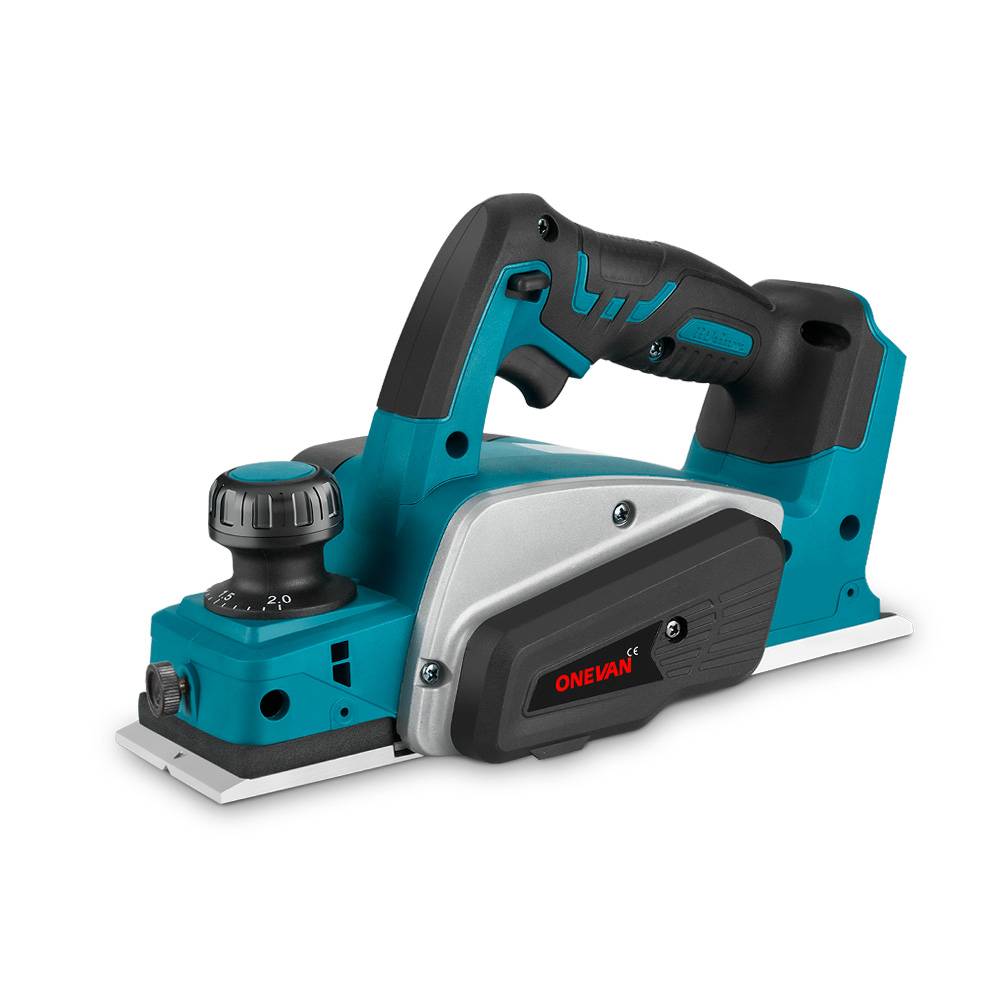
For carving, and especially for detailed engraving, we highly recommend the ONEVAN cordless angle grinder. Its infinitely adjustable speed control allows for precise adjustments based on the material being carved and the desired effect. The high-speed rotary mechanism, reaching up to 20,000 RPM, ensures efficient material removal while maintaining control. The compact and lightweight design, coupled with battery operation, further enhances maneuverability and portability.
2. Why Choose an Angle Grinder for Carving

Angle grinders are commonly used for cutting and grinding, but with the right attachments and techniques, they can also be incorporated for carving.
Carving can be challenging with traditional tools. Angle grinders offer a revolutionary approach to artistic creation. These powerful tools transform the way artists work. They enhance the efficiency and precision of the carving process. No more endless hours of manual work with simple chisels.
Artists need tools that support their creative vision. Angle grinders do precisely that. They break through the limitations of traditional carving methods. With an angle grinder, you can explore innovative carving techniques. The tool becomes an extension of your creative thinking.
Versatility of Angle Grinders in Various Carving Techniques
Angle grinders easily handle both traditional and contemporary carving styles. They work seamlessly on different materials, such as wood, stone, and metal.
An angle grinder is perfect for creating fluid, sweeping shapes. If you're looking for precise, delicate patterns, this tool has you covered. It adapts to your artistic vision.
Speed and Efficiency: How Angle Grinders Save Time
Time is a precious resource for artists. Traditional hand carving can take days or even weeks. Angle grinders dramatically reduce working time. They remove material quickly and efficiently, so what used to take days can now be completed in hours.
Precision and Control in Detailed Carving
Many people believe power tools lack precision. Angle grinders prove this misconception wrong. With practice, you can achieve incredible detail and control. The right disc and technique make all the difference.
Professional artists have discovered amazing possibilities with these tools. You can create razor-thin lines and smooth, perfect curves. It's like having a surgical tool in your workshop. The level of detail is remarkable, enhancing the capabilities of traditional carving methods.
Cost-Effectiveness: Maximizing Value in Your Tool Collection
Specialized carving tools can be expensive. Angle grinders offer an affordable alternative. They are versatile and can handle multiple jobs. Use them for carving, metalwork, and home repairs.
Think of it as getting several tools in one package. The initial investment can be recouped within a few projects. Artists and DIY enthusiasts can save money while gaining a robust, adaptable tool. It's a smart choice for those watching their budget.
Availability of Accessories and Discs for Different Materials
The world of angle grinder accessories is incredibly diverse. Different discs are available for various materials—wood, stone, and metal—and nothing is off-limits. Most hardware stores offer a wide range of options.
Experimenting becomes easier and more exciting. Your creative boundaries expand with each new accessory.
Ideal for Both Beginners and Experienced Carvers
Angle grinders are very easy to operate. Beginners will appreciate their ease of use, and experienced carvers love their power and versatility. The learning curve is surprisingly gentle.
Start with simple projects and grow with the tool. As your skills improve, the angle grinder keeps pace with your creativity. It's a tool that evolves alongside your artistic journey, supporting your development from novice to professional.
Ergonomics and User Comfort During Extended Use
Comfort is crucial during long carving sessions. Modern angle grinders are designed with user experience in mind. They feature comfortable grips and balanced weight, and vibration reduction helps prevent fatigue.
Manufacturers have invested in creating tools that feel natural. Adjustable handles and lightweight materials contribute to a better working experience so that you can focus on your art, not on hand discomfort.
Suitable for Indoor and Outdoor Projects
Angle grinders' key advantage is their flexibility. Whether you work in your garage or create in your backyard, these tools adapt to different environments. Just remember to follow safety guidelines and ensure proper ventilation.
The world becomes your workshop. Portable and powerful, angle grinders break traditional creative boundaries. You're no longer confined to a specific workspace. Inspiration can strike anywhere, and your tool is ready.
3. Step-by-Step Guide to Using an Angle Grinder for Wood Carving

How do you use an angle grinder for wood carving? This section explains every step in detail.
Preparing for Your Wood Carving Project
Proper preparation is a necessary requirement for working with wood through angle grinder carving. The following section provides detailed instructions on the step-by-step process. Adequate preparation can achieve a combination of safety measures and successful outcomes.
Step 1: Prepare Wood Carving Tools
Before starting, gather all essential carving tools and safety materials. You'll need your angle grinder, various carving discs, wood pieces, and safety equipment.
Step 2: Prepare Your Workspace
Success in wood carving depends on preparing your workspace well. Pick a spacious flat area that offers enough space for movement. Remove all items that can block your work from the workspace. This helps prevent accidents and gives you maximum freedom of movement.
Secure your wood piece carefully. The wood should not move during carving. A stable work surface prevents any unintentional movements that could cause injury or damage to your project.
Step 3: Wear Appropriate Safety Gear
Safety is paramount when using an angle grinder. Never compromise on essential protective gear, including goggles and gloves.
Safety Goggles: Working on such minute projects can expose one to particles in the eyes. To protect one's eyes from flying wood chips and dust, one must buy impact-resistant goggles that cover the entire eye area before starting work.
Gloves: Use thick, protective work gloves. They should fit well and provide a good grip. These gloves protect your hands from sharp edges and vibrations.
Dust Mask: Wood carving creates significant dust. A high-quality dust mask prevents you from inhaling harmful particles. Choose a mask rated for fine wood dust.
Hearing Protection: It is another important protection. Angle grinders are sometimes very loud. Do not forget to wear earplugs or noise-canceling headphones to protect your hearing.
Step 4: Choose the Right Attachment
Selecting the correct disc is critical. For wood carving, use carbide-tipped discs designed for wood. Consider the complexity of your design and the type of wood you're using.
Different attachments create different effects. Some are better for rough shaping, while others excel at detailed work. Take time to understand each disc's capabilities.
Step 5: Set Up the Angle Grinder
Carefully attach the chosen disc to your angle grinder, ensuring it's securely fastened and balanced. Then, check that the disc is appropriate for the angle grinder's speed and specifications.
Adjust the handle and guard for maximum comfort and safety. Practice holding the grinder before you start carving to get a feel for its weight and balance.
Step 6: Begin Carving
Start with gentle, controlled movements. Don't rush the process. Remove larger sections of wood first, then move to more detailed work. Keep the grinder moving to avoid burning or damaging the wood.
If you're new to angle grinder carving, practice on scrap wood first. This will help you understand how the tool responds and improve your technique.
Step 7: Stay Safe Tips
Maintain a firm grip on the angle grinder at all times. Stand in a stable position with good balance. Keep your body parts away from the spinning disc. Never force the tool or use it in awkward positions.
Be aware of the disc's rotation and potential kickback. You should follow the direction of the disc, not against it. Moreover, do not forget to take breaks to prevent fatigue, which can lead to accidents.
Step 8: Finish and Clean Up
Once the carving is complete, carefully remove any remaining rough edges. Use sandpaper or a fine-grit sanding disc for a smooth finish. Clean your workspace thoroughly, dispose of wood dust, and check your tools.
Inspect and clean your angle grinder properly. Store tools safely, with discs removed, in a dry place. Proper maintenance extends the life of your equipment.
4. Essential Techniques for Precise Wood Carving
Achieving wooden artwork through angle grinder carving demands skill, patience, and appropriate techniques. The listed techniques enable wood transformation into artwork masterpieces. All these methods require practice alongside a thorough approach to details.
Start with a Rough Outline
Before carving in detail, create a basic outline of your design. Sketch the main shape directly on the wood with a pencil. This guideline will help you understand your project's overall form and structure.
Consider this outline as a guide for your project. The initial sketch doesn't need to be perfect. It's an essential guide that will help you remove material more strategically. Visualize the final piece before you begin cutting.
Use the Right Disc
Selecting the appropriate disc is crucial for successful carving. Different discs work better for various stages of your project. Carbide-tipped discs are excellent for rough shaping, while finer-grit discs are best for detailed work and finishing.
Consider the type of wood and the level of detail you want to achieve. Harder woods require more aggressive discs, while softer woods require gentler approaches. Always match your disc to your specific carving needs.
Maintain a Steady Hand
Consistency is key when using an angle grinder. Keep your hand steady and your movements smooth and controlled. Avoid jerky or unpredictable motions. The goal is to create soft, even cuts.
Practice helps develop muscle memory. Start with simple projects to build confidence. Focus on maintaining a consistent angle and pressure. Your control will improve with each project you complete.
Work in Layers
Don't try to remove too much material at once. Carving is a process of gradual refinement. Remove small amounts of wood in multiple passes. This approach gives you more control and prevents accidental damage.
Think of it like sculpting. Each layer reveals more of your design. Start with broader, more general cuts. Gradually move to more detailed and precise work. Patience is your greatest asset in carving.
Adjust Speed as Needed
Angle grinders offer variable speed settings. Learn to use this feature effectively. Lower speeds are best for detailed, precise work, while higher speeds are better for removing more material quickly.
Pay attention to how the tool responds at different speeds. The type of wood and the disc you're using will also impact the ideal speed. Experiment and find what works best for each stage of your project.
Follow the Grain
The natural grain of wood determines how you should handle your carving work. It is essential to follow the direction of the wood grain rather than fight against it. Wood splinters less when working with the grain direction, and the cuts become smoother.
Understanding wood grain takes practice. Look carefully at the wood before you start. You'll see lines showing the direction of the wood fibers. Carve in a way that follows these natural lines.
Use Light Pressure
Let the tool do the work. Instead of forcing the angle grinder, apply gentle, consistent pressure. Too much pressure can cause uneven cuts or damage to the wood.
Think of guiding the tool rather than pushing it. The grinder's weight and the disc's speed should do most of the cutting. Your job is to provide direction and control.
Check Your Progress Frequently
Stop often to inspect your work. Brush away wood dust and examine the developing shape. This will help you catch and correct any mistakes early.
Use good lighting and take your time. Sometimes, stepping back gives you a better perspective. Don't be afraid to make minor adjustments as you go.
5. Common Mistakes and Solutions When Carving with an Angle Grinder
Carving with an angle grinder is an art that requires skill and patience. Professionals can also make mistakes. Recognizing and addressing these common errors can significantly improve your carving results and safety.
Using the Wrong Disc
Many carvers make the frequent mistake of choosing an incorrect disc. Not all discs are created equal. Using a metal-cutting disc on wood can damage both your material and tool. Each material requires a specific type of disc.
Solution: Invest in wood-specific carving discs. Read the disc specifications carefully. Match the disc to your wood type and desired carving technique. Keep a variety of discs in your workshop for different projects.
Applying Too Much Pressure
Many beginners think more pressure means faster carving. This is entirely wrong. Forcing the angle grinder can cause uneven cuts, damage the wood, and increase the risk of accidents.
Solution: Let the tool do the work. Apply gentle, consistent pressure. The disc's rotation and speed should do most of the cutting. Guide the tool, don't push it. Practice a light touch and controlled movements.
Ignoring Safety Precautions
Safety is often overlooked in the excitement of carving. Skipping protective gear or working in an unsafe environment can lead to serious injuries.
Solution: Always wear complete safety equipment, including safety goggles, a dust mask, hearing protection, and sturdy gloves. Work in a well-ventilated area. Keep your workspace clean and organized. Never compromise on safety.
Carving Against the Grain
Wood's natural grain direction affects how it cuts and looks. Carving against the grain can cause splintering, rough surfaces, and uneven cuts.
Solution: Study the wood's grain before starting. Always try to carve with the grain, not against it. This creates smoother cuts and reduces the risk of wood splitting. Take time to understand the wood's natural pattern.
Rushing the Process
Impatience is a common mistake in wood carving. Trying to complete a project too quickly leads to poor results and potential errors.
Solution: Take your time. Carve in layers, gradually removing small amounts of material. Step back frequently to check your progress. Plan your design and work methodically. Remember, carving is about precision, not speed.
Neglecting Tool Maintenance
Angle grinders require regular maintenance. Failing to clean and care for your tool can lead to poor performance and potentially dangerous situations.
Solution: Clean your angle grinder after each use. Check for loose parts or wear. Lubricate moving parts as recommended by the manufacturer. Store the tool in a dry place. Replace worn discs immediately.
Not Planning the Design
Starting to carve without a clear plan can lead to significant challenges. Lack of planning can result in wasted material and disappointing results.
Solution: Sketch your design before starting. Use light pencil marks to outline your concept. Break complex designs into smaller, manageable sections. Have a clear vision of the final piece before you begin carving.
Overlooking Workspace Organization
A cluttered workspace increases the risk of accidents. Tools in the wrong place, poor lighting, and limited working space can all contribute to mistakes.
Solution: Keep your workspace clean and organized. Have all tools and safety equipment within reach. Ensure good lighting. Use a stable work surface. Remove unnecessary items that could interfere with your carving.
Learning and Improving
Every mistake is an opportunity to learn. Don't get discouraged by initial challenges. Each project helps you improve your skills and understanding of angle grinder carving.
Practice on scrap wood, take classes or watch tutorial videos, and join woodworking communities to learn from experienced carvers. Patience and persistence are key to mastering this craft.
6. Conclusion
To wrap things up, angle grinders offer a fresh perspective on carving. They're not just for metal; with the proper setup, they're fantastic for wood, too. They give you a good mix of power and control, letting you shape and detail your wood creations. Getting comfortable takes some practice, and safety is always key. But once you get the hang of it, you can make some awe-inspiring stuff.
7. FAQs
Can I use an angle grinder on materials other than wood?
Yes, angle grinders work on metal, stone, and ceramic with the right attachments. Just use the correct disc for each material. Different discs like diamond-tipped or metal-cutting wheels expand your grinding possibilities.
How do I clean and maintain my carving tools?
Clean tools after use with a soft cloth. Keep blades dry and oiled to prevent rust. Store in a dry place and sharpen regularly to maintain cutting performance.
Can beginners use an angle grinder for carving?
Start with basic models and safety gear. Take classes or watch tutorials before trying complex work. Always wear protective glasses and gloves, and practice on scrap materials first.

