
Pruning shears are essential for garden care. Pruning is a vital process for plant health. By removing dry leaves and branches, you can significantly impact the distribution and balance of growth hormones within the plant.
For this purpose, you must have a sharp tool. Furthermore, pruning gives a compelling shape to the garden. It is a mandatory practice to maintain the overall health of the plants. Similarly, just as pruning is essential for plant health, regularly sharpening shears is crucial for maintaining their effectiveness and ensuring maximum productivity.
But the question is how to sharpen a pruning shear. Garden tools are vulnerable to dullness, but how do they be maintained?
That is why it is necessary to hone them frequently. The article below will help you understand different types of pruning shears, including cordless pruning shears, and the critical steps to sharpen these tools!
1. What Are Pruning Shears Used For?
Precise cutting prevents damage to delicate plants like fragrant herbs and decorative flowers. Pruning shears allows one to make these cuts accurately, ensuring the plants are healthy and grow properly. This sharp blade removes dead leaves and small twigs without damaging the plant.
Additionally, pruning shears are well-suited for creating floral arrangements due to their precise cutting ability. You can adjust the stems precisely to give the plants a unique look.
Bonsai Maintenance
Pruning shears are needed during bonsai maintenance because of the precision required to shape and keep these tiny trees. Pruning shears make this job easier since bonsai trees require regular trimming to maintain their size and shape. Through them, it is possible to cut fine branches and leaves accurately, thus enhancing the overall health and appearance of the bonsai tree.
These scissors can be used for pruning and pinching, which helps remove unwanted shoots and leaves and encourages proper plant growth.
Indoor Plant Care
Pruning shears are an indispensable important tool when dealing with indoor plants. Ferns, philodendrons, and succulents, among other plants, benefit from regular trimmings that eliminate dying parts while encouraging new foliage formation. You can easily access areas that need cutting with great precision through cordless pruning shears.
In addition, using these tools regularly helps keep indoor plants manageable so they do not grow unquestioningly, occupying unnecessary spaces.
The Role of Sharp Shears in Enhancing Plant Health
Pruning shears play a crucial role in maintaining healthy flora:
Clean Cuts: Sharp blades of pruning shears assist in maintaining clean and precise plant’ cuts. Through this way, you can effortlessly manage damage to plant tissue. Simultaneously, it also helps the plant to heal swiftly. This way, plants co and expend less energy on recovery, promoting overall health and vigor.
Reduced Disease Risk: Dull shears can crush the stems, so you cannot fulfill your purpose of making precise cuts. Ultimately, there are higher chances to invite diseases. Different plant diseases can easily penetrate the stems. It will cause pathogens. Sharp shears reduce this risk by making precise cuts.
Selecting the Appropriate Pruning Shears for Optimal Blade Maintenance
Caring for trees and shrubs in your garden is not just a job but an entire art. It's not just about the aesthetic appeal of neatly trimmed crowns; the main task of the gardener is to maintain the plants in a healthy condition. Young shoots that don't bear fruit or dry branches broken by the wind are all the extra weight preventing the tree from fully developing.
These unwanted branches are called prunings and need to be removed periodically through pruning. To do this efficiently and without damaging the tree, you need the skill of an experienced gardener and properly selected pruning shears.
2. Different Types of Pruning Shears
Several have different mechanisms and blade designs to suit specific uses and plant types. Here is a detailed account of the most common ones, focusing on their technicalities, applications, as well as sharpening requirements:
Bypass Pruning Shears
Mechanism: This pruner functions like scissors since it features two blades: a flat anvil and a sharp bypassing blade that is beveled. The bypassing blade slides past the anvil to make a clean shearing cut. This pruner can comfortably cut through live stems and branches about 1 inch in diameter.
Use Case: Bypass pruners are the most versatile as they cut cleanly and include:
General pruning includes pruning dead leaves, flowers, and other unwanted growth on shrubs, roses, flowering plants, and small fruit trees.
Taking green cuttings: Placing new plants by cutting healthy stems.
Harvesting vegetables and fruits: Gently pick fruits and vegetables such as tomatoes, peppers, and herbs.
Sharpening: Each of the blades has to be sharpened from time to time to ensure smooth cutting. The bypass blade should be honed at the correct bevel angle, which typically ranges from 15° to 20°. In this case, you may use a fine-grit oilstone. If that is not done, then it might be advisable to slightly grind down the top surface of the anvil utilizing a stone to eliminate any burrs which can interfere with the cutting process.
Anvil Pruning Shears
Mechanism: Unlike bypass pruners, anvil pruners have a mechanism that involves the crushing of branches between a sharp blade and a flat anvil. The sharp blade then cuts the branch while the anvil exerts counterforce on it, giving it support. This kind of crushing type works better on dead or dried-off branches, thus making them less prone to damage in case of an inaccurate cut.
Use Case: Anvil pruners are ideal for deadheading, which is pruning off dead flowers.
Pruning dry or dead branches: Removing dead, diseased, or broken branches from shrubs and trees (branches up to 1-1. 5 inches in diameter).
Heavy-duty pruning: Cutting through denser, more complex branches that may be hard to manage with bypass pruners.
Sharpening: The anvil pruner’s blade should be sharpened with a whetstone or a diamond sharpening plate at the proper bevel angle. Sometimes, it is advisable to lightly hone the anvil surface to eliminate any burrs or irregularities that may hinder the cutting process.
Ratchet Pruning Shears
Mechanism: Ratchet pruners are bypass pruners with ratcheting devices. These devices make it possible to cut thicker branches stage by stage. Small parts of the branch are cut off with every handle squeeze. As such, they only require a little physical strength for some cuts, making them suitable for those with little strength or undertaking major trimming tasks.
Use Case: Ratchet pruning shears are great for the following reasons:
Pruning large branches: Large diameter thick branches (up to 2-3 inches) in shrubs and trees can be pruned.
Repetitive pruning: Many cuts must be made at once, which can cause hand fatigue, so bypass types should be avoided.
Users with limited hand strength: The ratchet mechanism makes this possible, as cutting becomes easier, requiring less hand energy.
Sharpening: Ratchet and bypass pruners have some similar sharpening requirements. Both their cutting edges—the bypass blade and anvil—require periodic honing to ensure efficient operation. The bypass blade has its edge at the right angle, while light honing may improve the anvil surface.
Note: Some higher-end ratchet pruners may have a bypass mechanism that can be disengaged for single-cut action on thinner branches.
Corded Electric Pruning Shears
Mechanism: Corded electric shears save effort when it comes to pruning heavy branches or big jobs of trimming. Typically, they use reciprocating or bypass blade actions powered by an electric motor.
Use Case: Corded electric pruners are efficient because of their cutting power;
Heavy-duty pruning: Cutting large branches (3-4 inches in diameter) from trees and shrubs.
Landscaping professionals: Efficiently tackling large pruning jobs in professional settings.
Orchard maintenance: Pruning branches on fruit trees.
Sharpening: Electric pruning shears typically come with replaceable blades. Sharpening these blades often requires specialized tools or professional assistance due to the intricate nature of the motor and blade assembly. They can be purchased from various sources and will satisfy the needs of occasional users economically.
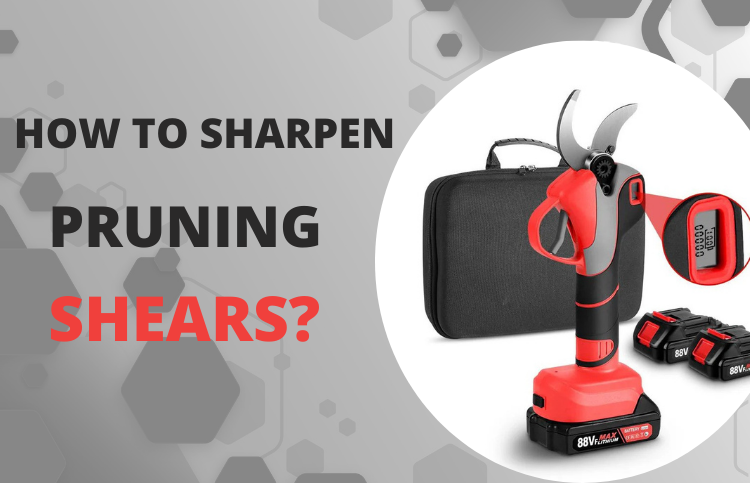
Cordless Pruning Shears
Cordless electric pruning shears are portable and have a battery-powered motor. They commonly employ the same blade action (bypass or reciprocating) as corded electric pruners.
Use Cases: These facilities have some control between power and portability that makes them suitable for:
• Prune moderately heavy branches on shrubs and trees up to 2-2.5 inches in diameter.
• Large garden owners: To work around the property on pruning tasks without being limited by a cord.
• Simple pruning: Similar to bypass pruners, these devices can be used for most common daily trimming jobs with reduced wrist fatigue.
Sharpening: Cordless models usually use replacement blades just like their corded counterparts. The best solution may be to use readily available replacement blades. However, some high-end models could allow blade removal for sharpening with specific tools. Refer to the manufacturer's guidebook for appropriate maintenance and sharpening instructions for your cordless pruner model.
3. How to Sharpen Pruning Shears?
Remember to sharpen your pruning shears if you want a beautiful and healthy garden. To do this safely and without causing damage to the shears, follow the steps below to sharpen your pruning shears.
Step 1: Cleaning the BladesLet’s gather supplies such as soapy water, a soft brush, and a clean cloth to start.
Thorough Cleaning: Wash the brush in soapy water and rub off any dirt on either side of the blade. It is crucial to have an eye for detail when cleaning the crevices between the blades and hinges since they may hide sap or dirt particles.
Rinse and Dry: Use a clean cloth to dry off any moisture from rinsing with clean water to prevent rust.
Some pruning shears have detachable blades or bypass mechanisms that are easy to remove for cleaning before sharpening. Check your user manual to see if your model can be taken apart.
Caution: Do not force your shears apart if they are not designed to be disassembled, as this can cause damage.
Clamp or Vise: If your shears can be disassembled, or if you have a model with a removable blade, secure the blade you want to sharpen in a vise or clamp.
Positioning: Lay the blade flat with its beveled edge facing downwards. For bypass shears, the beveled edge is the cutting side of the blade, whereas for anvil shears, the beveled edge should rest against the flat anvil surface.
The best sharpening technique will vary depending on your experience, familiarity with different tools, and desired sharpness. Here is a more detailed breakdown of each method.
Bench Grinder: It sharpens fast but requires more practice and control to avoid overheating or damaging the blade. It is recommended for experienced users who are comfortable with power tools.
File: This method strikes a good balance between ease of use and effectiveness. The diamond file provides a good balance between speed of sharpening and control.
Stone: Whetstones give excellent sharpening control and an extremely sharp edge, although they take longer to learn and master than oilstones, which provide sharp points using old traditional methods. Alternatively, Water stones are used with water as a lubricant, which distinguishes them from oilstones that require oil to maintain a smooth sharpening surface.
Dremel: It offers quick sharpening similar to a bench grinder, but care must be taken not to overheat or damage the blade. It is ideal for experienced users familiar with rotary tools.
Common Mistakes:
Irrespective of your choice of technique, there are some common mistakes that you can make during sharpening:
Blade Overheating: Excessive heat may spoil the blade's temper, reducing its capability to hold an edge. To prevent overheating, use light strokes while periodically dipping the blade in water (except oilstones).
Wrong Sharpening Angle: Maintain the bevel angle that was initially set on your shears, typically between 20-30 degrees. Identify the bevel angle of your shears (usually 20-30 degrees) and maintain that angle throughout the sharpening process.
Unequal Pressure Application: Applying unequal pressure may yield an imperfect cutting surface, resulting in poor cutting performance. Always use gentle, uniform movements for impeccable results.
To sharpen pruning shears, it is vital to know the bevel angle of the blade. This angle will range from 20-30 degrees and affects how the blade and cutting surface meet. The knowledge of this angle enables one to maintain it when sharpening to get the best performance.
Here are a couple of ways you can find out what your bevel angle is:
Consult the User Manual: The manufacturer’s instructions for your specific pruning shears model might list the bevel angle.
Use a Protractor: If no angle is provided in the manual, use a protractor. Close and align the protractor's flat edge with the blade's flat side. Align the protractor's center line with the shears' center line. Then, measure perpendicularly between the flat surface of the blade and the angled sharpened edge.
Now that we have identified which method suits you and what tools you need for your sharpening process let’s look at how to do it in steps:
Sharpening with a Bench Grinder:
Put Don Personal Protective Equipment: Ensure you are wearing safety glasses and cut-resistant gloves.
Set Grinder Speed Right Adjust the Grinder speed so it is medium enough to handle metal grinding.
Hold Blade Securely Hold the blade firmly so that its bevelled portion faces the grinding wheel.
Keep Angle Up Maintain established bevel angles during all stages of sharpening. On even strokes, brush gently against the grinder wheel, keeping contact only at the edges.
Cool Blade: Dip the tip into the water occasionally to keep it cool. Repeat & Flip: Re-sharpen one side, flip the blade over, and repeat the same procedure using the same angles.
Using a Stone to Sharpen:
Safety Equipment: Remember to wear safety goggles and gloves made of cut-proof material.
Prepare the Stone: If using an oilstone, add a few drops of sharpening oil to the surface. With water stones, there is no need for oil at all.
Secure the Shears: Clamp your shears into a vise or else hold them firmly.
Maintain Angle: Maintain this bevel angle by placing the blade flat against the wetted surface of an oilstone or against the stone itself in case it is a water stone.
Circular Motions: Using small circular motions and applying moderate pressure will allow you to pass along the entire length of the cutting edge with your blade without any problems.
Flip and Repeat: After several passes on one side, flip over the blade and follow the same procedure on the second side, maintaining a similar motion and angle.
Honing: Go ahead and switch to the fine grit side for honing after using coarse grit for sharpening (in case you use combination stones). This gives it a finer edge that cuts better. Use less force when honing.
Dremel Rotary Tool Sharpening:
Safety Glasses will protect your eyes from flying debris.
Cut-Resistant Gloves: Wear gloves designed to resist cutting to minimize the risk of accidental cuts.
Dremel Rotary Tool: Choose one with variable speeds and a diamond sharpening disc or grinding stone attachment.
Metal Vice (Optional): Securing shears can aid in stability during sharpening, though it may not always be necessary.
Other Options: If you do not have the recommended tools, consider these alternatives: Use a ceramic sharpening rod as a substitute for diamond files, though it may require more frequent use to maintain sharpness. Alternatively, in a pinch, you can use a flat surface like a brick as a last-resort sharpening stone, though be aware that this is less effective and may not provide optimal results.
Step 7: Check for sharpness!It is crucial to test the sharpness of the blade before concluding the sharpening process. Here are a couple of ways:
Paper Test: Take hold of one edge of a sheet of paper and attempt to cut it with your sharpened blade. A good sharp edge will slice through the sheet effortlessly.
Thumb Test (Caution): Be careful with this method! Gently slide your thumbnail across the backside (not sharpened) near the blade's edge. A well-sharpened knife should be slightly rough on its back but not enough to cut you.
Sharpening can cause small metal burrs to appear along the opposite side, which is not sharpened. These burrs can interfere with smooth cutting. Here’s how to get rid of them:
Use The Stone: Lightly swipe over the unsharpened side of the blade on a fine-grit side of the whetstone in a few strokes to remove any burrs if using a whetstone.
Leather Strop (Optional): To give your knives an extremely polished edge, strop them on leather treated with honing compound, dragging each direction many times.
Return them in place if applicable: Those who had removed their pruning shears before sharpening should carefully reassemble them per brand makers' instructions.
Apply Lubricant: Spread some lubricating material (such as WD-40) sparingly onto moving parts and towards the hinge to prevent rusting and ensure smooth operation.
In the event the cut is rough or requires more effort to make, this means that your blade should be sharpened. You can also move back and put a few more light strokes against the stone or file while mindfully maintaining the angle.
Step 11: Clean and Store ProperlyWipe Clean: Use a clean rag to remove any leftover metal particles or lubricant.
Store Properly: Keep your sharpened pruning shears in a dry, safe place where they do not receive direct sunlight. Consider using a holster or sheath to keep the blades protected, thus preventing them from becoming blunt too soon.
4. Conclusion
When pruning fruit or general plants, it is mandatory to make clean and precise cuts so that they can heal and grow faster. For this, using the right tools with well-sharpened blades is crucial. Therefore, regular maintenance is too often overlooked. Generally, people do not sharpen the blades. It is a simple operation that, if carried out regularly, preserves the edge and allows you to always have sharp pruning tools.
5. FAQ
1. How To Sharpen Pruning Shears At Home?There are two main methods for sharpening pruning shears at home:
- A diamond file with different grits (coarse, fine, extra-fine).
- Using a whetstone (requires more practice).
- Disassemble the shears (if possible) for easier sharpening.
- Clean the blades thoroughly.
- Secure the blade in a vise.
- Using a diamond file, follow the bevel angle of the blade and make smooth strokes away from you.
- Start with the coarse grit for neglected shears, then progress to finer grits for a polished finish.
- De-burr the edge by running the file along the flat side of the blade.
- Reassemble the shears and test them.
2. What Is The Best File To Sharpen Pruning Shears?
The best file for sharpening pruning shears is a diamond file. Diamond files are convenient to use, available in various grits, and last long.
3. What Can I Use To Sharpen Garden Shears?
You can use the abovementioned methods to sharpen pruning shears on your garden shears. Diamond files and whetstones are also suitable options.
4. How To Sharpen A Pruning Blade?
Sharpening a pruning blade is the same as sharpening pruning shears.
5. How Do You Sharpen Blade Shears?
You can sharpen blade shears similarly to pruning shears. For this purpose, you must follow the earlier steps, keeping the sharpening tool at the correct angle to the blade's bevel.
6. How Do You Sharpen A Dull Blade At Home?
There are two main ways to sharpen a dull blade at home:
- You can incorporate a diamond file with different grits (coarse for dull blades).
- Using a whetstone (requires soaking and proper technique).
7. Does Tin Foil Sharpen Blades?
No, tin foil is not recommended for sharpening blades. It can damage the edge and leave it uneven.
8. Will Sandpaper Sharpen A Blade?
Sandpaper is not recommended for sharpening blades as it may not effectively sharpen and can leave the surface scratched.
9. How To Sharpen A Blade Without A Sharpener?
If you don't have a diamond file or whetstone, a ceramic rod is a good alternative for maintaining a sharp edge on your shears. Use light strokes following the bevel angle. Alternatively, it is recommended that you take your shears to a professional for sharpening.
10. Should You Push Or Pull A Blade When Sharpening?
No matter the method you use, operator safety is paramount. You should always push the sharpening tool away from you. This prevents the tool from slipping and damaging you.


