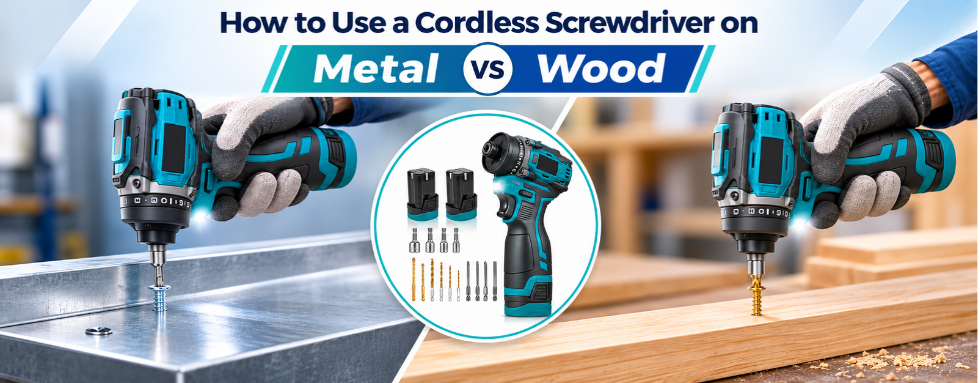
A screw that sinks into a pine stud in two seconds can refuse to move past the first turn in a 3 mm steel bracket, with the same cordless screwdriver doing the driving. Wood and steel respond to a turning screw in very different ways, and each needs its own clutch setting, speed, and fastener.
The sections below explain those differences, give pilot hole sizes for both materials, and report how our ONEVAN 16.8V brushless cordless screwdriver kit performed on each.
1. Can You Use the Same Cordless Screwdriver on Wood and Metal?
Yes. One cordless screwdriver can handle both, as long as its torque suits the thickness of metal involved.
The tool stays the same; the job does not. In wood, the main risks are splitting the board and sinking the head too deep. Metal brings a different set of problems: getting the screw to start a thread, keeping the bit seated, and controlling heat. Three things decide the outcome in either case, namely clutch setting, trigger speed, and screw type.
2. Why a Cordless Screwdriver Finds Metal Harder Than Wood
Wood Holds a Screw, Metal Fights Back
Wood is made of long fibers. A screw pushes those fibers aside on the way in, and they spring back against the threads, which is what gives the joint its holding power.
Steel offers no such give. A self-tapping screw must produce its own thread in solid metal, and it does this in one of two ways. Thread-forming screws squeeze the metal into shape. Thread-cutting screws, identifiable by a small slot at the tip, shave it away as chips. Every rotation meets firm resistance either way, and that resistance runs back up the screw into the bit. Bits lift out of screw heads at exactly this point.
Why Your Cordless Screwdriver Stalls on a Steel Bracket but Zips Through Pine
Torque demand and material hardness explain the gap. Our screwdriver delivers a maximum of 40 N·m. Pine asks for only a fraction of that. Mild steel is several times harder, and cutting the first full thread into it demands far more twisting force from the same screw.
When demand gets close to what the tool can supply, one of two things happens. A clutch set too low slips. At the top setting, the motor stalls instead. Sure, it can look like a failure. It just means something in the setup needs to change, such as the type of bit, the trigger speed, and whether a pilot hole was drilled. Correct that, and the same screwdriver will often seat the screw on the next attempt.
3. Set Your Cordless Screwdriver Right First on Metal and Wood
What the Numbers on Your Cordless Screwdriver Collar Mean
The numbered clutch collar around the front of the chuck sets the torque limit. Each number represents a torque limit. Once resistance passes that limit, the clutch slips with a ratcheting click, and the bit stops, protecting the screw, the thread, and the workpiece. Our kit offers 21 clutch positions plus 2 additional modes.
No number is tied to a particular material. Position 8 might drive a screw flush in pine and slip at once in 3 mm angle iron. So asking one question before each new material can help: what does a test screw in a scrap piece do at a low setting?
- It clicks just as the head sits flush. That setting is right.
- It clicks with the head still standing proud. Go up two positions.
- It never clicks, and the head ends up below the surface.
Listen to the motor as well. A pitch that drops steadily through the drive suggests the tool is near its working limit.
Turn Your Cordless Screwdriver Torque Down for Metal
First, you need to set the clutch in the lower third of its range. Then, you should let the tip bite at low speed and add speed only after the thread has started. If the clutch slips before the head seats, raise it one position at a time.
Turn Your Cordless Screwdriver Torque Fast for Wood
Wood behaves differently. Its fibers compress instead of shearing, and the threads pull the screw inward, so higher speed and mid-to-high clutch settings are generally safe. For 60 mm framing screws, this cordless screwdriver works well. Hinges, trim, and cabinet backs, on the other hand, need a much lower setting, because a small screw head pulls through soft surface wood easily. Slowing down for the last turn gives the most control over final depth.
4. How to Use a Cordless Screwdriver on Wood Without Messing Up
When You Can Skip the Pilot Hole on a Cordless Screwdriver (and When You Cannot)
Short screws, under about 38 mm (1-1/2 in), going into softwood well away from the edges can usually go in without a pilot. Screws with a notched Type 17 tip cut their own path and lower the splitting risk further.
When and How to Use Pilot Holes
Four situations that require pilot holes:
- Near the end of a board.
- Within about 25 mm of an edge
- In any hardwood.
- With screws larger than #8.
Sizing the pilot hole:
- Match the bit size to the root diameter (the solid core of the screw without its threads).
- For a #8 screw, a common choice is 1/8 in (3.2 mm) in hardwood and 3/32 in (2.4 mm) in softwood.
Checking the bit size:
- Hold the drill bit directly behind the screw; the threads should be visible on both sides as a quick sizing check.
Why Screws Go in Crooked with a Cordless Screwdriver
Hand angle causes most crooked screws. A tilt of three to four degrees at the first turn is hard to notice, yet over a 50 mm screw it moves the tip about 3 mm off line.
The best way to do this right is to be slow and deliberate at the start. Run the first two to three turns at low speed, keep the forearm aligned with the screw, and press on the back of the tool with the other hand. In dim spots, such as inside a cabinet, the LED on our kit lights the screw tip, which makes alignment easier to judge.
Softwood vs Hardwood: Same Cordless Screwdriver, Different Touch
Density separates the two. On the Janka hardness scale, eastern white pine rates around 380 lbf, while red oak sits near 1,290 lbf and hard maple near 1,450 lbf. That is more than three times the resistance against the same screw.
Softwoods such as pine, spruce, and fir accept higher speeds and a mid clutch setting without much risk. Hardwoods are less tolerant. Slower speed keeps heat down, and heat combined with high torque is a frequent cause of snapped screws. Expect a clutch setting a few positions above what pine needed. Rubbing paraffin wax on the threads cuts friction noticeably. For soft brass screws in oak, drive a steel screw of the same size first to cut the thread, then swap in the brass one.
5. How to Use a Cordless Screwdriver on Metal Without Stripping Screws
My Cordless Screwdriver Bit Keeps Slipping on Steel - What to Do
Three fixes cover most cases, and the order matters.
- Right bit. A PH2 bit in a PH3 head slips almost every time. Pozidriv screws, marked with small lines between the cross arms and common in European hardware, need a PZ bit; a Phillips bit tends to ride out of them. Rounded bit tips should be replaced.
- Slower speed. At high RPM, the first moments of a cut generate heat and chatter.Feather the trigger until the threads catch.
- Steady push. Firm, straight pressure keeps the bit in the recess. Steel needs noticeably more of it than wood.
Many sheet-metal screws come with hex washer heads instead of a cross. A magnetic hex socket suits these better than any bit, because it grips the outside of the head and holds the screw on the tool. Our kit includes four of them.
Self-Tapping vs Regular Screws for Your Cordless Screwdriver
Wood screws are the wrong choice for steel. Their coarse threads suit fibers, and the steel they are made from is usually softer than that of metal-rated screws.
Thin sheet is where self-tapping screws belong. Some variants, sold as self-drilling screws (Tek is a common name), carry a drill point that makes the hole, too. The point number gives capacity: a #2 point is typically rated to around 2.5 mm of steel, and a #3 point to somewhere between 3.5 and 4.4 mm, depending on the brand. Thick steel is a different matter. It must be drilled first, then fitted with a self-tapping screw. Without a pilot, the tip skates across the surface and overheats.
Drill a Pilot Hole So Your Cordless Screwdriver Does Not Slip
Cam-out is the term for a bit climbing out of the screw recess under load. Repeated cam-out ruins the recess. In steel, it happens when the torque needed to form the thread exceeds what the contact between bit and recess can carry. A pilot hole lowers that torque.
You will need a center punch, a drop of cutting oil, and a sharp HSS bit. Punch the mark so the bit does not wander, oil the spot, and drill at a low, steady speed. You can then use the matching self-tapping screw at a low clutch setting.
Pilot Hole Size for Thin Sheet Metal
For a #8 self-tapping screw in sheet up to about 1.2 mm, start with a 1/8 in (3.2 mm) drill bit. A #10 screw pairs with 1/8 in (3.2 mm). If the screw spins without biting, the hole is oversized - use a smaller screw or drill a smaller pilot hole.
Pilot Hole Size for Thick Steel
Thick steel takes the same pilot as any other screw of that size, but a self-tapping screw may not be strong enough to cut that much thread, so drill to the screw’s root diameter and use a machine screw.For a #10 screw in 3 mm steel and heavier, 9/64 in to 5/32 in (3.5 to 4 mm) is a typical range. You should generally avoid going undersized to be safe. A tight pilot in thick steel makes the screw bind halfway, and binding is when screws strip and snap.
6. How We Tested Our Own Cordless Screwdriver on Both (Our Product)
How We Tested Our Cordless Screwdriver (So You Know It Is Real)
We ran the ONEVAN 16.8V brushless kit through the jobs buyers most often ask about: pine and oak for wood, and thin sheet, angle iron, and a thick bracket for metal. For metal, we pre-drilled pilot holes with the 6 drill bits from the 14-piece set, then drove machine screws into each metal type (6 screws per type) at the matching torque setting, then drove machine screws into each metal type (6 screws per type) at the matching torque setting. The results below come from that run, not from a spec sheet.
We Ranked Our Cordless Screwdriver by How Tough a Metal It Handles
The ranking is based on the thickest metal the kit could seat a screw into using a pre-drilled pilot hole, leveraging its maximum 40 N·m torque and 21+2 setting.
Light Metal: Thin Sheet and Aluminum
Thin sheet up to about 1/16 in (1.6 mm) and aluminum gave no trouble. A mid torque setting seated self-tapping screws cleanly, with very little load on the motor.
Medium Metal: Angle Iron and Box Section
At around 1/8 in (3 mm), angle iron and box section made the tool work harder. With a pilot hole and a higher setting, it drove screws without stalling, though the motor load was clearly audible. At this thickness, that is expected behavior and not a defect.
Heavy Metal: Thick Steel Brackets
Brackets of 1/4 in (6 mm) and thicker marked the limit. With a proper pilot and the top setting the screws drove, but the motor was at its ceiling and further screws stalled. Repeated tasks like this are well beyond what this kit was designed for—an impact driver is the right tool there.
What Our Cordless Screwdriver Handles Easily - and Where It Gives Up
Every wood task and all light-to-medium metal fell within the kit's range during testing. Thick structural steel in volume did not. For that work, a brushless cordless impact drill is the better match.
7. Conclusions
Wood and metal do not call for separate tools. They call for separate setups.
Wood tolerates speed and needs pilots mainly near edges and in dense species. Metal rewards patience: low settings, self-tapping screws, and pre-drilled holes in anything beyond thin sheet. In our experience, a stripped screw can usually be traced to one skipped step.
For furniture, fixtures, and light-to-medium metal, a cordless screwdriver like our 16.8V kit is sufficient. Masonry is another job entirely, and our cordless hammer drills are built for it.
8. FAQs
What torque setting should I use on a cordless screwdriver for sheet metal?
There is no way to know the exact number in advance, because clutch scales differ between brands. Start low, drive a test screw into an offcut of the same sheet, and step up one position at a time until the clutch clicks at flush.
Why does my cordless screwdriver bit keep slipping on steel?
Mismatched bits, missing pilots, and excess speed cause most of it, and the metal section above covers those fixes in order. Two less obvious causes are worth checking as well: paint in the recess, which stops the bit from seating fully, and worn bits that look fine but have lost their sharp edges.
Which is harder on a cordless screwdriver battery, wood or metal?
Metal, in most cases. Forming a thread in steel takes more torque per screw, and torque draws current. Heat adds to the drain. The guidance for our kit recommends letting the motor cool during long jobs, which also protects the battery.
How do I stop screws from stripping in hardwood with a cordless screwdriver?
A pilot, wax on the threads, lower speed, and a clutch that clicks at flush prevent most stripping. If a hole has already stripped, glue a few wooden toothpicks into it, let the glue dry, trim them flush, and drive again.
Is a brushless cordless screwdriver worth it for light metal?
For light metal, generally yes. A brushless motor turns more of the battery's energy into work and holds its speed under load. Our kit's brushless motor is rated at 450 W, which leaves headroom for long runs of self-tapping screws into the sheet.
How do I know when my cordless screwdriver is too weak for the metal?
Three signs point to it: the motor stalls at the top setting despite a correct pilot, screws stop at the same depth every time, and the housing gets hot after only a handful of screws. At that stage, an impact drill is the better choice.