Angle grinders are unique power tools, but sanding isn't their manufacturing purpose. Yes, you can use an angle grinder for sanding; however, it is not the most efficient method. Specialized sanders are typically better for smooth, even sanding.
To sand with an angle grinder, you'll need a specific sanding attachment or flap disc. These accessories transform your angle grinder into a versatile sanding tool. However, they provide different levels of control and precision compared to dedicated sanders.
In the following article, you will read about angle grinders, the purpose of sanding, and, most importantly, how to use angle grinders for sanding.
1. Understanding the Angle Grinder
What is an Angle Grinder?
An angle grinder is specifically designed for metal fabrication, construction, and maintenance tasks. The tool features a rotating disc that enables a variety of applications. These applications are utilized in both industrial and personal settings.
Types of Angle Grinders
1. Corded Angle Grinders
Corded models provide consistent electrical power. They connect directly to power outlets. These grinders offer sustained performance with a continuous energy supply. They are particularly suitable for prolonged operational requirements. The consistent power makes them reliable for extended work periods.
2. Cordless Angle Grinders
Cordless angle grinders, also known as battery-powered angle grinders, deliver exceptional portability. They provide mobility across different work sites. These models utilize advanced lithium-ion battery technology. They offer performance comparable to corded variants. Their primary advantage is eliminating cord-related limitations. Professionals can work in diverse locations without power constraints.
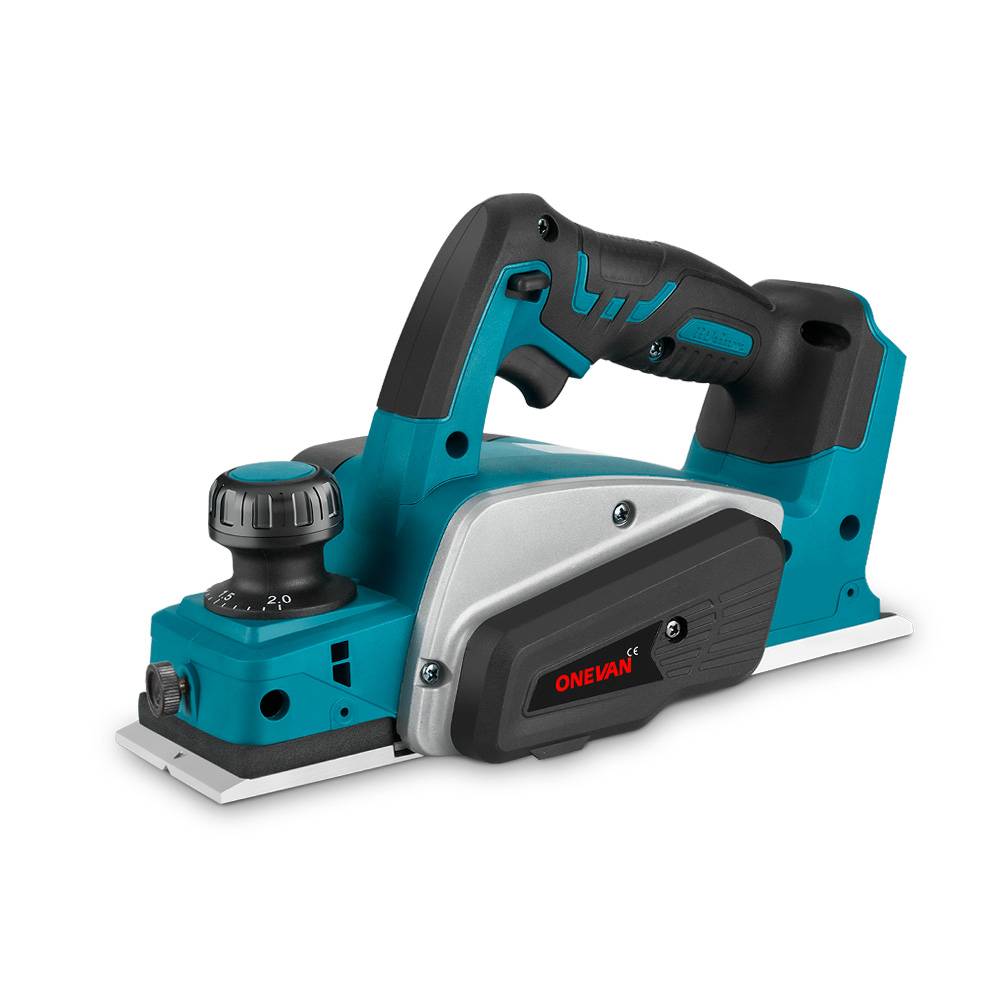
The ONEVAN 125mm Brushless Cordless Angle Grinder offers powerful performance with a 2000W brushless motor, six-speed control, and anti-overload protection. Its cordless, ergonomic design with a thickened cover shield ensures safety and comfort.
3. Pneumatic Angle Grinders
Pneumatic variants operate using compressed air systems. These are specialized tools used in professional industrial settings. They excel in environments requiring precision instruments. Their lightweight design makes them highly maneuverable. They are critical for specialized technical operations.
The Primary Functional Applications of an Angle Grinder
- Cutting: Enables precise material separation
- Grinding: Facilitates surface modification and preparation
- Polishing: Provides surface refinement and restoration
- Sharpening: Allows edge reconfiguration of tools
- Sanding: Supports surface smoothing and material removal
Each angle grinder type presents distinct operational characteristics. These characteristics are suitable for specific professional and technical requirements. The selection of an appropriate model depends on several factors:
- Intended application
- Power source accessibility
- Performance specifications
Professionals must prioritize safety protocols when using tools. Professionals must prioritize safety protocols when using tools. This includes wearing appropriate personal protective equipment. Proper tool-handling techniques are also essential when using angle grinders.
2. Purpose of Sanding with Angle Grinder
Angle grinders offer versatile sanding capabilities. They serve multiple surface preparation and modification purposes. Understanding these purposes helps professionals and DIY enthusiasts select appropriate techniques and attachments.
Surface Smoothing
Angle grinders can effectively smooth various material surfaces. They remove irregular textures and imperfections. The tool provides rapid material removal. Professionals can achieve consistent surface preparation using specific sanding discs. These attachments enable efficient smoothing across different materials.
Removing Old Paint or Rust
Sanding with an angle grinder becomes critical for surface restoration. The tool efficiently strips away deteriorated paint layers. It eliminates rust and corrosion from metal surfaces. Specialized abrasive attachments facilitate comprehensive surface cleaning. This process prepares surfaces for subsequent treatments like painting or refinishing.
Shaping
Professionals can modify material edges and surfaces. The tool allows for accurate reshaping of metal, wood, and composite materials. Skilled operators can achieve intricate shape modifications.
Selecting the Right Model
When considering sanding applications, the ONEVAN angle grinder offers substantial capabilities. Key selection criteria include:
- Motor power
- Battery life (for cordless models)
- Compatibility with sanding attachments
- Ergonomic design
- Weight and maneuverability
Professionals should evaluate their specific project requirements. The appropriate angle grinder model ensures optimal sanding performance and efficiency.
3. Feasibility of Sanding with an Angle Grinder
Angle grinders offer a versatile option for sanding applications. Understanding their capabilities requires a thorough evaluation of both advantages and limitations.
Advantages of Sanding with an Angle Grinder
High Speed and Efficiency
Angle grinders deliver exceptional rates of material removal. They significantly accelerate surface preparation processes. The tool's high rotation speed enables rapid material modification. Professionals can complete sanding tasks in substantially reduced timeframes compared to traditional methods.
Compatible with Many Accessories
These tools accommodate diverse sanding attachments. Manufacturers produce specialized discs for multiple material types. Users can easily switch between different sanding configurations. This versatility allows adaptation to various project requirements. The wide range of available accessories enhances the tool's functional flexibility.
Ease of Use
Angle grinders offer straightforward operational mechanics. Experienced users can quickly master basic techniques. The tool's design facilitates intuitive handling. Minimal training enables effective utilization across different skill levels.
Consistent Finish
Using the correct technique ensures a uniform surface treatment. Skilled operators can achieve predictable sanding outcomes. Specialized attachments contribute to controlled material removal. The tool provides the potential for smooth, consistent surface preparation.
Disadvantages of Sanding with an Angle Grinder
Risk of Overheating
Prolonged use generates significant thermal buildup. Extended operation can compromise tool performance. Material surfaces may experience unintended thermal damage. Operators must implement strategic cooling intervals.
Difficulty in Controlling Sanding Depth
Precise depth management presents technical challenges. Inexperienced users risk uneven material removal. The tool's high-speed operation requires exceptional manual control. Achieving consistently uniform surfaces demands advanced operational skills.
Professionals must carefully evaluate project-specific requirements. Selecting appropriate techniques and accessories remains critical. The comprehensive understanding of the tool's capabilities ensures optimal performance and safety.
4. How to Use an Angle Grinder for Sanding?
Professional sanding with an angle grinder requires a systematic approach and meticulous preparation. Following precise steps ensures optimal results and operator safety.

Step-by-Step Procedure for Sanding
Step 1: Gather Tools and Materials
Comprehensive preparation involves collecting essential equipment:
- Angle grinder with appropriate sanding attachment
- Specialized sanding disc or flap pad
- Comprehensive personal protective equipment
- Workpiece requiring surface modification
- Securing mechanisms like clamps or vice
- Optional dust collection system
Step 2: Prepare the Workspace
Select a well-ventilated, clean work environment. Establish a dedicated workspace with adequate lighting. Remove potential obstructions and ensure stable working conditions.
Step 3: Secure the Workpiece
Utilize robust clamping mechanisms. Ensure complete workpiece stability. Prevent potential movement during sanding operations. Implement multiple securing points if necessary.
Step 4: Attach the Sanding Accessory
Implement critical safety disconnection procedures:
- Disconnect power source for corded models
- Remove battery for cordless variants
- Disconnect air supply for pneumatic models
Carefully attach the sanding disc. Ensure manufacturer-recommended installation procedures. Verify secure attachment of mounting nut.
Step 5: Put on Safety Gear
Deploy comprehensive personal protective equipment:
- Impact-resistant safety goggles
- Respiratory protection
- Hearing protection
- Protective gloves
- Long-sleeve protective clothing
Step 6: Power On the Grinder
Powering on an angle grinder demands careful attention to safety and operational precision. Begin by positioning the tool at a safe distance from the work surface, maintaining a firm two-handed grip. Ensure your stance is stable and balanced. Engage the power switch smoothly, avoiding sudden movements. Allow the disc 3-5 seconds to reach full rotational speed, observing its movement carefully. A properly functioning grinder should demonstrate smooth, consistent rotation without noticeable vibration or unusual mechanical sounds.
Step 7: Begin Sanding
The actual sanding process requires a delicate balance of technique and control. Start by establishing a consistent contact angle with the work surface. Apply moderate, uniform pressure - avoiding both excessive force and too light a touch. Maintain a steady hand movement, using an overlapping pass technique to ensure even surface treatment. Keep the disc slightly tilted to optimize material removal. Move systematically across the surface, maintaining constant motion to prevent uneven wear or damage to the workpiece.
Step 8: Monitor Your Progress
Continuous assessment is critical during the sanding process. Implement periodic visual and tactile inspections to evaluate surface modification. Pay close attention to the material removal rate and overall surface uniformity. Look for any imperfections or uneven areas that may require adjustment.Be prepared to modify your sanding technique dynamically, adjusting disc orientation and pressure as needed.Different materials respond uniquely to sanding, so develop a keen eye for surface characteristics.
Step 9: Manage Heat Build-up
Thermal management is a crucial aspect of effective sanding. Implement a strategy of intermittent sanding intervals, allowing 30-60-second cooling periods between extended sanding sessions. Carefully monitor both the surface temperature and the tool's heat levels. Avoid continuous, extended operations that could damage the workpiece or the tool. Use light, consistent pressure and select an appropriate disc for the specific material type. Learn to recognize early signs of excessive heat buildup.
Step 10: Clean the Surface
After completing the sanding process, thorough surface cleaning is essential. Use appropriate cleaning mechanisms to remove all residual material and dust. Compressed air, soft brushes, or specialized cleaning cloths can be effective. Ensure complete debris removal to prepare the surface for subsequent treatments or finishing.
Step 11: Inspect the Results
Conduct a thorough evaluation of the sanded surface. Use both visual and tactile methods to assess the finish quality. Run your hand carefully over the surface to detect any remaining imperfections. Compare the result against your original objectives. Identify any areas that may require additional refinement or touch-up work.
Step 12: Store Your Tools
Proper tool maintenance begins immediately after use. Clean the angle grinder and all accessories thoroughly, removing any dust or debris. Inspect the tool and attachments for any signs of wear or damage.

5. Tips for Sanding with an Angle Grinder
To ensure successful sanding with an angle grinder, you need three basic things: technical skill, proper equipment, and safety equipment. Professionals and experienced users understand that precision and preparation are fundamental to achieving optimal results.
Choose the Right Attachment
Selecting an appropriate sanding attachment is critical to successful surface modification. Consider the specific material being worked on and the desired finish. Different attachments offer varying levels of abrasiveness and performance. Flap discs, sanding pads, and specialized abrasive attachments each serve unique purposes. Compatibility with your specific angle grinder model is essential.
Use the Correct Grit
Grit selection directly impacts surface quality and material removal rate. Coarser grits are ideal for initial material removal and heavy surface preparation. Finer grits provide smoother finishes and detailed surface refinement. Progressively move through grit levels to achieve desired surface characteristics. Match grit selection to the material type and project requirements.
Wear Safety Gear
Comprehensive personal protection is non-negotiable during angle grinder operations. Deploy full protective equipment, including impact-resistant safety goggles, respiratory protection, hearing protection, and sturdy work gloves. Long-sleeve clothing provides additional protection against potential debris and sparks. Prioritize personal safety above all other considerations.
Secure the Workpiece
Workpiece stability is crucial for precise sanding operations. Utilize robust clamping mechanisms or a sturdy vice to prevent movement during sanding. Ensure multiple securing points for larger or irregularly shaped materials. A stable workpiece allows for a more controlled and accurate sanding technique.
Maintain a Steady Hand
Consistent hand control determines sanding quality and surface uniformity. Develop a stable stance with balanced body positioning. Use a two-handed grip for maximum control and precision. Practice maintaining a consistent angle and pressure throughout the sanding process. Avoid sudden movements or jerky motions.
Keep Moving
Continuous motion prevents localized surface damage and ensures even material removal. Maintain a steady, overlapping pass technique across the entire work surface. Avoid prolonged focus on a single area to prevent uneven wear or damage to the material. Develop a rhythmic, systematic approach to surface treatment.
Use the Right Speed Setting
Speed control is critical for effective sanding. Different materials and attachments require specific rotational speeds. Start at lower speeds and gradually increase as needed. Avoid maximum speed settings unless necessary. Observe the material's response and adjust speed accordingly.
Monitor Heat Build-Up
Thermal management prevents potential surface and tool damage. Implement strategic cooling intervals during extended sanding operations. Recognize early signs of excessive heat, such as discoloration or unusual odors. Allow periodic cooling for both the workpiece and the angle grinder.
Clean the Surface Regularly
Consistent surface cleaning prevents material buildup and ensures optimal sanding performance. Remove dust and debris between sanding passes. Use compressed air, soft brushes, or specialized cleaning mechanisms. A clean surface allows for more precise and effective material removal.
Inspect the Attachment for Damage or Wear
Regular attachment inspection ensures safe and effective operation. Check for signs of wear, damage, or deformation before and after each use. Replace attachments showing significant wear or damage. Compromised attachments can lead to unpredictable performance and potential safety risks.
6. Conclusion
Angle grinders are versatile power tools that can transform surface preparation tasks. While primarily known for cutting and grinding, these tools offer surprising sanding capabilities. With the right attachments and techniques, professionals and DIY enthusiasts can achieve remarkable surface modifications efficiently and precisely.
7. FAQs
1. Does sanding with an angle grinder damage materials?
It can if you're not careful. Use the right disc and keep things moving. Always check your technique and maintain consistent pressure to avoid gouging.
2. Are there any advantages to using an angle grinder over sanding tools?
An angle grinder is quick, powerful, and gets through tough jobs conveniently. In terms of speed, it is better than traditional sanders. Moreover, its versatility and speed are the two main features that make it a go-to tool for pros and serious DIY enthusiasts.
3. Can I incorporate an angle grinder be used for sanding wood?
Sure, but go easy. Special wood discs help. However, you should practice scrap wood first to get a feel for the tool's movement and pressure.
4. How to control over-heating in angle grinder?
Please don't push it too hard. Take breaks, keep it moving, and let the tool breathe. Use cooling techniques like intermittent work and proper ventilation.
5. What types of materials can I effectively sand with an angle grinder?
Metal, concrete, wood - this tool's basically a superhero. Just swap out the right disc and you're good to go. Different materials require specific attachments and techniques.
6. Do I need a specific type of sanding disc for metal vs. wood?
Totally. Metal needs tough discs. Wood wants something gentler. Invest in quality discs specific to your material for best results.
7. Is it safe to use an angle grinder indoors?
Nope. Dust everywhere, potential sparks - take it outside. Wear proper protective gear like safety glasses and a dust mask.
8. How to select the right sanding disc for different materials?
Think of it like picking the right paintbrush. Rough jobs need coarse discs. Smooth finishes need fine ones. Consider the material's hardness and your desired finish.

