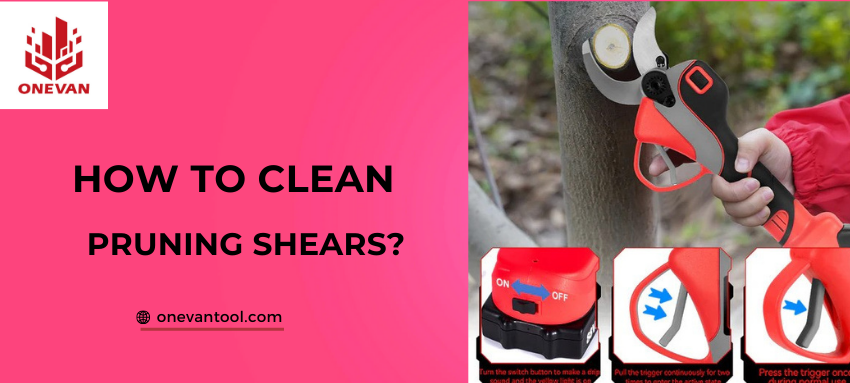
For pruning and caring for plants, choosing suitable work tools is extremely important, and it is necessary to ensure their cleaning and maintenance.
When you cut a plant with shears, its sap comes out, and the blades get dirty. Therefore, maintenance of scissors and pruning shears must be done regularly.
While some models of pruning shears are designed to clean themselves during cutting, it's still important to manually clean and maintain them to ensure optimal performance and prevent the spread of plant diseases.
After cleaning the blades, the next step is to sharpen them to ensure the tool remains sharp and effective. To sharpen the shears, gently perform abrasive strokes on the blades using a sharpening stone, ensuring an even edge. A whetstone or diamond stone is recommended for best results.
To prevent the spread of plant diseases, it's crucial to clean and disinfect agricultural tools. Viral diseases can easily be transmitted between plants through contaminated tools. Effective disinfectants include hydrogen peroxide, rubbing alcohol, and bleach solutions. After spraying, allow the blades to air dry completely to prevent rust and ensure thorough disinfection.
1. Different Types of Pruning Shears
|
Type of Pruning Shears |
Features |
Usage Tips |
Applications |
|
Bypass Pruning Shears |
* Two sharp, bypassing blades |
* Use the sharp blade |
* Pruning flowers, shrubs, roses, small trees |
|
Anvil Pruning Shears |
* One sharp blade that cuts against a flat anvil * Powerful cutting action * Easier to use for one-handed operation |
* Not recommended for live stems |
* Removing dead branches |
|
Ratchet Pruning Shears |
* Bypass blades with a ratcheting mechanism |
* Engage the ratchet mechanism for thicker branches |
* Pruning thick branches (up to 1.5 inches in diameter) |
|
Corded Pruning Shears |
* Electric motor powers the blades |
* Wear safety glasses and gloves |
* Pruning large branches (up to 3 inches diameter) |
|
* Rechargeable battery powers the blades |
* Wear safety glasses and gloves |
* Pruning large branches (up to 2 inches diameter) |
2. Why Clean Pruning Shears?
There are several important reasons why one should always maintain their pruning shears clean in a garden. Here is a breakdown of these key reasons:
To Prevent Spread of Plant Diseases
Unwashed pruning shears can carry harmful bacteria, fungi, and viruses. Pathogens like these are easily transportable but unintentional if you ignore washing your shears while moving from one plant to another. They can cause diseases that may damage many plants in your farm. Regular cleaning and sterilization is the only sure way to eradicate all these tiny enemies.
Maintaining Optimal Performance of Pruning Shears
Over time, pruning shears can accumulate sap, debris, and dirt, which can adversely affect their performance:
Cutting Efficiency Reduced by: These sticky sap and debris lead to blades sticking together, which makes good cuts challenging.
Dull Blades: With time, dirt and grime make the blades blunt, making them less sharp, resulting in the need for more force while cutting. Besides, it may lead to ragged cuts destroying plant tissue.
Increased Friction: Dirtiness increases friction between movable parts, making the shear feel heavy or unresponsive.
This regular cleaning will allow your blades to glide more smoothly with minimal effort giving fine cuts.
Increase Life of Pruning Shear
Cleaning keeps your pruning shears away from destruction due to rusting or corrosion. This happens in this manner:
Prevents Rusting; Moisture together with sap left on the blades could result in rust that weakens metal and thus shortens the life span of shears Cleaning eliminates such elements that cause rusting.
Reduces Wear and Tear: Faster wear down occurs due to filth, leading to faster wearing out of blades and other moving components. It significantly reduces this tear, lengthening your scissors' overall lifespan.
By ensuring cleanliness in your pruning shears, you will not need to replace them before their time.
3. When to Clean Pruning Shears?
Regular cleaning is necessary if you want your garden to be healthy and maximize the life of your pruning shears. Here are some critical moments where you need to clean your shears:
After Each UseWhile it might seem excessive, cleaning your pruning shears after each use is beneficial for several reasons:
Removing sap and debris: fresh sap and debris are more accessible to remove before they dry out and harden. This prevents them from piling up and hindering future cuts.
Decreases risk of transmission of diseases: even the healthiest plants might have pathogens that cause infection. Regular cleaning prevents these microscopic hazards from being transferred between crops.
If there has been heavy sap flow or any other factor that requires special attention while using such items, a wipe-down might not suffice; it is recommended for thorough cleaning.
It's crucial to clean your pruning shears immediately after cutting diseased plants to prevent the spread of pathogens to healthy plants.
In order to thoroughly disinfect blades together with other contaminated places, use rubbing alcohol or diluted hydrogen peroxide solution.
Ensure you rinse them with clean water and then dry well before using them again.
Therefore, before storing them in winter or any time longer than that, we need to thoroughly clean and grease our shears to be ready when needed. Do this:
Clean and disinfect: Soak the blades in a cleaning solution to remove dirt, sap, and debris. Then, wipe down the blades with a disinfectant to kill any remaining bacteria…
Dry Completely: Ensure all parts of the shears are completely dry before storing. Any moisture left behind can cause rust to form.
Lubricate Moving Parts: Apply a thin layer of lubricant to any hinges or moving parts to keep them from sticking and ensure smooth operation.
While not necessary for every plant transition, cleaning your shears is a good practice when pruning highly susceptible plants or those with known disease issues. This minimizes the possibility of infecting the new plant by mistake with pathogens from a previous one.
If Resin or Sap Builds Up on the BladesCutting will be significantly hindered when the blades have been choked by resin or sap. If there is plenty of it:
· Use a scraper or stiff brush to remove any big pieces of resin or sap.
· Apply a remover like alcohol-based cleaner or citrus cleaner to dissolve stubborn residue.
· Afterwards, proceed with your usual cleaning procedure.
Using them in harsh weather conditions, like being exposed to rain, snow, salt spray, etc., can make your shears catch rust. Clean and thoroughly dry your shears after using them in extreme weather conditions. Think about applying some light lubricant too just for that bit more peace of mind.
4. Step by Step to Clean Manual Pruning Shears

To ensure that your plants stay healthy, it is necessary for you to keep your manual pruning shears clean. Below is a step by step guide on how to clean them in detail:
Step 1: Preparing Your Working SpaceSafety First: Work on a ventilated area for a smooth working. Find something like newsprint papers or canvas in order that any rubbish and spilt cleaning fluids may be easily collected as you go about doing the job. Always protect your hands by wearing gloves against detergents and cuts.
Gather Your Tools: You'll need:
- Bucket or sink for cleaning solution
- Soft-bristled brush (toothbrush works well for tight spaces)
- Lint-free cloths (microfiber cloths are ideal)
- Cleaning solution (see Step 4 for options)
- Lubricating oil (3-in-1 oil or specific pruning shear lubricant)
- Optional: Scraper (for stubborn sap), disinfectant solution (alcohol or diluted hydrogen peroxide)
Refer to the manufacturer's instructions for specific disassembly guidelines. If you do not have access to the manual, follow these general steps:
Open the shears fully. Locate any screws or nuts holding the blades and handle together.
Unscrew or loosen fasteners carefully. Note the order and position of parts for easier reassembly later.
Separate the blades, spring, and handle components. Be mindful of any small parts like washers or springs that might come loose.
Pre-rinse: Briefly rinse all disassembled parts under clean running water to remove loose debris.
Scrub the blades: Use the brush to remove dirt, sap, and debris from both sides of the blades. Pay close attention to the cutting edge and any crevices. A scraper can be helpful for stubborn sap buildup.
Clean the handle and spring: Wipe down the handle and spring with a damp cloth or brush to remove dirt and grime.
Tip: If sap is particularly sticky, soak the affected parts in warm soapy water for a few minutes before scrubbing.
Choose a cleaning solution based on the level of cleaning required:
- For light cleaning: Use a simple solution of warm water and dish soap.
- For heavy cleaning or disinfection:
- Rubbing alcohol (70% isopropyl) is a good disinfectant for general cleaning.
- Diluted hydrogen peroxide (3% solution diluted with water 1:1) is another option for disinfection.
- TSP (TriSodium Phosphate) cleaners are effective for removing stubborn grime and sap, but wear gloves and eye protection due to their stronger nature.
Apply the solution: Dip the brush or cloth into your chosen cleaning solution and scrub all parts, especially the blades and any areas with heavy grime. Avoid soaking the shears for extended periods, as this can damage some components.
Step 5: Rinsing and DryingThoroughly rinse all parts with clean water. Remove any cleaning solution residue that could leave a film or cause rust.
Dry completely. Use clean clothes or paper towels to meticulously dry all parts, including any hidden areas. Leaving moisture behind is a major cause of rust.
Tip: Allow the parts to air dry completely for an hour or so before reassembly to ensure no hidden moisture remains.
Reassemble the shears in the reverse order of disassembly. Refer to your notes or manual if needed. Tighten any screws or fasteners securely, but avoid overtightening.
Lubricate moving parts. Apply a thin coat of lubricating oil to the spring, any hinges, and where the blade meets the handle. Avoid getting oil on the cutting edge of the blades.
Test the shears. Open and close the shears smoothly. Ensure the blades meet cleanly and make a crisp cutting sound when squeezed.
Store properly. Keep your clean shears in a dry, well-ventilated area without exposure to moisture or extreme temperatures. Depending on your preference, you can store them open or closed.
Following these steps, you can effectively clean your manual pruning shears, ensuring they stay sharp, functional, and ready for your next gardening project.
5. Step by Step to Clean Electric Pruning Shears

Cleaning electric pruning shear requires a slightly different approach than cleaning their manual counterparts. Here is how you can safely and efficiently do it.
Step 1: Preparing Your Working SpaceInitially, ensure that your workspace is level, well-ventilated, and immaculate. Spread some old newspapers or a drop cloth to catch any residues. It’s important to note that your workspace should also be dry, as water can combine with the electrical components of an electric device, like shears to cause danger.
Gather Your Tools: You'll need:
· Microfiber cloths are good (soft and lint-free wipes)
· Spray bottle with rubbing alcohol (isopropyl 70% ) (optional)
· A can of compressed air (optional)
· Oil used for lubrication (consult your manual for recommended type)
User manual for your particular electric pruning shears (especially if you might want to disassemble them in the future)
Important Safety Caution: Avoid using abrasive cleaners or harsh chemicals that can damage the electrical components of the shears. Additionally, never use hoses or immerse electric shears in buckets of water to prevent the risk of electrical damage and personal injury.
Unplug the Shears—Always disconnect the shears from all power sources, including removing any rechargeable batteries, before starting the cleaning process. If your shavers operate on rechargeable batteries, make sure they are removed from their sockets, too.
Locate Electrical Parts—Refer to the user manual to find elements such as the motor housing, charging port, and power cord. Moisture must stay off these regions.
Target Surface Debris—Although some of the blade components may be removable by users, there is no need to completely dismantle them whenever they get dirty.
Wipe Down Blades—Using a gentle, lint-free cloth, carefully wipe away surface dirt or sap from the blades. Take care to avoid direct contact with the sharp edges to prevent injury. Make sure that the blades are precisely wiped, but never let them touch your hands through these sharp edges.
Optional Compressed Air: If you notice crevices or small areas in your shears where dirt might get lodged, a can of compressed air should be used to blow it out gently. Keep the can vertical as you spray gently so that no internal destruction is brought about by forceful cleaning.
Never Submerge Blades - The blades and other parts of the pruners should not be immersed in water or chemical mixtures as this could damage the electrical components and compromise their safety precautions.
Light Cleaning Only—Rubbing alcohol is highly recommended for sterilizing and removing difficult stains from blades. However, use it with care only when necessary.
Spray, Don't Soak – Use a spray bottle filled with rubbing alcohol to lightly mist the blade surface. Be cautious to prevent any liquid from dripping towards the motor housing or other electrical components.
Immediately Wipe Dry—Use another dry, lint-free cloth to wipe away any remaining traces of the solution from the blades around it so that no moisture is left behind before proceeding further.
Caution: Excessive use of rubbing alcohol may dry out rubberized grips or other plastic components on shears, thus potentially damaging them; use sparingly and only for occasional deep cleaning purposes.
Thorough Drying Is Essential: After finishing with cleaning all elements of an electric shear should be completely dry before being returned into use or stored because if left wet they may start rusting or encounter electrical problems later on.
Air Drying – In a well-ventilated place, keep disassembled until completely dry if you remove any user-serviceable parts from the shavers.
Drying Microfiber Cloth: After drying outside or somewhere, use a clean microfiber cloth to wipe off any remaining water residue, especially in cracks or where water can gather.
Operation Testing: Once your unit is completely dried up again, reassemble it (if necessary) and plug it back into the wall. Switch on the machine and see if it works all right. The opening and closing of blades should be smooth, with no strange sounds from the motor.
Refer to Manual: Your user manual contains specific storage instructions for your electric pruning shears. Normally, they should be kept in a cool place devoid of high temperatures and direct sunlight. Do not keep them compressed with blades or in wet surroundings.
6. Troubleshooting for Manual and Electric Pruning Shears
Break down common problems that you can face with manual and electric pruning shears and their solutions to make them work smoothly again.
Problem: Jamming on both manual and electric pruning shears
Solution:
Manual Shears: Check if there is any rubbish between the blades by opening them fully. Use a small stick or compressed air to get rid of it. If still jammed, slightly loosen the blade bolt, close the shears, and retighten the bolt.
Electric Shears: Turn off the power of the shears and remove any visible obstructions. Consult your manual for information on how to remove user-serviceable blade covers or parts to access jammed areas. Contact a competent technician if the shears jam further.
Problem: Uneven Cuts on both manual and electric
Solution:
Manual Shears: The problem may be blunt blades or misaligned blades. Either replace too much worn out or sharpen them using a sharpening stone. In case they appear not in line, contact an expert for reshaping and resharpening.
Electric Shears: It might be dull blades or motor dysfunctionality that is causing this problem. Sharpen these according to the manufacturer’s instructions (some electric shears have self-sharpening mechanisms). Should sharpening fail, take it for repair by an authorized professional dealing with motor issues.
Problem: Difficulty Cutting-Manual only
Solution: This could be due to dull blades, poor cutting technique, or attempting to cut branches exceeding the shear's capacity. When they become blunt either have sharpness restored or purchase new ones. Utilize the correct cutting method (bypass shears for live stems, and anvil shears for dry wood). To handle thicker branches, use loppers or a pruning saw instead.
Problem: Weak Cutting Power-Electric only
Solution: It can be caused by a low battery (cordless models), dull blade, or malfunctioning motor. Therefore, recharge the batter (if applicable). Sharpen the blade according to the manufacturer’s instructions. Consult a qualified technician for motor inspection if sharpening fails to resolve the issue.
7. Conclusion
Using the correct cleaning methods for your shears is crucial to ensure their longevity and functionality. Properly maintained shears contribute to healthier plants by minimizing the spread of disease. Therefore, it is crucial always to have work tools in an optimal state. Thorough cleaning after each use, combined with periodic disinfestation of agricultural tools, is the best way to take care of garden tools.
8. FAQ
1. What should I use to clean pruning shears?
A warm water and dish soap mixture will do in most cleaning situations. Rubbing alcohol (70% isopropyl), diluted hydrogen peroxide (3% solution diluted with water 1:1), or TSP cleaner can be used for heavier cleaning or disinfection (use gloves and eye protection when using TSP).
2. Can you use vinegar to clean pruning shears?
Vinegar being a standard household cleaner, it is not recommended for pruning shears because it may be acidic and over time, damage the metal parts. Just stick to the above-mentioned cleaning solutions.
3. How do you remove rust and sap from pruning shears?
For mild rust, use baking soda and water to make a paste for scrubbing. With more complex rust, a rust remover from the stores might do. For sap, rubbing alcohol or citrus cleaner may help dissolve that stubborn residue.
4. Can I use isopropyl alcohol to clean pruning shears?
Isopropyl alcohol (70%) is a safe and effective disinfectant for cleaning pruning shears. Wipe away any moisture on the electrical components of electric shears if they are part of your tool’s design.
5. Does vinegar remove rust from garden tools?
Vinegar can remove minimal surface rust but also dulls the metal somewhat. If your pruning shears have more tough rust, go for a hard-core commercial rust remover.
6. Can you use hydrogen peroxide to disinfect pruning shears?
Another option for disinfecting pruning shears is by using diluted hydrogen peroxide (3% solution diluted with water 1:1). It would be an excellent substitute to alcohol since it flares up easily.
7. Can you clean pruning shears with Lysol?
Lysol is a disinfectant spray that may contain harsh chemicals in them. It’s generally not advised to use Lysol on pruning shears for metal or rubberized grips may be scathed. Stick to the above cleaning solutions.
8. Will rubbing alcohol rust scissors?
Rubbing alcohol (70%) itself doesn’t cause rust on your pruning shears. It can, however, dry and wipe away the oils that protect your metal surfaces. Always ensure you’ve dried them properly, and might have to apply a light coating of lubricating oil after using alcohol to clean them.
9. How to sterilize pruning shears?
Two main options are available for sterilizing your pruning shears:
Rubbing alcohol (70%): Apply it with a cloth or spray bottle, avoiding the electrical components of electric shears. Let it sit for just a few minutes before wiping clean and drying thoroughly.
Diluted hydrogen peroxide (3% solution diluted with water 1:1): Follow the same application method as rubbing alcohol, ensuring proper drying afterward.

