Metal roofing has gained popularity in both rural and urban areas for various types of buildings, including homes, shops, and factories. Every year, more people choose it for homes, shops, factories, and even small sheds, because it lasts very long and handles heat, rain, and wind. You can see many friends and carpenters move from old clay tiles and wood to metal roofing. Easy maintenance, strong under heavy rain, does not break if goats walk on the roof, and does not catch fire easily.
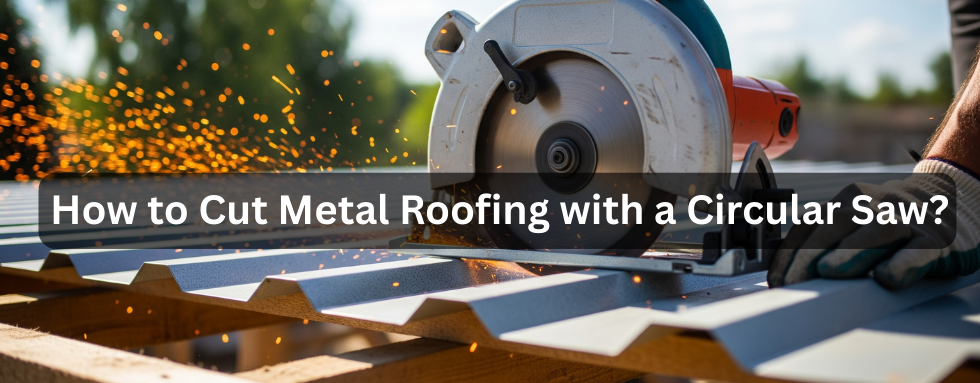
Still, the big question comes: how to cut metal roofing with a circular saw? Can I cut metal roofing with a circular saw, or is some special tool always needed? Yes, you can cut metal roofing with a circular saw. Even so, you need the right blade, a steady hand, and some patience. With basic knowledge, a right circular saw, and safety tips, the job gets much easier. For beginners, the first attempt can be intimidating due to flying sparks, loud noise, and the heat generated from cutting metal. But after practice, cutting metal roofing becomes a simple job like cutting wood planks. The key is to start with a slow and steady pace, familiarize yourself with the cutting technique, and avoid rushing to ensure clean cuts and improved safety.
1. Why Use a Circular Saw to Cut Metal Roofing?
Some people use nibblers, tin snips, or larger power tools like metal shears for cutting metal roofing materials. I use a circular saw when I want a straight and quick cut. Let me tell you some reasons why I prefer it.
1. Quick Cuts & Consistent Performance
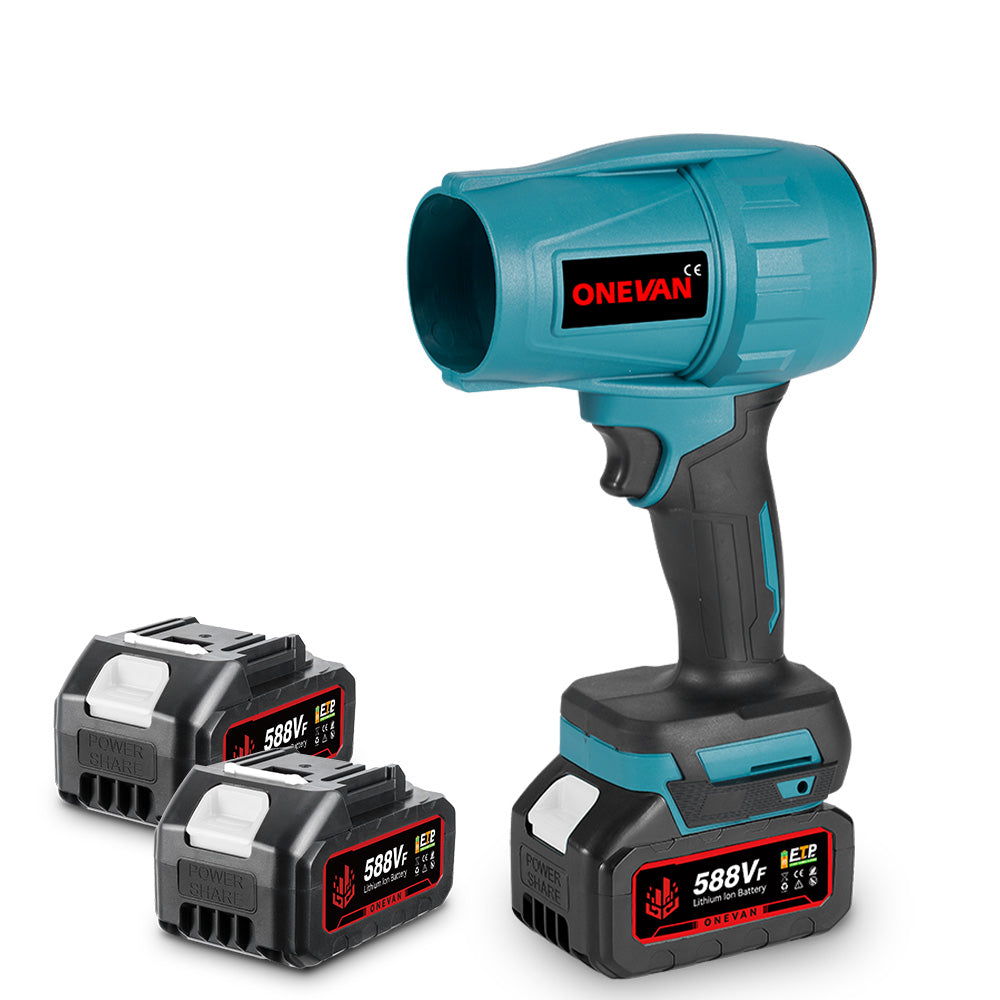
Cutting by hand with shears or snips is a time-consuming process—the hands are sore after a few panels. My friend tried to cut twenty sheets with a tin snip—the next day, his palm was all blistered, wrist swollen. ONEVAN 180mm 7 Inch Brushless Cordless Circular Saw cuts fast. Every sheet is the same size, each cut smooth and straight. You finish a big bundle of sheets in less time. Hand tools are suitable for small repairs, such as those involving one or two sheets. But when building the whole roof, power tools save many hours. Time is money, especially when hiring workers by the day rate.
2. Different Blades for Different Metals
Steel, aluminum, and tin are commonly used materials for roofing. With the right blade, a circular saw can handle each one. You just need to switch to the appropriate blade; carbide-tipped blades are often recommended for both steel and aluminum, while specialized blades can be used for other metal types —no need to buy big tools for a small workshop or home.
Galvanized steel requires a different blade than standard aluminum roofing materials. Color-coated sheets are also cut differently from plain sheets. But one good circular saw with a few other blades can handle all types. This is much cheaper than buying separate machines for each metal type.
3. Straight or Angled Cuts
Sometimes the sheet must be fitted at an angle—maybe for joining two roofs or to cover the wall edge. With a circular saw, making an angled cut is easy. Only use a guide or measure well. You save metal sheets and avoid mistakes.
Hip roofs need many angle cuts. The valley and ridge area requires a special shape. Hand cutting these angles is very hard; the result is not neat. A circular saw with a proper guide makes a perfect angle every time.
4. Accessibility and Availability
Nearly every mason, carpenter, or welder in my area has circular saws. In supply shops, rental shops, and even my neighbor, one always saw it there. Emergency repairs happen anytime. Storm damage includes roof damage, a fallen tree, and a broken sheet. If I can borrow a circular saw quickly, I can significantly expedite the repair process. Waiting for a special tool may take weeks, and this could lead to further damage from rain.
5. Precision
Old hand cutting shakes, making bend lines, and waste material. With a sharp, proper blade, cuts line up fine. Sheets join well, with less gap, making the project look neat. Customers always notice the quality of work. Crooked cut, rough edge, uneven joint—these things show poor artistry. Good circular saw cuts make professional results even for beginners.
6. Cost-Effectiveness
Purchasing a large metal-cutting machine for a single roof seems wasteful. Circular saws are less expensive and can be used for cutting wood, boards, and plastic. Even for making a chicken coop or animal shade, you do not need many tools. The ONEVAN 180mm Brushless Cordless Circular Saw is suitable for both household and farm applications. My calculation: a good circular saw costs the same as cutting service for a medium roof. But I saw it many years ago, and handled hundreds of projects. Investment pays back in a few jobs only.
7. Flexibility in Worksite Conditions
Sometimes, work isn't near the plug. Sometimes the roof is high, too far for heavy machinery. Cordless circular saws come in handy. Take up the ladder, climb the roof, and cut the sheet in place. This flexibility really helps when fitting odd shapes or in windy areas. Village work is often far from the electricity line. The generator is expensive to run for the whole day. The Li-Ion battery operated quietly, with no fuel smell, and was easy to carry on a bicycle or small truck.
2. Understanding the Tools Required to Cut Metal Roofing
Choosing the Right Circular Saw
Begin with the right circular saw. There are many types, each good for something.
Corded Circular Saw: Good for long, steady work. Power will not end unless the light goes off. Most shops and masons use corded circular saws for big roofs. Wire circular saws also give more power, blades spin faster, and cut cleaner. For a workshop with good electricity, a corded circular saw is the best choice. Heavy-duty corded saws are designed to handle thicker sheets more effectively due to their higher power and robust construction. Professional roofers mostly use corded circular saws for production work.
Cordless Circular Saw: Battery makes the saw easy to use for working at height or away from a plug. Modern batteries provide improved power and longevity compared to earlier models, which often struggled to last through a full day's work with heavy use. ONEVAN 125mm Brushless Cordless Circular Saw with a big battery can handle more than ten sheets before recharge. New lithium batteries typically offer longer run times and faster charging compared to older nickel-based batteries, making them better suited for demanding applications. Charge fast, last long, not heavy. Suitable for repair work, small jobs, and work in remote areas. Always keep a spare battery charged for a long career.
Power Spec:Thin roofing sheet cut by a light-duty circular saw, but thick metal needs a high-watt, high-amp. I use at least 1200 watts, 13-15 amp for corded devices; for cordless devices, check for 20V and above. More power means the blade does not slow down in thick metal. Underpowered circular saws may struggle with thicker materials, resulting in rough cuts and increased wear on the motor if not used appropriately. It's better to invest in a good power circular saw than to replace a cheap one every year.
Size: 7 1/4 inches is the most common, but 6 1/2 inches, 5 1/2 inches, or even 8 inches circular saws all use the correct blade. Smaller circular saws are lighter and easier to control for precision cuts. Bigger circular saws cut faster and handle thicker metal. Most people are happy with a 7 1/4 inch size—good balance of power and weight.
Selecting the Appropriate Blade
Now, blade is everything. Wrong blades ruin both work and the circularsaw.
Material: Not every blade cuts metal. For cutting metal roofing, I recommend using carbide-tipped blades for their durability and longevity, while multi-purpose steel-cutting blades can also be used for various metal types, but may not last as long. If in doubt, ask the shopkeeper. Cheap blades may look the same, but their teeth often fall off after just a few cuts. Carbide tips last much longer than steel teeth. Worth paying more for quality blades. One good blade cuts many roofs, saving money in the long run.
Tooth Count: Many teeth, cleaner result. Fewer teeth, faster but rougher edge. To finish work, use 60-80 teeth. For rough cutting, 24-40 teeth are enough. Fine-tooth blades also produce less noise and fewer sparks. Suitable for working near a neighbour's house or inside a building. Coarse blade suitable for thick metal, industrial work.
Design: Look for blades with reinforced teeth; laser-cut slots reduce vibration. Some blades have a special coating that reduces heat and prevents rust. Modern blades have expansion slots, anti-vibration holes, and noise reduction features. These small things make a big difference in cutting quality and tool life.
Do Not Use: The old trick is to use a blunt wood blade backwards, but this is a fire risk and burns the blade. Only use a wood blade backwards in an emergency, one or two sheets. A proper metal blade is always better and safer.
Additional Tools and Equipment
Safety Gear: It is essential to wear gloves with a rubber grip, safety glasses, and, in many cases, a face shield to protect against flying metal chips. I know a carpenter who lost an eye from a metal chip—now he always tells young workers about safety. Metalworking cut-proof gloves can protect against sharp edges and hot metal. Safety glasses must provide wrap-around protection, not just front protection. Metal chips bounce everywhere. Hearing protection is essential for extended cutting sessions.
Clamps or Vices: Secure the sheet; otherwise, it will move and produce crooked cuts. Use a C-clamp, quick clamp, or even heavy stone work. The sheet must not move during the cut. Spring clamps are quick to use but not very strong. Screw clamps take time to adjust, but hold very tightly. For windy areas, use many clamps, not just one or two.
Straight Edge: A Ruler or wooden batten helps draw lines. An aluminium angle strip is also a good guide for circular saw bases. Must be straight, not bent. A four-foot level makes a good cutting guide. Clamp the level to the sheet, and run the circular saw base along the edge. Give a perfect straight cut every time.
Dust Mask: Metal dust is harmful to the lungs. A simple paper mask is okay for short work. For all-day cutting, you need a good filter mask. Galvanized coating creates zinc fumes when hot. Not healthy to breathe. Always work in the open air, wear a mask, and take breaks.
Hearing Protection: The circular saw is loud, and the echo in the tin roof amplifies the noise. Foam plugs are cheap and work well. Ear muffs are better suited for long jobs. Protect your hearing when you're young to avoid problems later in life. Cutting metal is much louder than cutting wood. Neighbors also appreciate less noise.
Measuring Tape and Pencil or Marker: Always measure twice before cutting. Bright markers show better on shiny metal than pencil. Good 25-foot tape measure standard. Markers with chisel tips work well on metal surfaces. Chalk lines help with long cuts.
Support Board or Sawhorse: Metal roofing is floppy; good support stops vibration. Sawhorse every 4 feet for a long sheet. Plywood sheets also work as cutting tables.
3. Preparation Before Cutting Metal Roofing
Safety Precautions
Before starting, tidy up the area. Remove nails, tools, oil bottles—anything that can trip. Position the support board so the sheet does not wobble. Put on gloves, tie a scarf or handkerchief if you have loose hair, and wear hard shoes. Ask family or children to stay away—metal sparks and chips fly far. If using an extension lead, keep the cord away from the line of the circular saw. Keep a bucket of water nearby in case sparks burn dry grass. Inform neighbors that you will be making noise early in the morning or late evening. Good relations with neighbors are essential for future projects.
Measuring and Marking the Metal Roofing
Check twice where to cut. Mistakes in measuring waste material cost money. Use Sharpie, chalk or paint marker—pencil does not show on shiny sheet, marker never erased by finger. White markers show well on dark sheets. Dark marker for light sheet. If cutting many sheets together, clamp the stack and draw a line on top. But the first sheet was cut separately as a test. Check the size to fit properly before cutting the whole batch. For a curved roof, hold the sheet in place to check fit, then draw a cutting line. Take a photo of the roof area to remember the shape when cutting on the ground.
Setting Up the Work Area
Place metal roofing on twin sawhorses, so both sides of the cut get support. The distance between sawhorses should be less than the sheet length. Both ends must have support. Clamp or weigh sheet—a stone or filled bucket works on a windy day. Wind can lift light sheets, causing dangerous situations. For long cuts, align the guide board on line and clamp it in place. The check guide is straight, parallel to the cut line. Before switching ON, the check blade is new, the guard works, and the handle is dry. Wet hands can slip, causing accidents.

4. Step-by-Step Guide: How to Cut Metal Roofing with a Circular Saw
Step 1: Set Blade Depth
Unplug the circular saw or remove the battery. Adjust the base for the blade to stick just 2-3mm below the metal. Setting it too deep can increase noise, heat, and the risk of kickback. Tighten the depth lever. Deep blades are also more likely to catch on support, causing kickback. Shallow blades cut clean, are safe, and last longer.
Step 2: Set Tool to Line
Hold the circular saw with both hands—line the blade tooth with the mark. The circular saw blade sits smoothly on metal. If using a guide, the shoe must touch the guide along the whole cut. Check the blade guard to ensure it swings freely and isn't stuck with old sawdust. The guard must cover the blade when not cutting.
Step 3: Start the Cut
Started away from metal. Let the blade reach full speed. Gently move the blade to the sheet, line up, then push forward steadily. Loud sparks come at the start; do not jump back. The first touch is always scary, but it's something you should expect. Sparks are normal and not dangerous if an area is clean of flammable materials.
Step 4: Keep Pressure and Speed
Maintain a steady speed without stopping. Cutting too quickly can lead to overheating and burning the material, while cutting too slowly may result in a rough edge. Steady forward. Pause if the blade heat makes a smell. Listen to the motor sound. If the motor strains, slow down and push. If the blade makes a grinding noise, check for proper blade installation. If the blade stalls, pull back, check that the metal is not stuck, and try again gently. Stalling can damage the motor and bend the blade.
Step 5: Near End—Finish Safe
As you cut the last bit, hold the sheet so it does not bend and pinch the blade. Do not let the offcut fall on your foot. After passing entirely, switch off the lift saw. Support both pieces near the end of the cut. Dropping pieces can bend sheets, hurt feet, and make noise.
Step 6: Inspect Edge
The edge may be sharp or rough. Wear gloves, brush edges. A file or grinder can be used to smooth the surface if needed. For overlap joints, edges can stay rough, but for visible ends, neat trim looks better. Test sharp edges carefully. Even a small bur can cut through a work glove. The deburring wheel on the grinder works quickly to smooth edges.
Step 7: Clean Up
Pick all significant cuts and sweep up any small bits. Metal cuts skin, even tiny pieces. My uncle stepped on a chip, and blood came out. It's best to use a strong broom and a magnet if you have one, then walk in an area with good shoes. Metal chips hide in the grass, cracks in the floor. Take time to clean correctly. Magnets on strings help find small pieces.
5. Common Mistakes to Avoid
1. Using the Wrong Blade
Using a wood blade—it burns, makes big sparks, breaks teeth. Always get a proper metal blade. Using the wrong blade is dangerous and yields poor results.
2. Safety Measures Missing
No gloves—hands get hurt—no glasses—eye injury. Always put safety first. One accident costs more than all the safety gear.
3. Not Supporting Metal
If the sheet is unsupported, it lifts and bends, cutting along a zigzag pattern. Clamps, heavy stones, or friends help keep it firm.
4. Cutting at Bad Speed
Fast push melts the edge, while slow push burns the motor. Learn middle speed. Practice on scrap pieces first.
5. Wrong Blade Depth
Deep set—makes a big spark, small set—blade rubs shoe. Only a few mm below the metal is enough.
6. Poor Marking
If you can not see the line, the cut will go wrong. Use a bright mark, check before cutting. Mark both sides if needed.
7. Skipping Maintenance
Dirty guard, dull blade, loose handle—risk of accident. Clean the blade and check for any signs of dullness, damage, or debris buildup before every job to ensure optimal performance and safety.
8. Blade Opposite Side
If the blade is installed incorrectly, the circular saw may struggle to cut effectively, leading to overheating and potential damage. The arrow on the blade must match the arrow on the guard.
9. Overheat, No Cool
Rest every few sheets. Hot blade cuts are not only poor but also dangerous to touch.
10. Not Clear Metal Scrap
Leftover bits poke my foot, puncture the tire, cut the animal. Clean everything after work finishes.
6. Conclusion
Cutting metal roofing with a circular saw is not some magic or city-man job. Even one who grows up in a village learns it if the mind is steady, and the hands are careful. Correct blade, safety, and steady routine turn a new worker into an expert. Practice makes perfect. Begin with scrap metal and learn the feel of circular saws. Watch experienced workers if possible. Ask questions, learn from mistakes. Soon, cutting metal roofing became as easy as cutting wood boards. Good tools, proper technique, and a patient mind—these three things make a successful metalworker. Invest in quality circular saw and blade, they last many years. Learn proper safety, protect yourself and others. Take time to do the job right, and customers will appreciate quality work.
7. FAQs
Can I cut metal roofing with a regular wood-cutting blade?
No, better get a metal cutting blade for smooth, safe, and long-lasting results. Some people use a wood blade backwards in quick jobs, but real work requires proper tools.
How powerful is my circular saw for cutting metal?
If the circular saw cuts wood clean, it can try thin metal. Weak saw stop in the middle. The ONEVAN circular saw is usually strong enough for all metal roof jobs if the blade is sharp.
Are there alternative methods to cut metal roofing besides using a circular saw?
Yes, tin snip, hand shear, angle grinder, nibbler—all work. But for long, straight roofs, a circular saw is faster.
What type of blade should I use for cutting metal roofing with a cordless circular saw?
Use a carbide-tipped, fine-tooth metal cutting blade suited for battery circular saw speed. Change the blade before each big project.
Are there specific techniques for achieving clean cuts on metal roofing with a cordless circular saw?
Clamp guide, use a full sharp blade, steady speed, pause to cool the blade. Mark both sides if possible for good accuracy.