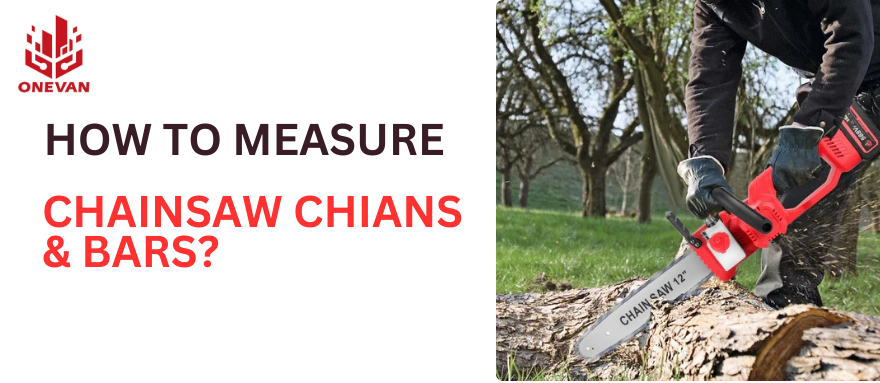
Chainsaw blade length varies depending on the chainsaw power and model. Larger chainsaws often come with 20-inch bars, while smaller models may have 18-inch bars or shorter.
The easiest way to check the exact bar size is to read your manufacturer's reader manual. These manuals have the recommended bar length.
But hey, manuals get lost sometimes. No worries! You can measure the chainsaw bar yourself to find the right size.
The power of the saw affects the length of the guide bar. If the saw is very powerful, choosing a guide bar that is too long can increase the load on the saw, potentially leading to a major failure. On the other hand, if you select a guide bar that is too short for the saw's power, you may not fully utilize the tool's potential.
1. How to Measure Chainsaw Chains?
When selecting a chainsaw cutting set, pay particular attention to the length of the chainsaw guide bar to ensure it matches your cutting needs and safety requirements. This should be compared to the saw's engine power and the type of material.
Measuring Chain Pitch
Definition and Importance of Pitch:
The chainsaw chain pitch is the distance between the centers of three consecutive rivets, divided by two. This pitch shows size of the chain's cutting teeth and guide bar groove. If you use the correct pitch, you will get:
- Proper fitting
- Cutting efficiency
- Reduced wear on the chain and bar.
Step-by-Step Guide to Measure Pitch with a Ruler or Caliper:
- Necessary Tools: Get a ruler or a caliper for accurate measurement.
- Mark the drive links: Rectangular-shaped links with a flat underside fit into the groove of the guide bar. They also carry a cutter tooth on one side.
- Measure the distance:
- Ruler: Carefully lay the chain flat on a stable surface. Count three consecutive rivets (the small metal pins connecting the links).
- Caliper: To get precision in measurement, a caliper jaws can effectively measure the distance between the center points of three consecutive rivets.
- Divide by two: After getting the distance between three rivets, divide that number by two. It will give you the chain pitch.
Common Pitch Sizes: The most common chainsaw chain pitches are:
- ¾" (0.95 cm)
- .325" (0.83 cm)
- ¼" (0.63 cm)
Tip: In many cases, the pitch information can be found stamped directly on the chainsaw bar itself.
Measuring Chain Gauge
Definition and Significance of Gauge:
A proper gauge ensures the chain fits snugly within the groove of the guide bar. An incorrect gauge can lead to excessive chain play, increased wear on the bar and sprocket, and potential binding or derailing of the chain – all safety hazards.
Techniques for Precise Gauge Measurement:
- Caliper: It is one of the most accurate methods. Use the caliper jaws to measure the thickness of a single drive link.
- Go/No-Go Gauge: A Go/No-Go gauge has two sides – one sized to fit a specific gauge and the other slightly larger. If the chain link slides freely through the correct-sized slot but is blocked by the smaller slot, you have the right gauge.
Common Gauge Sizes: Common chainsaw chain gauge sizes are:
- .043" (1.1 mm)
- .050" (1.3 mm)
- .058" (1.5 mm)
- .063" (1.6 mm)
Tip: Similar to pitch, the gauge information might also be stamped on the chainsaw bar.
Counting Drive Links
Why Knowing the Number of Drive Links is Crucial:
The number of drive links in a chain directly correlates to the length of the chainsaw bar. Using the correct number ensures proper chain tension and prevents the chain from being too short (potentially derailing) or too long (causing binding and power loss).
How to Accurately Count Drive Links:
- Safety: Wear hand protection gloves.
- Keep the chain flat: Spread the chain out on a flat surface with the drive links facing upwards.
- Systematic counting: Start at one end and carefully count each individual drive link. A trick to improve accuracy is to count in pairs, moving one link at a time with your thumb and forefinger.
Tip: Often, the recommended number of drive links for a specific bar length will be printed directly on the bar itself. Consult your chainsaw manual for confirmation.
2. How to Measure Chainsaw Bars?
Just like measuring the chain, understanding your chainsaw bar's dimensions is crucial for proper fit and optimal performance. Here's a breakdown of key chainsaw bar measurements, including groove gauge, length, and different bar types.
Determining Bar Groove Gauge
The bar groove gauge, also known as the drive link slot width, determines the thickness of the chain that will fit seamlessly within the bar. Using a chain with an incorrect gauge can lead to:
- Excessive play: A loose chain increases the risk of derailing and reduces cutting efficiency.
- Binding: A chain too thick for the groove can bind, causing friction, overheating, and potential damage to the bar, sprocket, and chain.
- Premature wear: Improper fit accelerates wear on both the chain and bar.
Methods to Determine the Correct Gauge:
- Read existing markings: In many cases, the bar groove gauge get stamped directly on the bar itself. It is often found at the mounting location.
- Caliper measurement: To get the precise measurement, take advantage of a caliper to measure the width of the groove at its narrowest point.
Common Bar Groove Gauge Sizes:
These typically match the common chain gauge sizes:
- .043" (1.1 mm)
- .050" (1.3 mm)
- .058" (1.5 mm)
- .063" (1.6 mm)
Measuring Bar Length
The most crucial measurement for a chainsaw bar is the effective cutting length, which is the length of the bar from the tip to the point where it attaches to the chainsaw body, excluding any portion that does not engage with the chain during cutting.
Tips for Measuring Effective Cutting Length:
- Tape measure: Lay the bar flat on a stable surface. Extend the tape measure from the tip of the bar to the point where the bar meets the chainsaw body (not including the mounting hardware). Round the measurement to the nearest inch or millimeter.
Common Mistakes:
- Don't include the full bar length: The total bar length is usually longer than the effective cutting length.
- Round to the nearest standard size: Chainsaw bars have even-inch increments (e.g., 14", 16", 18"). It is recommended to round up to the nearest standard size.
Cordless Chainsaws:
Cordless chainsaws may have shorter bar lengths due to their compact design. Always consult your specific chainsaw model's manual for recommended bar lengths.
Understanding Different Bar Types and Their Specifications
Solid vs. Replaceable Nose Bars:
- Solid bars: These are one-piece units with a fixed nose (the pointed tip). They are generally more affordable but require replacement when the nose wears down.
- Replaceable nose bars: These have a replaceable nose piece that can be swapped out when worn, extending the lifespan of the bar itself.
Key Specifications to Consider When Selecting a Bar:
- Bar length: Choose a length appropriate for the intended cutting tasks. Longer bars handle larger diameter trees but can be less maneuverable.
- Bar groove width (gauge): Ensure the bar groove matches the gauge of your chainsaw chain.
- Bar mount type: Different chainsaw models have specific bar mounting configurations. Ensure compatibility with your saw.
- Material: Standard chainsaw bars are made from chrome-moly steel. Specialty bars may be available in lighter materials for specific applications.
Note on Cordless Chainsaws:
While most of these bar selection principles apply to both corded and cordless chainsaws, cordless models may have limitations on bar length and type due to their design. Always refer to your cordless chainsaw's manual for specific bar compatibility information.
3. Matching Chainsaw Bar and Chain for Your Chainsaw

The right bar and chain combination is like putting the right shoes on for the job. It ensures:
- Smooth & efficient cutting
- Maximizes safety
- Extends the tool life.
Let’s figure out the perfect match for your chainsaw.
Identifying the Right Chain Type for Your Bar
Chainsaw chains come in different flavors, each designed for specific cutting tasks and bar types. Let's explore the main players:
- Full Chisel Chains: These bad boys have aggressive, sharp teeth that rip through wood like nobody's business. Ideal for professional loggers and experienced users tackling tough hardwoods. However, they require more frequent sharpening and can increase bar wear due to their aggressive cutting style. Not recommended for beginners with lightweight bars.
- Semi-Chisel Chains: These chains have slightly rounded chisel teeth that provide a good bite. It also reduces wear and requires less frequent sharpening compared to full chisel chains. A jack of all trades tool.
- Low-Profile Chains: These chains feature the least aggressive tooth profile, making them ideal for homeowners and occasional chainsaw users. They reduce kickback risk. Simultaneously, they are easier to sharpen. In addition, low profile chains put less strain on the chainsaw motor.
Matching Chain Type to Your Needs and Bar:
Consider these factors when choosing a chain type:
- Your cutting tasks: Heavy-duty logging demands a full chisel chain, while light pruning might be best suited for a low-profile option.
- Bar type: Lightweight bars may not handle the aggressive cutting of full chisel chains. Semi-chisel or low-profile chains are generally safer choices.
Matching Chain Pitch and Gauge to Your Bar
Imagine your chain as a key and the bar groove as the lock. Just like you wouldn't use the wrong key, the chain pitch and gauge need to perfectly match the bar's specifications for proper fit and function. Here's why it matters:
- Matching Pitch: The chain pitch refers to the distance between drive links. A mismatch will cause the chain to sit incorrectly in the bar groove, leading to binding, poor cutting performance, and potential damage to the chain and bar.
- Matching Gauge: The chain gauge refers to the thickness of the drive link. Too thin gauge will have excessive play in the groove. It also increases the risk of derailing. If it's too thick, the chain will bind and cause friction.
Step-by-Step Guide to Choose The Best Chain Dimensions:
- Check the Bar: Look for stamped markings on the bar itself. It should indicate both the bar groove width (gauge) and the recommended chain pitch.
- Consult the Manual: Your chainsaw manual will also have specific chain size recommendations for different bar lengths.
Adjusting Chain Tension for Different Bar Types
Now that you have the perfect chain and bar combo, proper tension is key. Here's how to adjust tension based on your bar type:
- Solid Nose Bars: These typically have a tensioner screw near the sprocket. Loosen the nut, turn the screw to adjust tension until the chain has slight up-and-down play (around 1/8 inch) at the mid-point of the bar, and then retighten the nut.
- Replaceable Nose Bars: The tensioner mechanism might be located on the nose piece itself.
Best Practices for Maintaining Optimal Chain Tension:
- Check tension frequently, especially during a new chain break-in period. New chains tend to stretch slightly as they settle in.
- Never operate a chainsaw with a loose chain. It's a major safety hazard and can damage the bar and sprocket.
4. Common Measurement Mistakes in Chainsaw Maintenance
Even the most seasoned chainsaw user can fall victim to measurement mishaps. You will read common mistakes you must avoid when measuring chainsaw parts.
Misreadings of Pitch and Gauge
Pitch and gauge are the foundation of a perfect chain-bar fit. Here's how misinterpreting these measurements can throw a wrench (or chainsaw) in your plans:
- Pitch Misinterpretation: Confusing the distance between two rivets with the actual pitch can lead to a chain that's too big or small for the bar groove. This results in:
- Binding: A tight chain struggles to move freely, causing friction, overheating, and potential damage.
- Poor cutting: An excessively loose chain won't engage the bar properly, reducing cutting efficiency and control.
- Derailment: A chain with the wrong pitch may jump off the bar groove, creating a serious safety hazard.
- Gauge Confusion: Mixing up the width of the drive link with the bar groove width can have similar consequences:
- Excessive Play: A thin chain in a wide groove will have too much wiggle room, increasing the risk of derailing and reducing cutting precision.
- Binding and Wear: A thick chain in a narrow groove will bind, causing friction and accelerated wear on both the chain and bar.
Avoiding Mistakes:
- Double-Check Measurements: Don't rely on memory or quick glances. Use calipers for precise measurements and double-check your calculations for pitch.
- Consult the Manual: Your chainsaw manual is your golden ticket. It will specify the recommended chain pitch and gauge for your specific chainsaw model.
- Look for Markings: Many chainsaw bars have the groove width (gauge) and sometimes even the recommended pitch stamped directly on the bar itself.
Ensuring Accurate Bar Length Measurement
Bar length selection impacts everything from maneuverability to cutting capacity. Here's how to avoid mismeasuring your bar:
Consequences of Incorrect Bar Length:
- Safety Concerns: A bar that's too long for your chainsaw can be unwieldy and increase the risk of kickback.
- Reduced Efficiency: A bar that's too short may limit your cutting capacity and require more frequent maneuvering for larger logs.
- Chain and Bar Wear: An improperly sized bar can put additional stress on the chain and bar, leading to premature wear and tear.
How to measure precise bar length?
- Effective Cutting Length, Not Overall: Focus on measuring the usable length of the bar where the chain actually cuts, excluding the section that mounts onto the chainsaw body.
- Tape Measurement: Lay the bar flat on a stable surface and extend the tape measure from the tip of the bar to the point where the bar meets the chainsaw body (not including the mounting hardware). Round the measurement to the nearest inch or millimeter.
Pro Tip: Don't be fooled by the overall bar length! It's typically longer than the effective cutting length
5. Conclusion
If you use a right bar and chain with your chainsaw, you must know the technical measurements. For example if you know how to measure chain pitch, gauge, and bar length, it will help you in:
- Avoid common misinterpretations that can lead to safety hazards,
- Poor cutting performance
- Unnecessary wear on your equipment
If you put a little focus on measurement details, you can get maximum results from your chainsaw. It will also assist in keeping your cuts precise.
6. FAQ
1. What is the difference in measurements for cordless chainsaws & corded?
Cordless chainsaws may have shorter recommended bar lengths due to their compact design. Always consult your specific model's manual for confirmed measurements.
2. How to identify chainsaw chain size?
Look for three key measurements: pitch (distance between drive links, divided by two), gauge (thickness of the drive link), and number of drive links (correlates to bar length).
3. How is chain size measured?
Use a ruler or caliper to measure pitch and gauge. Count the total number of drive links for chain length.
4. What does 72 mean on a chainsaw chain?
"72" likely refers to the number of drive links in that specific chainsaw chain.
5. How do you measure a chainsaw bar and chain?
For the bar: measure the effective cutting length (tip to chainsaw body) with a tape measure. For the chain: use caliper/ruler for pitch and gauge, then count drive links.
6. What does .325 mean on a chainsaw bar?
".325" indicates the bar groove width (gauge) in inches. It's designed for a chain with a gauge of 0.325 inches.
7. Can you use a .050 chain on a .043 bar?
No. A .050 chain is too thick for a .043 bar groove and will cause binding. The chain gauge must match the bar groove width.
8. What is the most common chainsaw bar length?
The most common chainsaw bar length depends on region and use. Generally, 16-inch and 18-inch bars are popular for homeowner use.
9. What is the difference between 3/8 & 3/8LP chainsaw chains?
3/8 and 3/8LP chainsaw chains are different in pitch: 3/8" (standard) and 3/8LP (Low Profile).
10. What is the most aggressive chainsaw chain?
Full chisel chains deliver a very impressive cutting capability. What is the reason? They have pointed teeth; however, you must sharpen them more often and can also contribute to more bar wear.
11. What does LP mean on a chainsaw chain?
LP stands for "Low Profile." This refers to a narrower chain pitch designed for lower kickback and easier control on smaller saws or for light cutting tasks.

