Whenever you open the AC system of a vehicle to change a part or fix a leak, you should apply a vacuum pump before adding refrigerant and reassembling the system. It is incredibly important, as vacuum pumping ensures the AC system has no leaks and removes moisture and dirt.
If you open an AC system and don’t apply an AC vacuum pump before closing or reassembling it, the system's cooling capacity can be reduced. You might also increase the risk of rusting and corrosion inside the system. In this blog post, we’ll talk about how you can apply a vacuum pump to your car’s AC. There’s no rocket science about it, and anyone can do it comfortably at home. Let’s see how to do it.
1. Tools and Equipment Needed for Vacuuming and Recharging Your Car’s AC
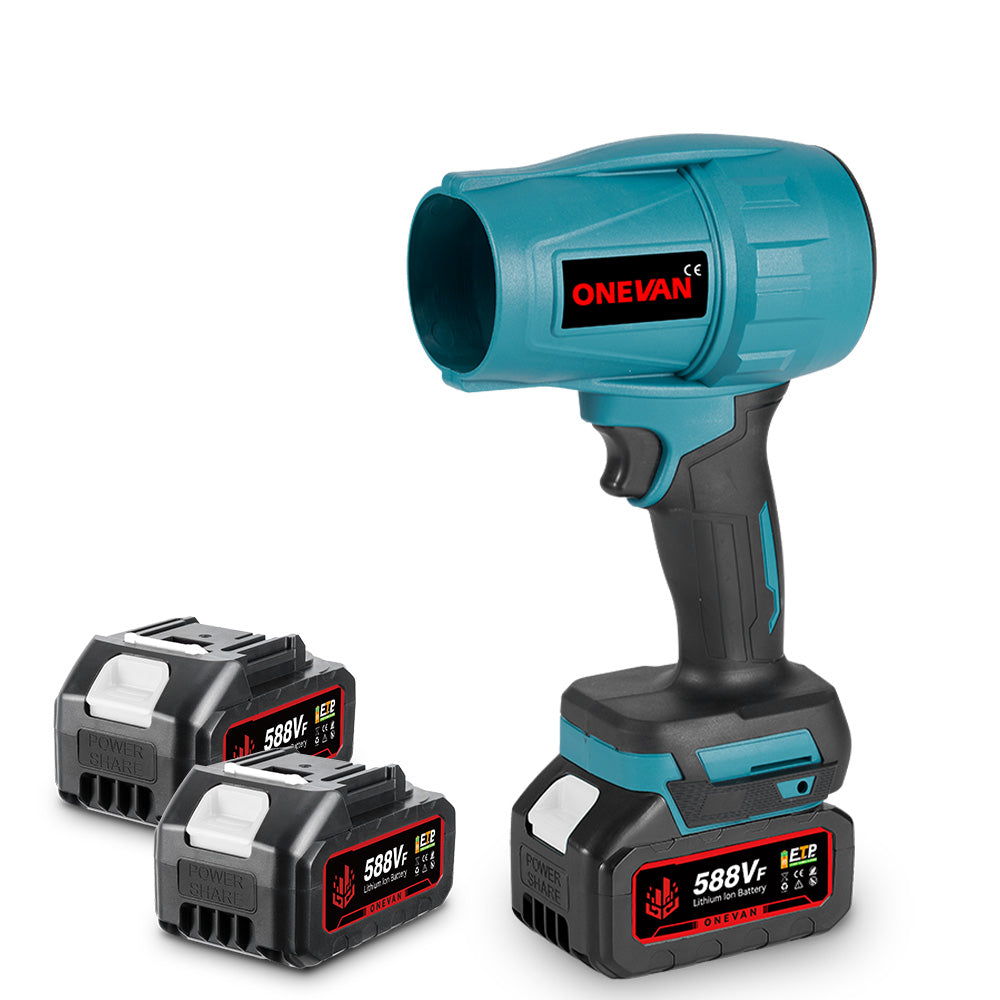
You need two major pieces of equipment: a vacuum pump and a rechargeable AC adapter. The first essential power tool is a car AC vacuum pump. If you’re a car owner, not a professional, use ONEVAN’s brushless cordless vacuum pump. It provided professional-grade power and performance, and its cordless design removes all the hassle of managing electrical wires and supplies. It is also equipped with a Brushless motor, which is more efficient.
The second thing you need is a manifold pressure gauge. Make sure it’s compatible with your car. If it has a sight glass, it’s a plus, as you can see how much refrigerant is being added through it.
Last but not least is protective equipment. When changing your car’s AC refrigerant and using the vacuum pump, wear safety goggles and gloves, as the refrigerant can cause frostbite if it comes into contact with your skin. Gloves keep you safe from such incidents.
Googles are also extremely important as a refrigerant; if spilled into the eyes, they can cause blindness. Other safety measures include wearing shoes and long sleeves. Make sure you turn the car's ignition off before doing anything with the AC system. Never vent refrigerant into the open air, as this is illegal and can result in fines.
2. How to Vacuum Your Car AC System With a Pump
Once you have taken the necessary precautions and you have your gear, it’s time to start applying the vacuum pump. Follow these steps to do it right.
Step 1: Connecting the Vacuum Pump
First, hang the manifold gauge and close both valves. Attach the low-pressure hose to the low-pressure side port and the high-pressure port to the high-pressure side port on the manifold gauge. Low-pressure hose is usually blue, and high-pressure hose is usually red.
The middle hose is the service hose, which is yellow. Attach it to the middle service port on the gauge. Make sure they fit properly and aren’t leaking.
Next, attach the hoses to their respective coupler valves. Attach the low-pressure blue hose to the low-pressure coupler valve and the high-pressure red hose to the red coupler valve.
Next, it’s time to move to your car. Open the front lid, and you should be able to see both the low-pressure side service port (often labelled “L”) and the high-pressure side service port (often labelled “H”).
Now attach the blue coupler valve to the low-pressure side service port and the red coupler valve to the high-pressure side service port of the car. Be gentle, as applying too much force can damage the Schrader valves.
Lastly, attach the yellow service hose to the vacuum pump and snug it properly so it doesn’t leak. With this done, our setup is complete, and we’re ready to start applying the vacuum.
Step 2: Running the Pump — How Long and How to Monitor Vacuum Level
Start the vacuum pump and open both valves on the manifold gauge. You’ll see that both of the readings on the gauge are below zero. This is a positive sign as it shows the pump is actually pulling a vacuum.
Now the important question here is how long this pump should run. There’s no absolute time limit or guideline for it. The goal is to achieve a system pressure of 500 microns or less. Most cars achieve this in 30-45 minutes, which is a good time period if your AC system has undergone a minor fix or replacement. But if there has been extensive work on the AC system, you should run this pump overnight.
Step 3: Holding Vacuum to Check for Leaks
After you have applied the vacuum pump, the last step before detaching it is to check for leaks. As I mentioned above, if you’re using a micron gauge, a rapid rise in the car's AC system after disconnecting the pump means there’s a leak that you should fix.
If you’re not using a micron gauge, first close the valves on the pressure gauge before shutting down the pump. Don’t disconnect now; wait about an hour and observe the pressure gauge readings. If the readings on the manifold gauge remain stable for an extended period, this typically indicates no significant leaks, allowing you to disconnect.
Step 4: Disconnecting and Confirming Readiness for Recharge
After confirming that the system has no leaks, you can remove the coupler valves from the low- and high-pressure side ports and detach the setup from the car’s AC.
3. How to Recharge Your Car AC After Vacuuming
After vacuum pumping, the next step is to recharge the AC. Recharging means adding fresh refrigerant to the AC system so it can cool your car again. Follow the following steps to recharge your car's AC.
Step 1: Connecting the Refrigerant Can
The easiest way to recharge on your own is to use a refrigerant can, which you can easily buy at the market. You should add the refrigerant by weight, so you’ll need a scale (a cheap food scale will work completely fine). The second thing you’ll need is a manifold gauge, preferably one with a sight glass. Make sure that the manifold gauge you’re using is compatible with the refrigerant, and the refrigerant is compatible with your car’s system.
Attach a refrigerator can adaptor to the can. Turn it closed. Attach the yellow service hose of the manifold gauge to this can adapter. Keep both manifold gauge valves closed.
Now connect the blue and red hoses to the gauge and to the side service ports of the car AC, just as we did while applying vacuum. One important step here is to purge the yellow line. For this purpose, you need to open the blue valve on the gauge and open the can adapter valve just a tiny bit. You’ll hear a low hiss. This will release any trapped moisture from the yellow line. Close the adapter valve after a few seconds. Keep the red valve on the manifold gauge closed at all times.
The next step is to add coupler valves to the hoses and attach them to the low- and high-pressure service ports of the car's AC.
To start recharging, turn on both the engine and the AC. To initiate the refrigerant recharge, turn on the blue valve on the gauge. Shake the can and open the adapter valve a tiny bit until you see liquid in the sight glass, and keep it there. Keep rotating the can between upright and horizontal positions while it feeds the AC system. When you think it's empty, rotate the can upside down for 1 minute to ensure any remaining refrigerant is drawn into the system.
If the can is empty and you need to switch, close the adapter valve first, then the blue valve, and then swap the can and reopen the adapter and blue valve. Once the desired refrigerant amount has been reached according to your car's specifications, keep the engine running, then close and remove the blue coupler valve. Then remove the red coupler valve and turn the engine off.
Before you cap the service ports, ensure that the Schrader valves are firmly closed to prevent any refrigerant leaks from the ports.
Step 2: Tips on Pressure and Temperature Monitoring
The following are some tips to consider while recharging your car’s AC.
- Use only a refrigerant type compatible with your car. The quantity of refrigerant to be added also depends on the car.
- To successfully recharge a car's AC system, the ambient temperature should be above 55 degrees Fahrenheit (13 degrees Celsius). That’s why it’s recommended to never charge your car in cold weather.
- While recharging, make sure the engine is on, the windows are down, the AC is set to max cooling, and recirculation is on.
- Place a thermometer inside the AC’s vent to monitor the temperature.
Step 3: Following Safety Guidelines During Refilling
Vacuum pumping and recharging the car’s AC are safe procedures if you follow the necessary precautions.
- Make sure the refrigerant and manifold gauge are compatible with each other and with the car's AC system.
- Use safety googles and glasses. Refrigerant must not come into contact with your skin or any other body parts.
- Never vent refrigerant in the environment. Always retrieve it with special equipment available at automobile service shops.
- Water dripping under the car during this process is normal, so don’t worry about it.
4. How Long Should You Leave the Vacuum Pump On Your Car’s AC System?
Typical Duration Recommendations
Before we wrap up this article, let’s quickly review some important information. As for the duration of vacuum pumping, 45 minutes to 1 hour is more than enough for most cars. But in case your AC system stayed open for long periods in an environment with higher humidity and moisture, or large parts of your car system are fixed, repaired, or replaced, a lot of moisture and dirt can collect inside the AC system, and you’ll need to run the vacuum pump for longer periods, like overnight.
Signs of Successful Evacuation
A simple method to verify evacuation is to use a micron gauge to measure the pressure in the AC system. It’s an extremely sensitive manometer that you can use to measure the pressure inside a car’s AC system. As soon as the gauge reads 500 microns, detach the pump and manifold gauge from the vehicle and monitor the reading for any significant rise, which would indicate leaks. If it rises but remains below 1000 microns, the vacuum has been applied successfully.
If the pressure rises quickly by a large amount, there’s a leak you need to fix. If the micron gauge reading increases slowly and stabilizes, there may still be moisture in the AC system, indicating that you need to run the vacuum pump for a longer duration.
What to Do When the Vacuum Pump Runs Longer Than Expected
If the vacuum pumping is running forever and you’re not getting to a successful evacuation, you should check the following things:
- See if there are any leaks in Schrader valves, hoses, or the pump.
- See if there’s moisture or if the AC system has been exposed to moisture. In such cases, the evacuation process may take significantly longer than usual and may require additional checks for efficiency.
- Replace the vacuum pump oil, remove valve cores, or use short full-bore hoses. The quality of the vacuum pump also affects the duration and quality of the evacuation, so use ONEVAN vacuum pumps for the best results.
5. Safety Tips When Using a Car AC Vacuum Pump
Follow the following safety tips to make sure vacuum pumping is hazard-free.
Wear Personal Protective Equipment (PPE)
Goggles and gloves are a must-wear as refrigerant on your skin and eyes can cause frostbite and blindness, respectively.
Work in a Well-Ventilated Area
Make sure your workplace is well-ventilated. You must not inhale any refrigerant or lubrication mist.
Check Equipment Integrity Before Use
Before you start the pump, make sure all the attachments are tight and there are no leaks in the system.
Avoid Electrical Hazards
Never place the pump on a wet floor, near flammable materials, or in an unventilated area.
Handle Refrigerants According to Guidelines
Never vent refrigerant into the open air or start an evacuation on an already pressurized system. Both these things break the law and can get you into legal trouble. Always recover the refrigerant using certified instruments available at automobile service shops.
Prevent Overheating of the Vacuum Pump
Give the pump space and air to breathe. Change its oil when it’s stale.
Be Careful With High Pressure and Vacuum Levels
Open and close valves slowly. Do not turn on the high-pressure valve during recharging the car's AC.
Disconnect Equipment Properly After Use
Close manifold gauge valves first. Then turn off the pump and remove the couplers. This sequence prevents air from entering the system.
6. Conclusion
Applying a vacuum pump to your car's AC is important, especially if it has been repaired or its cooling is reduced. All you need is a manifold pressure gauge and a quality pump. Check out ONEVAN cordless vacuum pump of industry-leading vacuum pumps that offer the highest efficiency and least hassle. Make sure you take all the necessary precautions and follow the steps mentioned in this article carefully. If you run into a problem, you can consult your nearest automobile service shop.
7. FAQs
Why is my vacuum pump not reaching the desired vacuum level?
If your pump isn’t reaching the desired vacuum level, there might be small leaks, an obstruction in the lines, a greater moisture load on the system, or the pump’s oil can be contaminated. Fix these bottlenecks and you’ll see significant improvement.
Can I skimp on vacuuming time?
Not really. Time doesn’t matter. The system should be dry. Vacuum can be achieved in half an hour or after a full night. You should end the evacuation before you have achieved a vacuum.
How often should maintenance be performed on vacuum pumps?
For occasional vacuum pump use, it is advisable to change the oil before and after each session to ensure optimal performance. Also, check hoses and O-rings before each session. You can also perform occasional leak tests, also known as blank-off tests, to assess the pump’s performance.
Is it safe to run the vacuum pump without AC refrigerant?
This is exactly how you should be running a vacuum pump. It’s essential to recover any remaining refrigerant from the system before applying a vacuum.