One of the most reliable tools for achieving perfect alignment and measurements in construction, renovation, and home improvement is the laser level. It emits bright horizontal, vertical or cross lines which serve as visual cues, thus getting rid of guesswork and producing a professional effect even with inexperienced hands.
Because both DIY enthusiasts and professionals use laser levels, these devices help minimize errors and speed up alignment while providing precision over long distances. Products like the ONEVAN Laser Levels offer additional features, including high-quality beams, self-levelling, and 360° coverage, making them suitable for nearly any indoor or outdoor project. With knowledge on how to use a laser level in various situations, you can be able to approach tasks that need perfection in levelling, aligning or height reference.
1. Different Types of Laser Levels
Line Laser Levels
Line laser levels project straight horizontal, vertical, or cross-lines to cover entire rooms. They are used for flooring, wall construction, and overall alignment. The ONEVAN Laser Level is such a product, which has a 16-line 4D content to fully cover a room layout work. These levels are easy to use, they are very precise and ideal for tile work, shelves, wall decoration and framing.
Dot Laser Levels
Dot laser level projectors provide one or more laser points on surfaces. These dots are reference points that are used to transfer measurements or align certain marks. Electricians, plumbers, and construction workers commonly use dot laser levels for point-based precision instead of long lines.
Rotary Laser Levels
This equipment is more powerful and has a longer range, making it ideal for leveling large areas. These equipments are more powerful, long-range and are applicable to areas where the creation of a uniform level point over a large field is fundamental.
2. Key Components of a Laser Level
Laser Emitter and Beam
The most fundamental unit undertaking the projection of visible green or red rays is the laser emitter. The emitters are of high quality, which means that they provide sharp and bright lines where there is a wide space. Green lasers, such as those in advanced levels, are more visible, and they can be applied in indoor and outdoor work.
Tripod or Mounting Options
Tripods simplify precise levelling by providing stability and adjustable height. Wall mounts, magnetic mounts or ceiling brackets are also supported in numerous models in order to perform specialised tasks. The tripod is essential for positioning the laser level on walls or raised areas.
Self-Leveling Mechanism
Self-levelling is a capability which self-corrects the laser to make the beam perfectly straight within some level of inclination. This does not allow manual correction and is much faster and more accurate. It is especially useful to users who are having their first experience with how to use a laser level.
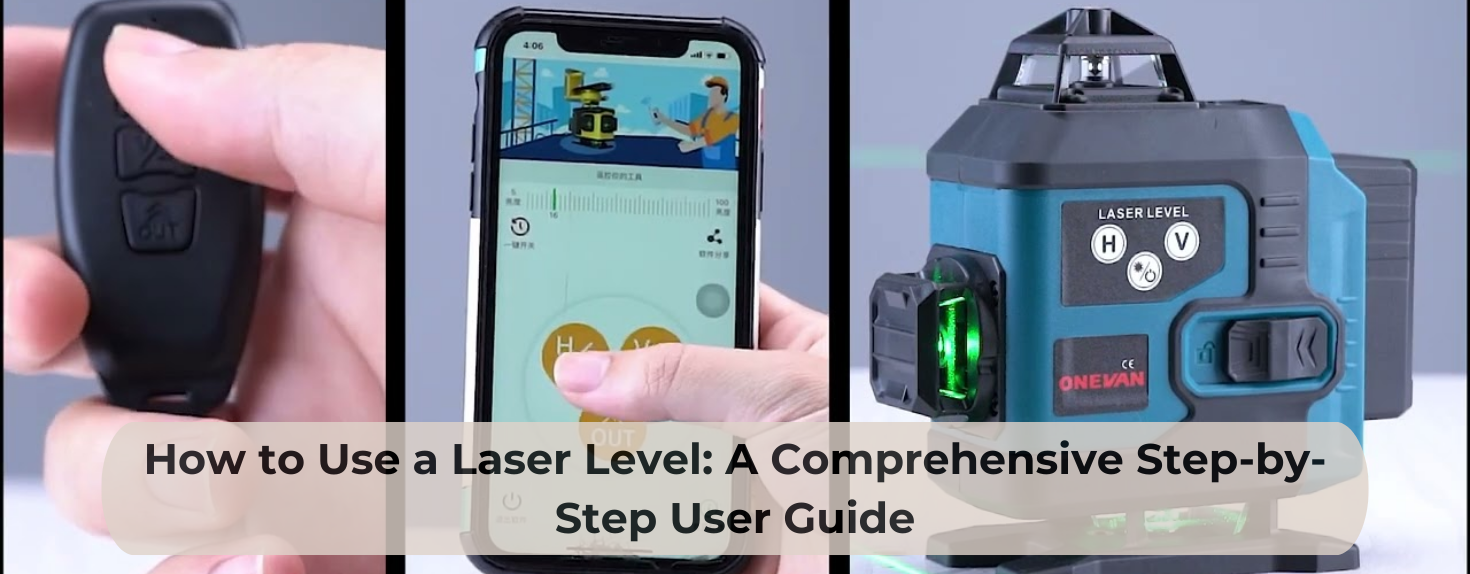
Control Panel / Buttons
The control panel has power buttons, line selection, brightness control and manual mode switching/switching. The use of modern models makes it easy to control operations such that a novice can change patterns of the laser without any difficulties.
Battery and Power Supply
The majority of lasers are now operated by rechargeable batteries and have hours of operating time. Professionals who need constant accuracy in long projects also require long battery life.
3. Step-by-Step Guide to Operating a Laser Level
Once you know the proper steps, the use of a laser level becomes a lot easier. Whether you are a novice or an expert, following a systematic approach helps ensure accuracy and avoid mistakes. This step-by-step guide will assist you in setting up/enabling your device and using it with a high level of confidence within any environment. Starting with the activation of the tool and marking of the ideal reference points, every process is meant to ensure that your work becomes quicker and more accurate. A laser level can change the quality and efficiency of your work with the right approach to cutting, drilling, sifting and milling edges of wood, metal and plastic constructions or DIY projects.
Step 1: Powering On and Positioning the Laser Level
Place the laser level on a stable surface or tripod before starting your measurements. Turn it on and ensure it's set to the correct working height for your project. In case you are planning on how to utilise a laser level to smooth a ground surface, make sure that the subject area is sturdy and safe before you cast the beam.
Step 2: Activating and Adjusting Beams (Lines, Dots, Rotation)
Choose vertical, horizontal, or cross lines as required for your task. Line lasers are used to project several beams that will cover the ceiling, floor, and walls of the room, compared to the rotary lasers that can provide 360-degree movement. Brightness is regulated as per the lighting conditions.
Step 3: Using Self-Levelling vs. Manual Mode
When the mode is switched to self-leveling, this automatically makes the beam straight. This suits most of the beginners who are yet to know how to operate laser level devices properly. Manual mode lets you project angled lines, for example, when installing stair railings.
Step 4: Using a Laser Detector / Receiver (If Applicable)
Detectors help locate the laser beam outdoors or over long distances, where visibility may be limited. This simplifies some projects, such as the process of applying a laser level when grading or mass landscape development.
Step 5: Marking Points and Reference Lines Based on Laser
After projecting the laser lines, make the measurement points on the surface. Whether you are learning how to install the laser level to level the ground or to centre the indicators in a room, marking is what makes the difference in installing the material.
Tips for Working on Different Surfaces and Heights
- When working on uneven or rough terrain, use a heavy-duty tripod for better stability.
- Adjust the laser line brightness according to the ambient sunlight.
- Magnetic mounts are also used to give perfect fitment to walls.
- Check alignment again before drilling or fixing anything.
4. How to Use a Laser Level in Different Scenarios
Aligning Tiles and Floor Leveling
Laser levels would come in very handy when installing the tiles, as they cast sharp, straight lines of reference on the floors and walls. When precisely aligned, these lines help lay tiles in straight, regular patterns without manual measuring for each tile. In learning techniques of using a laser level to level the floor, you only need to place the equipment and direct the line where the initial row is to be laid and then follow the line to the correct spacing and avoid sloping lines on the tiles. This gives it an easier clean layout and significantly more professional finish, particularly when it comes to big flooring projects.
Hanging Cabinets, Shelves, and Pictures
The installation of shelves, cabinets, or picture frames eliminates the element of guesswork using laser levels. To know how to employ a laser level to mount pictures, adjust the level to the height of the desired position, cast a horizontal ray and align everything using the ray. This stops any bent or tilted installations and ensures the alignment of all the frames or shelves is straight on the wall. The laser line is suitable whether one is doing the decoration of a living room or has to install heavy cabinetry in a kitchen, since it saves much time, in addition to being accurate.
Installing Drop Ceilings and Framing Walls
In construction or rebuilding, it is essential to stick with a similar reference height. A laser level assists in making a good guide for the ceiling grid system, studs, and lines of framing. It has a 360-degree projection, which gives you a chance to ensure that you have straight beams and solid wall frames. This gives the required speed, accuracy, and checks are made so much easier as the structure is assembled.
Landscaping and Outdoor Grading
Models of Laser levels are also extensively utilised in the outside world in patios, walkways, trenches, and soil levelling. It is particularly relevant to the knowledge of how to use a laser level for grading formations when it comes to slopes or drainage paths. By casting an external line to be seen over a length of distance, the equipment aids in maintaining even heights and slopes, making sure water flows in the right direction and the ground is level. Bright green or rotary laser levels are ideal outdoors because they remain visible even in sunlight.
Plumbing and Electrical Layouts
In the case of plumbing and electrical planning, laser levels are used to ensure installation is straight and aligned successfully. Laser lines direct the pipe routes, heights of switches and outlets and straight conduit or wiring. This reduces errors, ensures correct measurements, and simplifies future maintenance or inspections. There is no need to sketch out vertical lines of pipes or horizontal lines of wiring; a laser level makes it all straight from the beginning.
5. Common Problems When Using a Laser Level
Laser Not Levelling Correctly
This normally occurs as a result of unsteady surfaces or going beyond the self-levelling scope. Stabilisation: The level can be repositioned or may be a tripod.
Laser Beam Visibility Issues
Bright sunlight and reflective surfaces can reduce laser visibility. Use higher brightness settings or laser detectors for outdoor work.
Battery or Power Failures
The weakness of the beam can be caused by a low battery. Storage units: Recharge or replace prior to commencement of long projects.
Tripod Stability and Setup Challenges
Unleveled surfaces may destroy tripod stability. Alter the placement of legs or reconfigure the system to have more stability.
Handling Reflective Surfaces and Environmental Factors
Laser beams can scatter on glass, mirrors, and shiny metal surfaces. Change the angle of reflection by simply changing the level.
6. Conclusion
A laser level is an effective instrument that makes it easy to do anything as simple as indoor installations and as complex as large-scale outdoor grading. No matter whether you have just learned how to use a laser level or you are perfecting your skills to meet increased requirements in your work, the knowledge of its parts, features, and good practice will surely guarantee the accuracy and reliability of results. In the world of home improvement to home building, knowing how to use a laser level correctly helps you complete work faster, with greater accuracy and less mess. Through practice, you will get familiar with such things as how to use a laser levelon a wall, how to use a laser levelto hang pictures and even how to use a laser levelto level ground easily.
7. FAQs
1. Can I use laser levels outdoors in bright sunlight?
But yes, there is a possibility of diminishing visibility as well. A laser detector works better than optical ones in the field work, particularly in grading and levelling long distances.
2. How do I know if my laser level needs calibration?
When the projected lines appear to be irregular or uneven on the surfaces, then the device might need to be calibrated. Many laser levels display a warning light when calibration is needed.
3. What are the differences between rotary and line laser levels?
Rotary lasers produce a 360-degree horizontal plane coverage to be applied in large open spaces, whereas the line laser produces straight line effects of the laser that can be used in indoor layouts, walls, and flooring projects.
4. Is plumbing something that can be done with laser levels?
Absolutely. The laser levels are used to set pipes, fixtures and conduits, providing the correct placement of the pipes, fixtures, and conduits, whether vertical or horizontal.
Tags:
laser level guide, how to use a laser level, laser level tutorial, step-by-step laser level instructions, laser level for beginners, construction laser level tips, DIY laser level guide, laser leveling tools, using a laser level indoors, laser level setup