
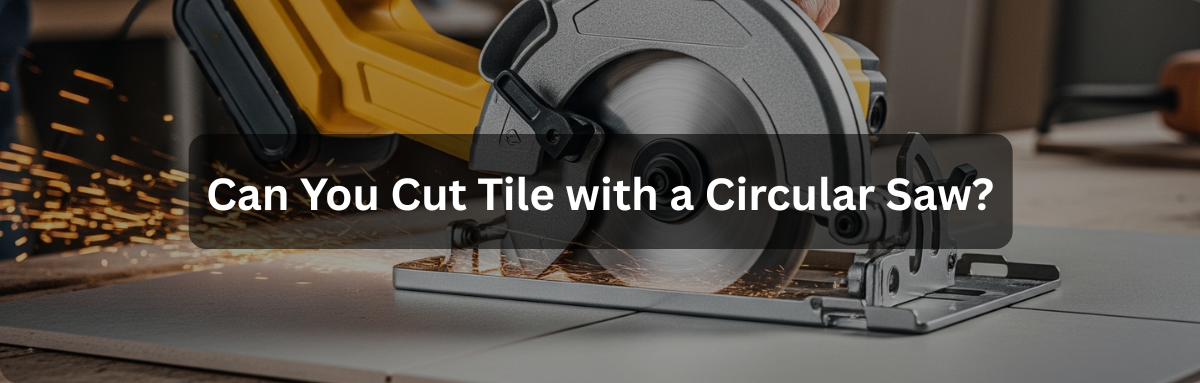
Sí, una sierra circular puede cortar azulejos eficazmente. Sin embargo, es importante elegir la hoja adecuada. Además, la configuración correcta y comprender los materiales de los azulejos son otros dos factores importantes. Mucha gente se pregunta: "¿Puede una sierra circular cortar azulejos?". Puedes hacerlo eligiendo el método adecuado.
Una sierra circular gira la hoja a gran velocidad. Normalmente, la velocidad oscila entre 5000 y 6000 RPM. Los motores ofrecen una potencia considerable, que suele oscilar entre 10 y 15 amperios. Las hojas vienen en tamaños de 4-1/2 a 10 pulgadas.
1. Cortar baldosas con una sierra circular
Es posible cortar baldosas de cerámica con una sierra circular. Solo se necesitan hojas especiales impregnadas de diamante. Las baldosas de cerámica son duras, con una calificación de 5-6 en la escala de Mohs, que generalmente es más blanda que muchos tipos de acero. Como se mencionó anteriormente, es importante usar la hoja adecuada. Las baldosas de porcelana son aún más duras, con una calificación de 7-8 en la escala de Mohs. También requieren temperaturas de cocción más altas durante el proceso de fabricación. Por lo tanto, al cortar, deberá considerar las propiedades específicas y las herramientas recomendadas para cada tipo de baldosa.
Para la porcelana, la pregunta es: "¿Se pueden cortar baldosas de porcelana con una sierra circular?". La respuesta también es afirmativa, pero cortar baldosas de porcelana suele ser más difícil y requiere más habilidad o técnica. Las concentraciones de diamante en las hojas para baldosas se describen típicamente en términos de tamaño de grano o número de diamantes por pulgada, que a menudo oscilan entre 25 y 40 diamantes por pulgada. Sin embargo, las concentraciones más altas de diamante son más caras. La dureza de la unión del material de la hoja es importante porque afecta su capacidad de corte a través de diferentes materiales. Una unión blanda se utiliza para materiales duros porque permite que los diamantes desgastados se desprendan de la superficie. Por el contrario, una unión dura es mejor para materiales más blandos.
2. Tipos de sierras circulares adecuadas para cortar baldosas
Sierras circulares con cable
Las sierras circulares con cable ofrecen potencia constante. Funcionan a 15 amperios, lo que equivale a unos 1800 vatios. Esto mantiene la hoja girando rápidamente, incluso a través de baldosas resistentes. Sin embargo, los cables de extensión largos consumen mucha energía.
Cortar azulejos puede generar mucho calor, con temperaturas de la hoja que pueden alcanzar los 200-300 °C, dependiendo del tipo de sierra y hoja utilizadas. Tome descansos de 30 segundos después de unos cuantos cortes. Esto evita que la hoja se vitrifique y que los azulejos se agrieten. Además, el ambiente polvoriento del corte de azulejos puede acelerar el desgaste de las escobillas del motor debido a la acumulación de partículas finas, lo que puede afectar su rendimiento. Las partículas de sílice pueden penetrar en las carcasas de las escobillas, provocando chispas y daños en el conmutador. Es recomendable limpiar la carcasa del motor semanalmente durante los proyectos de corte de azulejos.
Sierras circulares inalámbricas
Las sierras circulares inalámbricas funcionan con baterías de iones de litio. La mayoría son de 18 V y 20 V, con una capacidad de 3 a 5 amperios-hora. Obtendrá entre 15 y 20 cortes en baldosas de cerámica de 9,5 mm (3/8 de pulgada) por carga, o entre 8 y 12 cortes en porcelana más gruesa de 1,27 mm (1/2 pulgada). A medida que la batería se descarga, su voltaje puede disminuir, pudiendo bajar de 20 V a niveles inferiores bajo carga. Esto significa cortes más lentos mientras trabaja.
Los motores sin escobillas son mejores que los de escobillas. Exprimen entre un 25 % y un 30 % más la vida útil de la batería por cada carga . Los controladores electrónicos de estas sierras optimizan la entrega de potencia según la carga. Los gatillos de velocidad variable permiten ajustar las RPM de 1000 a 5000, lo cual resulta útil para diferentes materiales de baldosas.
Por ejemplo, la sierra circular inalámbrica ONEVAN de 180 mm y 7 pulgadas sin escobillas es una excelente opción. Cuenta con un potente motor sin escobillas de 4000 W, 11 000 RPM y una batería de iones de litio de 588 VF para un uso prolongado.
Sierras húmedas
Las sierras húmedas están diseñadas específicamente para cortar azulejos. Bombean de 1 a 3 galones de agua por minuto directamente sobre la hoja. Esto ayuda a mantener temperaturas más bajas, reduciendo significativamente el riesgo de alcanzar los 400-600 °F asociados con el corte en seco, prolongando así la vida útil de la hoja. La mayoría de las sierras húmedas utilizan hojas de diamante de 10 pulgadas. Estas giran a una velocidad de 9000 a 12 000 pies por minuto. La hoja corta una línea delgada de 0,080 pulgadas a través del azulejo.
Herramientas rotativas de mano
Las herramientas rotativas giran a una velocidad increíble, entre 15 000 y 35 000 RPM. Utilizan diminutos discos de corte de diamante con pinzas de 3 mm (1/8 de pulgada). Son ideales para baldosas cerámicas delgadas de hasta 6 mm (1/4 de pulgada) de espesor. Estas herramientas suelen operar a velocidades de corte más lentas, de entre 60 y 90 cm (2 y 3 pies por minuto), lo cual es adecuado para trabajos de detalle y curvas, pero puede ser menos eficiente para cortes rectos en comparación con sierras más grandes. Sin embargo, son excelentes para trabajos de detalle y curvas, como orificios de salida, que las sierras más grandes no pueden realizar.
3. Tipos de hojas de sierra circular adecuadas para cortar baldosas
Hojas de diamante de borde continuo
Las cuchillas de borde continuo tienen un filo de diamante sólido e ininterrumpido. Mantienen un contacto constante con la baldosa. Las partículas de diamante suelen tener una malla de 40 a 60.
La altura del borde afecta la duración de la hoja porque los bordes más altos pueden proporcionar una superficie de corte más grande y una mayor resistencia al desgaste, mientras que los bordes más cortos pueden desgastarse más rápido.
Los bordes más altos (0,315 pulgadas) ofrecen una mayor vida útil de la hoja, pero requieren más potencia. Los bordes más cortos (0,250 pulgadas) cortan más rápido, pero se desgastan antes. El grosor del borde (0,080-0,090 pulgadas) ayuda a equilibrar la velocidad de corte y la vida útil de la hoja. La concentración de diamante en las hojas de diamante suele variar en función del tamaño del grano o la cantidad de diamantes por pulgada, lo que afecta la eficiencia de corte y la durabilidad.
Hojas de diamante segmentadas
Las hojas segmentadas tienen de 8 a 12 segmentos de diamante separados por gargantas. Estas gargantas ayudan a limpiar los residuos y a mantener la hoja fría. La altura del segmento suele oscilar entre 0,315 y 0,394 pulgadas, con profundidades de garganta también en ese rango. El diseño de socavación detrás de cada segmento hace que la hoja corte con mayor agresividad. Los ángulos de socavación de 15 a 20 grados ofrecen un buen equilibrio entre la velocidad de corte y la vida útil del segmento. Los ángulos más pronunciados cortan más rápido, pero pueden desgastar los segmentos de forma desigual. El diseño de la garganta también afecta la eficacia de la eliminación de residuos. Las gargantas anchas mejoran el material, pero también pueden debilitar la hoja. Las gargantas estrechas ofrecen un filo más afilado, pero pueden obstruirse con polvo de baldosas durante el corte en seco.
Hojas de diamante turbo
Las cuchillas turbo combinan características de las cuchillas continuas y segmentadas. Tienen un filo continuo, pero con un borde dentado . Con este dentado, los residuos se eliminan mejor. Normalmente, tienen una profundidad de 0,030-0,050 pulgadas con 30-40 dentados por pulgada. En comparación con los bordes continuos, los bordes dentados crean un corte pulsado que reduce la acumulación de calor. Esto las hace ideales para materiales que generan mucho calor durante el corte. La geometría del borde logra un equilibrio entre un corte suave y una rápida remoción de material.
Hojas especializadas para cortar baldosas
Las hojas de porcelana utilizan un aglomerante metálico más duro. Necesitan aglomerantes duros para sujetar firmemente los diamantes. Tienen una resistencia de 45-55 HRC en la escala Rockwell. Esto las hace más resistentes que las hojas de mampostería convencionales, de 35-45 HRC.
Las hojas de cerámica utilizan aglomerantes más suaves. Los diamantes sin filo se rompen, dejando al descubierto diamantes nuevos y afilados. Esto garantiza que la hoja corte correctamente durante toda su vida útil.
Las hojas de piedra se adaptan al tipo de piedra. Las hojas de granito utilizan diamantes grandes de malla 30-40. Las hojas de mármol utilizan una malla fina de 60-80 para cortes suaves.
4. Tipos de baldosas que puedes cortar con una sierra circular
Azulejo de cerámica
Las baldosas cerámicas se componen de diversos materiales, como sílice, alúmina y fundente, junto con otros aditivos que mejoran sus propiedades. Se cuecen a 1800-2100 °F. Esto las hace algo porosas, con una absorción de agua del 3-10 %.
Los azulejos de pared suelen ser delgados, de entre 6 mm y 9 mm. Los azulejos de piso suelen ser más gruesos, de entre 12 mm y 16 mm, y mucho más resistentes. Necesitará hojas diferentes para cada tipo.
Las baldosas esmaltadas tienen una fina capa de vidrio propensa a astillarse. El esmalte se expande de forma distinta a la del cuerpo de la baldosa. Marque primero las superficies esmaltadas con una herramienta de carburo.
Los cambios de temperatura pueden agrietar las baldosas cerámicas. Deje que las baldosas frías alcancen la temperatura ambiente antes de cortarlas.
Azulejo de porcelana
La porcelana se cuece a una temperatura mucho mayor, entre 1150 y 1250 °C. Esto produce baldosas extremadamente duras con una absorción de agua inferior al 0,5 %. Son el doble de resistentes que las baldosas de cerámica. Las baldosas de gran formato son propensas a agrietarse debido a su tamaño. El corte de la porcelana tarda entre un 40 % y un 50 % más que el de la cerámica.
Azulejo de piedra natural
La pizarra es una roca metamórfica que se forma a partir de la alteración del esquisto mediante calor y presión, y que a menudo contiene arcilla y ceniza volcánica. Se fragmenta a lo largo de capas naturales. Su alto contenido de cuarzo la hace abrasiva para cortar. La mica ayuda a lubricar la cuchilla. El óxido de hierro puede manchar el equipo.

5. Guía paso a paso para cortar baldosas con una sierra circular
Mucha gente pregunta: "¿Cómo se cortan azulejos con una sierra circular?" y "¿Puedo cortar azulejos con una sierra circular?". Aquí tienes una guía paso a paso para cortar azulejos eficazmente con una sierra circular.
Paso 1 Reúna herramientas y materiales
Antes de empezar, asegúrate de tener todo lo que necesitas:
Sierra circular
Asegúrese de que el tamaño del eje de la hoja coincida con el de su sierra, que suele ser de 1,6 cm (5/8 de pulgada). Consiga una sierra con cable potente de 15 amperios y una sierra circular inalámbrica de 20 V con suficiente par. La sierra circular inalámbrica sin escobillas ONEVAN de 125 mm cuenta con una hoja de 12,7 cm (5 pulgadas) y un diseño ligero, lo que facilita su manejo.
Borde recto
Necesitará algo para guiar la sierra y realizar cortes rectos. Use una guía de aluminio o un trozo de madera sujetado con una abrazadera que haya verificado que esté perfectamente recto. Los cortes de baldosas deben tener una precisión de 1/32 de pulgada, por lo que la madera de construcción normal podría no ser lo suficientemente precisa. Compruebe la rectitud de la guía con una cuerda a lo largo de toda su longitud.
Botella rociadora de agua
Use un rociador fino para rociar agua mientras corta. Tenga mucho cuidado de no rociar agua sobre las piezas eléctricas, ya que esto puede causar una descarga eléctrica o dañar el motor. Coloque la boquilla a unos 15 cm del punto de corte.
Cinta métrica/regla
Una regla de acero proporciona una precisión de 1/64 de pulgada en un rango de 48 pulgadas. Las cintas de fibra de vidrio pueden estirarse y dar lecturas incorrectas. Utilice herramientas de medición de buena calidad para baldosas costosas.
Lápiz o marcador
Un lápiz de grasa o un marcador especial para azulejos funcionan mejor en superficies vidriadas. Los lápices de grafito pueden manchar, y los marcadores permanentes pueden traslucir azulejos de color claro. Pruebe su herramienta de marcado en una muestra antes de marcar los azulejos en buen estado.
Banco de trabajo y superficie estable
Debe sujetar completamente la baldosa al cortar. Las áreas sin soporte, incluso de tan solo 15 cm (6 pulgadas), pueden causar grietas. Use relleno de espuma y alfombra para amortiguar las baldosas y dejar espacio para la cuchilla.
Gafas de seguridad, guantes y mascarilla antipolvo
Esto es crucial. El polvo de sílice generado durante el corte de baldosas puede causar silicosis, una enfermedad pulmonar grave e incurable, lo que enfatiza la importancia de usar protección respiratoria adecuada. Use siempre al menos una mascarilla N95 para tareas de corte estándar, pero considere usar un respirador P100 para cortes extensos o exposición prolongada al polvo de sílice. Las gafas de seguridad con protección contra impactos son esenciales para proteger los ojos de los fragmentos de baldosas que pueden volar a alta velocidad durante el corte.
Paso 2 Marcar la baldosa
Mida desde los bordes de referencia. Para esquinas cuadradas, puede usar el método del triángulo 3-4-5 . Las baldosas grandes pueden presentar ligeras variaciones debido a la expansión térmica; por lo tanto, se recomienda medir cada baldosa individualmente en lugar de usar una plantilla.
Marque las líneas de corte tanto en la cara (superior) como en la parte posterior (inferior) del azulejo. Las marcas de la cara pueden quedar cubiertas por el polvo de corte, mientras que las posteriores ayudan a mantener la alineación. Use una escuadra para asegurarse de que los cortes sean perfectamente rectos. Los cortes en ángulo crearán líneas de lechada irregulares. Además, recuerde tener en cuenta el ancho de la junta de lechada al tomar las medidas. Las juntas de lechada estándar tienen un grosor de entre 1/16 y 1/8 de pulgada, según el tamaño del azulejo y el lugar de instalación. Reste este ancho a las medidas de la abertura para un ajuste perfecto.
Paso 3 Configuración de su estación de trabajo
Coloque las baldosas boca arriba para que la superficie vidriada quede visible. Las hojas de sierra circular cortan hacia arriba, por lo que las astillas suelen aparecer en la parte inferior. Cortar las baldosas boca arriba ayuda a minimizar los daños visibles.
Apoye la baldosa a ambos lados de la línea de corte. Use aislamiento de espuma, relleno de alfombra y madera de sacrificio. Estos puntos de apoyo deben estar a menos de 10 cm de la línea de corte para evitar que la baldosa se doble y se agriete. Despeje el área de trabajo de cualquier residuo u obstáculo. Finalmente, quítese la ropa suelta, las joyas y las corbatas. Las cuchillas giratorias pueden enganchar estos artículos y causar lesiones graves. Recójase el cabello largo y quítese los relojes, anillos y collares.
Paso 4 Ajuste de la sierra circular
Ajuste la profundidad de la cuchilla 3 mm (1/8 de pulgada) más que el grosor de la baldosa. Mida la baldosa con un calibrador, ya que los tamaños pueden variar. Una profundidad excesiva puede causar astillas. Una profundidad excesiva puede atascar la cuchilla.
Compruebe el apriete de la cuchilla según el manual. Generalmente, entre 15 y 25 pies-libras para cuchillas de 7-1/4 pulgadas. Las cuchillas sueltas se tambalean y cortan mal. Apretar demasiado daña las roscas.
Use una escuadra para comprobar la alineación de la placa base. Una placa desalineada provoca cortes en ángulo incluso con guías rectas. Ajuste los tornillos para que la cuchilla quede exactamente a 90 grados.
Paso 5: Cortar la baldosa con una sierra circular
Arranque la sierra lejos del azulejo. Deje que la hoja alcance su velocidad máxima durante 2 o 3 segundos antes de comenzar el corte. Accionando el azulejo a máxima velocidad se evita que la hoja se enganche, lo que puede causar grietas en el azulejo al inicio del corte.
Alimente la sierra a una velocidad de 15 a 30 cm por minuto. Esta es aproximadamente la mitad de la velocidad que usaría para cortar madera. Un avance demasiado rápido puede causar grietas en las baldosas debido a la carga de impacto, mientras que un avance demasiado lento puede sobrecalentar la hoja y provocar que se vitrifique. Mantenga una presión constante hacia adelante sin forzar el corte. Las hojas de diamante funcionan mediante amolado, no mediante corte con los dientes.
Una presión excesiva puede desviar la hoja y fracturar la baldosa. Mantenga la placa base plana contra la superficie de la baldosa durante todo el corte. Inclinar la sierra creará bordes biselados y aumentará el riesgo de rotura debido a una presión desigual. Aplique un ligero rocío de agua en la zona de corte cada 2-3 segundos. Esto enfría la hoja y reduce el polvo sin generar riesgos eléctricos.
Paso 6 Finalización del corte
Continúe cortando hasta que la hoja salga completamente de la baldosa. No levante la sierra hasta que la hoja deje de girar. Una hoja en movimiento puede engancharse en los bordes de la baldosa, causando astillas o lesiones personales.
Sujete la pieza cortada a medida que se acerca al final del corte. Dejar caer la pieza puede astillar la baldosa principal y dañar los bordes recién cortados. Use la mano libre para sujetar la pieza sobrante. Inspeccione los bordes cortados para detectar astillas y zonas rugosas.
Paso 7 Repetición del proceso
Limpie el polvo de las baldosas entre cortes. Este vuelve resbaladizas las superficies y obstruye las rejillas de ventilación de la sierra, lo que provoca sobrecalentamiento. Revise la hoja cada 10 a 15 cortes. Las hojas desafiladas requieren más presión y generan un calor excesivo. Reemplace la hoja cuando note que el corte se vuelve notablemente más lento, produce quemaduras en el material o muestra signos visibles de desgaste. Controle la temperatura del motor durante sesiones de corte prolongadas. Si la carcasa del motor se calienta demasiado al tacto, deje que se enfríe para evitar el sobrecalentamiento.
6. Consejos para cortar baldosas con éxito con una sierra circular
Cómo elegir la hoja de diamante adecuada
Se trata de ajustar la dureza del aglomerante de la hoja a la dureza del azulejo. Esto suele ser contradictorio: se utiliza un aglomerante blando para materiales duros y uno duro para materiales más blandos. Esta relación inversa ayuda a maximizar la eficiencia de corte y la vida útil de la hoja, garantizando que los diamantes queden correctamente expuestos. Recuerde que la sierra circular inalámbrica sin escobillas ONEVAN de 180 mm ofrece una velocidad de hoja de 10 800 RPM. Esto permite optimizar el rendimiento de las hojas de diamante para diversos tipos de azulejos.
Uso de agua para enfriar
Aplique un ligero rocío continuo de agua cada 2-3 segundos mientras corta para mantener la cuchilla fría y minimizar el polvo sin causar inundaciones. Demasiada agua crea peligros eléctricos. Muy poca agua deja la cuchilla vitrificada. Use agua a una temperatura de entre 60 y 80 °F. El agua fría sobre baldosas calientes puede causar un choque térmico y provocar grietas.
Practicando la paciencia y la precisión
Planifique siempre sus cortes antes de empezar y realice cada paso con cuidado. Cortar con prisas puede romper las baldosas y lesionarse. Las instalaciones de baldosas de alta calidad requieren precisión, que no se consigue acelerando el proceso.
7. Errores comunes y cómo evitarlos
Pasar por alto las precauciones de seguridad
Este es un error crítico. La exposición al polvo de sílice puede causar silicosis, una enfermedad pulmonar grave e incurable. Estas diminutas partículas de sílice, de tan solo 0,5 a 5 micras de tamaño, pueden penetrar profundamente en los pulmones. Utilice siempre protección respiratoria adecuada al cortar baldosas para evitar la exposición a materiales peligrosos. Además del polvo, los fragmentos de baldosas pueden salir despedidos a más de 80 km/h.
Ajuste incorrecto de la profundidad de la cuchilla
Ajustar la hoja demasiado profundo puede causar astillas más grandes en la salida de la baldosa y exigir más potencia de la sierra. Si la profundidad no es suficiente, la hoja puede atascarse y sobrecalentarse. Procure ajustar la hoja a una profundidad ligeramente superior al grosor de la baldosa, normalmente alrededor de 3 mm (1/8 de pulgada), para un corte óptimo sin astillar excesivamente.
No asegurar la baldosa
Una baldosa suelta puede moverse durante el corte, lo que no solo puede causar situaciones peligrosas, sino también cortes desalineados y una mala calidad general del borde. Asegure siempre las baldosas adecuadamente para evitar cualquier movimiento durante el corte; se recomienda sujetarlas a una distancia razonable de la línea de corte. Nunca intente sujetar las baldosas con la mano mientras utiliza una sierra eléctrica .
8. Otras herramientas adecuadas para cortar baldosas
Sierras húmedas
Las sierras húmedas están diseñadas específicamente para cortar azulejos. Utilizan bombas que suministran de 1 a 3 galones de agua por minuto. El agua llega directamente a la hoja, manteniéndola fría y a una temperatura inferior a 200 °F. El corte en seco puede alcanzar entre 400 y 600 °F. Esto evita el vidriado de diamante y prolonga la vida útil de la hoja entre un 300 y un 500 %.
Cortadoras manuales de azulejos
Las cortadoras manuales de azulejos funcionan rayando la superficie esmaltada del azulejo con una rueda de carburo y luego partiéndolo a lo largo de la línea marcada. La rueda de rayado crea una ranura poco profunda, generalmente de 0,002 a 0,005 pulgadas de profundidad, que concentra la tensión para facilitar un corte limpio. Estas cortadoras están diseñadas para cortar azulejos de diversos grosores; los modelos básicos suelen cortar azulejos de hasta 1/4 de pulgada de grosor y las versiones de alta resistencia, de hasta 5/8 de pulgada de grosor. Su longitud de corte varía de 12 a 48 pulgadas. Estas herramientas son excelentes para cortes rectos en azulejos de pared, pero generalmente no pueden cortar azulejos gruesos de piso. Los modelos profesionales suelen incorporar ruedas de rayado de carburo de tungsteno y barras de rotura endurecidas para una mayor vida útil.
9. Conclusión
Sí, se pueden cortar baldosas con una sierra circular si se ajustan las especificaciones de la hoja a las propiedades del material y se utilizan las técnicas de corte adecuadas. La concentración de diamante, la dureza de la unión y los parámetros de corte influyen en las tasas de éxito. Las baldosas cerámicas con una dureza de Mohs de 5-6 se cortan con mayor facilidad que las baldosas de porcelana con una dureza de Mohs de 7-8. Al trabajar con materiales de porcelana, se espera que los tiempos de corte y el desgaste de la hoja sean de 2 a 3 veces mayores.
10. Preguntas frecuentes
¿Cómo se compara el corte de baldosas con una sierra circular con otros métodos?
Una sierra circular es portátil y rápida para cortes rectos. Genera más polvo que una sierra húmeda. Las sierras húmedas ofrecen cortes superiores y sin polvo, pero requieren mayor preparación.
¿Qué debo hacer si mi azulejo se astilla durante el proceso de corte?
Revise la cuchilla; podría estar desafilada o mal colocada. Ajuste la velocidad de corte, posiblemente presionando demasiado rápido. Sujete bien la baldosa para evitar que se mueva.
¿Puedo utilizar una hoja de sierra circular normal para cortar baldosas?
No, no puedes. Las hojas de madera comunes no son efectivas para cortar azulejos y tienden a sobrecalentarse rápidamente. Debes usar una hoja impregnada de diamante para cortar azulejos.
¿Cuál es la mejor manera de garantizar cortes rectos al utilizar una sierra circular sobre una baldosa?
Utilice una regla de alta calidad sujeta con abrazaderas como guía. Asegúrese de que la placa base de la sierra esté perfectamente alineada con la hoja. Esta configuración evita cortes torcidos.
¿Puedo cortar eficazmente baldosas gruesas con una sierra circular?
Sí, una sierra circular potente con la hoja de diamante adecuada puede cortar baldosas gruesas. Ajuste la profundidad de la hoja 3 mm (1/8 de pulgada) más allá de la baldosa. Es normal que la velocidad disminuya y las hojas se desgasten más.
¿Cómo limpio y mantengo mi sierra circular después de cortar baldosas?
Limpie la sierra después de cada uso con aire comprimido para eliminar el polvo. Limpie el cuerpo y revise el desgaste de la hoja. El mantenimiento regular prolonga la vida útil de la herramienta.


