¿Quieres realizar proyectos de bricolaje con tu amoladora angular inalámbrica? Necesitarás saber cómo usarla correctamente. He recopilado 15 maneras creativas de transformar tu hogar con esta versátil herramienta eléctrica . Desde elegantes barandillas de metal hasta muebles de madera restaurados, estas técnicas probadas te ayudarán a obtener resultados profesionales.
1. Restauración de muebles con amoladora angular inalámbrica: soluciones económicas
Restaurar muebles es bastante fácil con una amoladora angular inalámbrica . Aquí tienes cinco maneras de lograrlo.
Escena 1: Restauración de una vieja mesa de madera
Una amoladora angular inalámbrica con disco de láminas es una herramienta potente para restaurar una mesa de madera vieja. Por ejemplo, puede preparar la superficie.
Así es como puedes usar tu amoladora angular eficazmente. Usa un disco de láminas (de grano 80 para empezar) y eliminarás ese material viejo en la mitad del tiempo que tardas lijando a mano. Trabaja en la dirección de la veta de la madera, manteniendo la amoladora en movimiento para evitar marcas. Una vez que llegues a la madera sin tratar, cambia a grano 120 para un acabado liso, listo para teñir.
Escena 2: Restaurando una silla de metal oxidada
Una amoladora angular inalámbrica puede realizar trabajos de metalistería con eficacia. Por ejemplo, puede eliminar el óxido sin esfuerzo y darle una nueva forma.
¿Tienes una silla de patio antigua de metal que ya no tiene buen aspecto? Tu amoladora angular con un cepillo de copa de alambre eliminará rápidamente el óxido. Empieza por las zonas más oxidadas y ve avanzando. Mantén la amoladora en un ángulo de 15 grados; esto te proporciona el mejor contacto sin ser demasiado agresivo. Una vez que el óxido haya desaparecido, alisa las asperezas con un disco de láminas antes de pintar.
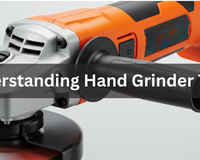
Esta amoladora angular inalámbrica ONEVAN de 125 mm sin escobillas puede realizar fácilmente tareas difíciles. Su diseño inalámbrico le permite moverse con libertad y su motor sin escobillas le proporciona potencia. Puede cambiar de velocidad para lijar madera o eliminar óxido del metal. El disco de 125 mm es compatible con diferentes herramientas, como cepillos y discos de lijado.
Escena 3: Restauración de un sillón de madera
Los sillones ornamentados con detalles curvos suelen ser difíciles de restaurar, pero no con una amoladora inalámbrica. En este caso, una amoladora angular inalámbrica puede facilitarle mucho el trabajo y permitirle realizarlo con mayor precisión. Consiga un accesorio de almohadilla de lijado para detalles y podrá llegar a esos puntos difíciles alrededor de los brazos y la espalda. Empiece con un grano grueso en las zonas más ásperas y luego vaya aumentando hasta llegar a granos más finos. La clave está en aplicar una ligera presión y dejar que la herramienta haga el trabajo.
Escena 4: Transformando una vieja caja de madera en un banco de almacenamiento
Una amoladora angular inalámbrica puede reparar muchos objetos viejos de tu casa. Con una amoladora angular, puedes hacer cortes más precisos y exactos fácilmente. Transformando una vieja caja de madera en un banco de almacenamiento. Aquí tienes un proyecto genial: convierte un cofre de madera pesado en un banco de almacenamiento. Usa la amoladora con un disco de corte para recortar la tapa y que encaje mejor si está deformada. Cambia a un disco de láminas para alisar las asperezas y preparar la superficie. La función inalámbrica realmente destaca aquí porque puedes trabajar en todos los lados sin enredarte con los cables.
Puedes empezar por revisar si hay clavos ocultos con un imán. Esto ayudará a asegurar la durabilidad de tu disco de corte. Tómate tu tiempo con los bordes; son lo primero que se nota. La clave es la paciencia. No te apresures de un grano a otro.
Escena 5: Restauración de un marco de madera para fotos
Una amoladora angular inalámbrica facilita y suaviza el pulido de incluso piezas delicadas. Con los accesorios adecuados, las amoladoras también pueden optimizar las tareas más exigentes.
Puedes empezar por montar un cepillo de alambre de diámetro pequeño y limpiar con cuidado las ranuras y esquinas intrincadas. La clave está en ir despacio y con constancia; no hay que apresurarse. Si hay clavos o grapas viejas, el disco de corte los atravesará sin problemas. Termina con un disco de láminas de grano fino para lograr una superficie lisa como el cristal.
Es importante recordar que, si bien siempre se puede quitar material adicional, no se puede volver a colocar el que se ha quitado.
Consejos profesionales:
Utilice siempre protección para los ojos y una mascarilla antipolvo.
Mantenga las baterías de repuesto cargadas: estos proyectos pueden consumir energía.
Primero prueba tu técnica en un lugar oculto
Deje que la herramienta se enfríe entre sesiones intensas
Limpie sus accesorios después de usarlos: durarán más.
2. Mejoras en la cocina y el baño con amoladora angular inalámbrica: Guía experta para cortar azulejos
¿Listo para esos proyectos de azulejos que has estado posponiendo? Tu amoladora angular inalámbrica puede con el trabajo, y sí, es más fácil de lo que crees. Aquí te explicamos cómo superar cinco desafíos comunes al cortar azulejos:
Escena 1: Cortar los azulejos para que encajen en los bordes de la encimera de la cocina
Quiere lograr una apariencia atractiva en los bordes de los azulejos de la cocina. Si usa un disco de corte de diamante adecuado con su amoladora angular inalámbrica, podrá lograrlo fácilmente.
Corte de azulejos para que encajen en los bordes de la encimera de la cocina. ¿Alguna vez te has preguntado cómo los profesionales consiguen esos cortes perfectos en los bordes de la encimera? Aquí tienes el procedimiento:
Disco de corte de diamante (borde continuo para porcelana, segmentado para cerámica)
Cuadrado de velocidad para marcar
Cinta de pintor para evitar que se astille
Botella antisalpicaduras para el control del polvo
Marca la línea de corte con cinta adhesiva, rocía la baldosa con agua y realiza pasadas uniformes. Consejo: Corta hasta la mitad desde arriba, luego voltea la baldosa y completa el corte desde el lado opuesto. Obtendrás bordes más limpios siempre.
La amoladora angular inalámbrica ONEVAN de 76 mm , con motor sin escobillas de 20 000 RPM y velocidad ajustable, es ideal para trabajar con azulejos. Su disco de 76 mm (3") proporciona una buena profundidad de corte (13,5 mm con protector antipolvo, 16 mm sin él). Se pueden incorporar muelas de diamante con un diámetro interior de 9,5/10 mm. Se recomienda verificar el grosor del azulejo.
Escena 2: Remodelación de los azulejos de la pared del baño
Remodelar los azulejos del baño ya no tiene por qué ser un dolor de cabeza. Puedes remodelarlos fácilmente y lograr cortes precisos con una amoladora angular.
Necesitarás:
rueda de diamante
Plantilla de cartón para formas irregulares
Marcador para líneas de transferencia
Gafas de seguridad (el polvo de las baldosas no es ninguna broma)
Empieza con una plantilla a tamaño real de tu área de corte. Transfiérela a tus azulejos y luego ve despacio; si cortas la pared a toda prisa, tendrás problemas. Trabaja por secciones, manteniendo la hoja húmeda para un corte suave y una mayor vida útil del disco.
Escena 3: Reemplazo de baldosas del piso del baño
Las baldosas requieren una atención especial porque todo el mundo las ve. Su superficie puede desteñirse con el tiempo. Sin embargo, una amoladora angular inalámbrica puede ofrecerle resultados de calidad profesional.
Agarrar:
Rueda de diamante nueva (hojas desafiladas = cortes ásperos)
Borde recto
Alfombrilla antideslizante para sujetar las baldosas
Mascarilla antipolvo
Aquí está el truco : Primero, marque el esmalte con una pasada ligera y luego haga un corte profundo. Esta técnica evita que se astillen los bordes de los azulejos. Para cortes largos, use la regla como guía; la amoladora la seguirá como un carril.
Escena 4: Corte de baldosas para la instalación de tuberías/salidas
Los cortes circulares que pueden parecer complicados se pueden lograr con la amoladora angular inalámbrica adecuada. Necesitará:
rueda de diamante
Compás para marcar círculos
Técnica de corte por inmersión
Paciencia extra (esto requiere práctica)
Marca tu círculo y haz cortes de alivio desde el borde hasta la línea (piensa en rebanadas de pizza). Luego, conecta los puntos alrededor del círculo. Tómate tu tiempo: hacer cortes circulares apresurados puede provocar grietas en las baldosas.
Escena 5: Talla de patrones decorativos en azulejos
¿Quieres ser creativo y dibujar patrones? En este caso, una amoladora angular inalámbrica con el accesorio adecuado puede dar resultados excelentes.
Esto es lo que necesitas:
Broca con punta de diamante
Lápiz para transferencia de patrones
Control de velocidad variable
Toque ligero
Empieza con patrones sencillos: líneas rectas o curvas básicas. Mantén la velocidad baja y la presión ligera. El secreto está en realizar varias pasadas suaves en lugar de un solo corte fuerte. Una vez que domines lo básico, prueba diseños más complejos.
3. Creaciones artísticas con amoladora angular inalámbrica: esculturas de metal y piezas funcionales
Puedes acelerar tus creaciones artísticas incorporando una amoladora angular inalámbrica de forma eficaz. Aquí tienes ejemplos de buenas escenas.
Escena 1: Creación de esculturas de metal
Transformemos esa amoladora inalámbrica en tu herramienta personal para esculpir. Comienza con la configuración básica: Necesitarás un disco de corte de 11,5 cm para cortes precisos, junto con discos de láminas de grano 40 y 80 para dar forma y alisar. Un disco de alambre es esencial para crear las texturas orgánicas que dan vida al arte en metal.
Cuando esté listo para cortar, comience con las formas más grandes. Un secreto profesional: deje siempre aproximadamente 3 mm (1/8 de pulgada) de sobra; siempre puede lijar más, pero no puede volver a agregar metal. Para un mejor control, utilice la amoladora al 75 % de velocidad.
La magia surge en el trabajo de detalle. Cambia a ese disco de láminas de grano 40 para definir los bordes, trabajando en secciones pequeñas de no más de 15x15 cm a la vez. Crea profundidad superponiendo piezas: aquí es donde el arte en metal realmente empieza a destacar.
¿Quieres crear efectos llamativos? Prueba el efecto de tejido de cesta haciendo tramas cruzadas con tu rueda de alambre. Para un efecto de gota de lluvia, haz toques rápidos con tu rueda de amolar. Las texturas de corteza de árbol cobran vida con pasadas irregulares con un disco grueso, mientras que una superficie lunar emerge con movimientos circulares aleatorios.
Escena 2: Diseño de muebles metálicos funcionales
El arte funcional empieza con los materiales adecuados y una buena amoladora angular a batería . Los tubos cuadrados de una pulgada crean marcos robustos, mientras que las placas de acero de 1/8 de pulgada crean tapas perfectas. Ten a mano barras planas de diferentes grosores para esos detalles creativos que distinguen tu obra.
Empieza por construir el cuadro. Los ángulos de 45 grados deben ser perfectos para las esquinas; no se permiten huecos. Prueba todo el ajuste antes de hacer los cortes finales. Un secreto que distingue a los profesionales de los aficionados: limpia bien las juntas con un cepillo de alambre antes de soldar.
Para el tratamiento de superficies, comience con grano 40 para fijar la textura y luego utilice grano 80 para lograr un acabado más fino. La clave es mantener una presión constante mientras trabaja.
Escena 3: Elaboración de collage de metal
El collage artístico con metal implica combinar diferentes metales para lograr un impacto visual. Sin embargo, una amoladora angular puede ahorrar mucho tiempo y esfuerzo.
El cobre combinado con acero crea una impresionante pátina oxidada, mientras que el latón y el aluminio ofrecen contrastes brillantes que llaman la atención. Para un look clásico, pruebe acero con bronce o opte por una combinación moderna de acero inoxidable y cobre.
La capa base debe ser resistente (considere un grosor mínimo de 3 mm). Cree primero los puntos de anclaje y luego texturice toda la superficie antes de añadir los detalles. Para las piezas superpuestas, el metal de calibre 22 funciona perfectamente. Doble los bordes para añadir dimensión, asegure todo con pestañas o soldaduras y difumine las transiciones con un disco de láminas fino.
Escena 4: Adición de texturas y efectos de superficie
Una amoladora angular inalámbrica es sin duda una buena herramienta para cortar y esmerilar, pero también se puede utilizar para añadir texturas y efectos superficiales.
Texturizar metal permite que tu amoladora funcione como una herramienta de precisión. Trabaja con un cepillo de copa de alambre con alambre de 0,020 pulgadas para efectos básicos, y luego usa fresas de diamante para detalles más finos.
Para crear remolinos, ajuste el agarre según los efectos deseados, dibujando círculos constantes con la amoladora. Las líneas rectas requieren una velocidad constante; cualquier variación se refleja en la pieza final. ¿Desea crear ondas de agua? Pruebe con movimientos de arco superpuestos. Los efectos de veta de madera se consiguen con pasadas largas y onduladas.
Escena 5: Personalización de letreros metálicos
Fabricar letreros metálicos personalizados requiere una selección inteligente de materiales. También requiere precisión. Puedes incorporar una amoladora angular inalámbrica para lograr resultados profesionales.
Personalización de letreros metálicos. La fabricación de letreros requiere la elección correcta de los materiales. El acero de calibre 16 ofrece una durabilidad que durará años, mientras que el aluminio de 3 mm (1/8 de pulgada) los hace más ligeros. El latón es difícil de superar para lograr ese toque elegante. Lograr letreros de aspecto profesional comienza con una preparación minuciosa. Tómese su tiempo para crear plantillas limpias y nunca se apresure al cortar: una mano firme crea líneas rectas.
4. Conclusión
Ahora ya debe dominar estos pasos para usar su amoladora angular inalámbrica como un profesional. La amoladora angular inalámbrica ofrece una versatilidad excepcional para los aficionados a las mejoras del hogar . Esta guía presentó 15 proyectos prácticos de bricolaje, que abarcan desde la restauración de muebles y el trabajo con azulejos hasta la fabricación artística de metal. Al emplear los accesorios y las técnicas adecuadas, los usuarios pueden lograr resultados de calidad profesional. Es fundamental tomar precauciones de seguridad, incluyendo protección ocular y respiratoria.
5. Preguntas frecuentes
¿A qué tipo de proyectos puedo incorporar una amoladora angular inalámbrica?
Las amoladoras inalámbricas son útiles para trabajar el metal y cortar. Son excelentes para eliminar pintura vieja y óxido, y manejan soldaduras, azulejos y tallar piedra con maestría.
¿Cómo elegir el disco de amolar adecuado?
El material determina la elección del disco. El metal necesita discos de corte. La piedra y los azulejos requieren discos de diamante. El lijado requiere discos de láminas. Siempre verifique el tamaño y la velocidad nominal.
¿Son las amoladoras angulares inalámbricas lo suficientemente potentes para tareas pesadas?
Los modelos actuales de 18 V/20 V son muy potentes. Realizan la mayoría de los trabajos profesionales con facilidad. Solo tenga en cuenta que podrían agotarse durante largas sesiones industriales.
¿Qué precauciones de seguridad debo tomar al utilizar una amoladora angular inalámbrica?
Nunca omita la protección ocular y facial. Mantenga un agarre firme con ambas manos. La protección está ahí por una razón: úsela. Despeje su espacio de trabajo y deshágase de la ropa suelta.


