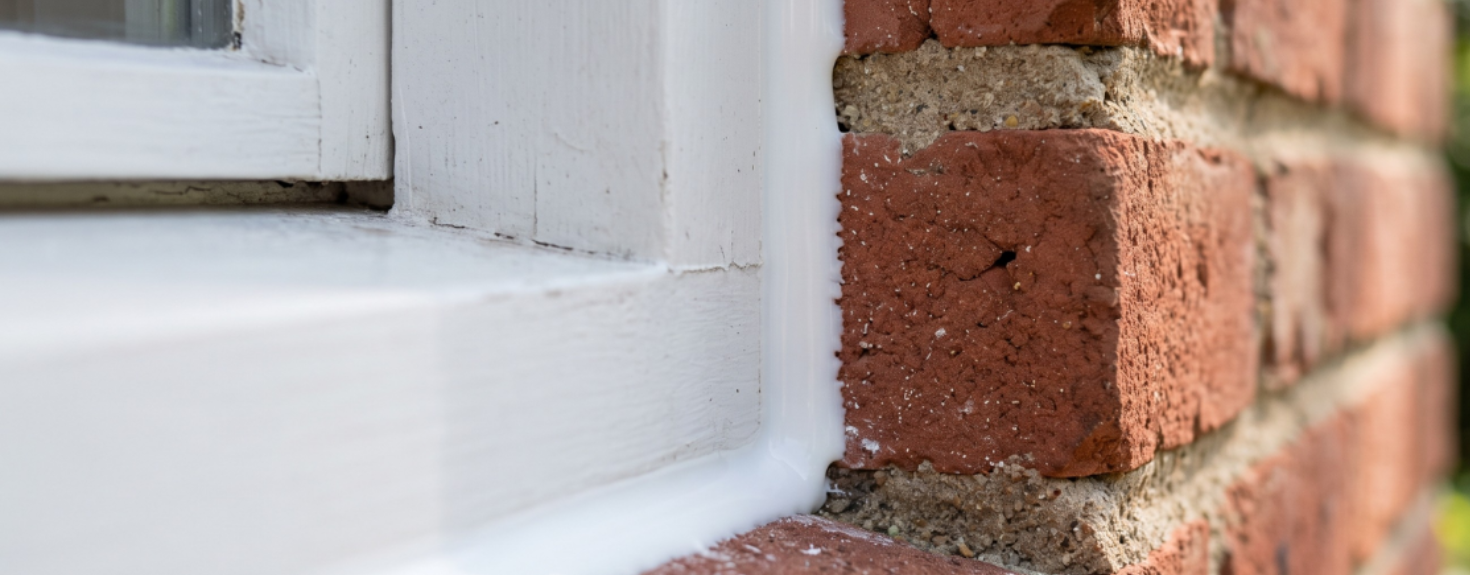
¿Siente frío cuando está sentado cerca de una ventana? Esta es una señal de que su hogar está perdiendo aire caliente. La ventana tiene un hueco que permite la entrada de aire frío. Esto provoca un desperdicio de energía y facturas de calefacción más altas.
¿Quiere un hogar confortable que le proteja del clima? Selle sus ventanas para bloquear estas corrientes de aire. Aprendamos cómo sellar ventanas con una pistola de calafateo para evitar la pérdida de calor.
1. Por qué sellar ventanas con una pistola de calafateo inalámbrica
Veamos un proyecto básico. Supongamos que tiene tres ventanas para sellar. Si utiliza una herramienta manual antigua, puede experimentar dolor de manos rápidamente. Tiene que apretar el mango de metal, y esto no es fácil. Causa fatiga grave en las manos y calambres musculares. La gente a menudo se enoja porque sus manos temblorosas crean una línea desordenada. La pasta sale en grumos gruesos y feos.
Una pistola de calafateo inalámbrica resuelve eficazmente este problema al automatizar la aplicación de sellador. Cuando aprieta el gatillo, un motor eléctrico empuja el sellador por usted. Obtiene una línea de pasta hermosa y suave. No siente ninguna tensión.
La pistola de calafateo inalámbrica crea un flujo constante desde el principio del marco hasta el final. No tiene que detenerse para bombear una palanca. Esta guía le muestra el mejor camino hacia un gran acabado. La gente ahorra tiempo, protege sus articulaciones y sella bien sus casas.
2. Señales de que sus ventanas necesitan un nuevo sellado
Debe revisar los marcos de sus ventanas cada año. Las pequeñas grietas causan grandes problemas si las ignora. Camine por sus habitaciones y busque estas siete señales claras.
1. Huecos o grietas visibles
Inspeccione las uniones donde el marco de la ventana se une a la pared. Verá espacios abiertos. El aire frío se filtra por estos agujeros. Si detecta un hueco, debe arreglarlo rápidamente.
2. Corrientes de aire en días ventosos
Coloque su mano cerca del cristal cuando sople el viento afuera. Si siente que el aire se mueve por su piel, el sellado antiguo ha fallado. La gente suele notar este problema más durante los meses de invierno.
3. Facturas de energía altas
Mire sus facturas de electricidad mensuales. Si el costo aumenta, es probable que sus ventanas estén perdiendo aire. Cuando los marcos con corrientes de aire dejan entrar el aire frío, su horno funciona horas extras. Como resultado, paga más dinero.
4. Manchas de agua o pintura descascarada
La lluvia entra a través de sellos exteriores defectuosos. Mire la pared de yeso debajo del marco. Si ve manchas oscuras o pintura descascarada, el agua está dañando su casa. Debe detener la fuga antes de que la pudrición destruya la madera.
5. El sellador viejo se desmorona
Toque el sellador viejo con su herramienta o dedo. Si la pasta se siente dura y seca, ya no puede proteger la casa. Se desprende en pequeñas escamas. El sellador de alta calidad permanece flexible, lo que le permite adaptarse al movimiento de la casa.
6. Luz del día a través de las juntas
Apague las luces interiores en una tarde brillante. Cierre sus persianas y mire cerca del marco de la ventana. Si puede ver la entrada de luz, indica la presencia de una grieta. No hay barrera entre su habitación y la tormenta.
7. Bichos dentro
Insectos, como las arañas, a menudo se sienten atraídos por pequeñas aberturas. ¿Los ve a menudo cerca de sus ventanas? Deben venir de los huecos en el sello exterior. Puede bloquear su camino cuando aplique una nueva pasta.
Lista de verificación estacional: Cuándo inspeccionar sus ventanas
La gente debería revisar sus ventanas dos veces al año. Inspeccione los marcos en otoño antes de que llegue la escarcha. Vuelva a revisarlos en los meses cálidos antes de encender el aire acondicionado.
Mire las predicciones meteorológicas antes de empezar. La temperatura exterior perfecta para esta tarea es entre 50 y 80 grados Fahrenheit. No trabaje cuando hace demasiado frío, ya que la pasta se endurece. La pasta estará demasiado líquida si la temperatura es demasiado alta.
3. Herramientas y materiales: Lo que necesita para sellar ventanas
Necesita el equipo adecuado antes de empezar. Reúna sus artículos para que el trabajo sea rápido y sencillo.
Artículos esenciales
- Pistola de calafateo inalámbrica: una gran herramienta como la pistola de calafateo eléctrica inalámbrica ONEVAN le ahorra músculos. Le da control total.
- Sellador para ventanas: seleccione el tubo adecuado para su trabajo específico.
- Cúter: una hoja afilada abre los tubos. Corta la pasta vieja.
- Herramienta para alisar: este objeto de plástico da forma al cordón húmedo para obtener una línea limpia.
- Trapos: tenga un paño cerca para limpiar errores.
- Cinta de pintor: esta cinta crea bordes rectos. Protege sus paredes de manchas.
Artículos adicionales
- Rascador de sellador: una herramienta de metal levanta el material viejo de las juntas profundas.
- Alcohol isopropílico: este líquido limpia la grasa y ayuda a que la nueva pasta se adhiera.
- Espátula: una hoja plana levanta trozos gruesos.
- Aspiradora: una pequeña máquina aspira el polvo de las grietas.
El mejor sellador para ventanas
El mejor sellador depende de la ubicación de su proyecto. Siempre compre silicona 100% para proyectos exteriores porque la silicona no se daña con la lluvia o el calor. No se agrieta con el tiempo y funciona bien durante décadas.
Puede utilizar silicona pintable o látex acrílico para las áreas interiores. El látex acrílico se limpia con agua y se puede pintar sobre él para que coincida con su pared.
Los selladores de alta viscosidad son muy espesos. Son difíciles de empujar con una herramienta manual. Pero funcionan muy bien con una pistola de calafateo inalámbrica. El motor eléctrico proporciona alta presión. Su mano no puede igualar esta fuerza. El motor empuja la pasta espesa a través de la punta con facilidad, por lo que no fuerza sus brazos.
4. Cómo quitar el sellador viejo de las ventanas
Mucha gente comete un gran error. Ponen pasta nueva directamente sobre el sellador viejo. Debe saber que el sellador nuevo nunca se pegará al sellador viejo. Si se salta la limpieza, el sellador nuevo puede desprenderse en unas pocas semanas. La gente debe entender que la eliminación lleva tiempo. La fase de limpieza lleva más tiempo que la aplicación real de la pasta nueva.
Paso 1: Seleccione su método
Mire el sellador viejo para elegir un plan. Use un cúter si el material viejo está suelto y seco. Para tramos largos, una herramienta raspadora funciona mejor. Si se enfrenta a silicona espesa, compre un gel suavizante químico. Aplique el gel, espere unas horas y raspe la pasta blanda. Para silicona rebelde, un gel químico es una inversión que vale la pena.
Paso 2: Cortar y marcar
Corte el borde superior de la tira vieja con un cuchillo. Luego, corte el borde inferior. Debe marcar ambos lados del cordón. Use una presión ligera y constante.
Paso 3: Hacer palanca y tirar
Comience su trabajo en una esquina. Inserte su raspador o una espátula debajo del material viejo. Levante la herramienta para separar la tira de la pared. Agarre el trozo suelto con los dedos o unas pinzas. Tire lentamente de la tira. El material viejo a menudo se desprende en tiras largas si tira suavemente.
Paso 4: Eliminar los residuos restantes
Agregue alcohol isopropílico a un trapo limpio y frótelo contra el marco para disolver el pegamento. También puede usar una cuchilla de afeitar en un ángulo de 90 grados y raspar. Esto eliminará los residuos.
Paso 5: Limpiar y secar
Limpie la junta abierta con un trapo y alcohol para erradicar el polvo y los aceites de los dedos. El marco debe secarse durante 15 a 20 minutos.
5. Cómo aplicar sellador nuevo a las ventanas
Luego viene la mejor parte del trabajo. Siga estos pasos básicos para obtener un resultado perfecto.
Paso 1: Coloque la punta
Corte la punta de plástico del tubo e insértelo en su herramienta inalámbrica. Sostenga la pistola de calafateo con ambas manos para garantizar estabilidad y precisión durante la aplicación. Coloque la punta angulada en la esquina de la junta.
Paso 2: Apriete el gatillo
Presione el gatillo para encender el motor eléctrico. El motor empuja la varilla interna para forzar la salida de la pasta. Observe la punta de cerca hasta que la pasta llene el hueco de la esquina.
Paso 3: Muévase a lo largo de la junta
Mantenga presionado el gatillo. Mueva sus brazos a lo largo de la junta a un ritmo constante. Debe tirar de la pistola hacia usted. No la empuje hacia adelante. Observe el cordón detrás de la punta. Asegúrese de dejar una tira limpia de un cuarto de pulgada. No se apresure y no se detenga rápidamente.
Paso 4: Suelte el gatillo
Cuando llegue al final de la junta, suelte el gatillo. Buenas herramientas como la pistola de calafateo eléctrica inalámbrica ONEVAN de 50 mm tienen un sistema antigoteo. En el momento en que suelta el gatillo, el motor invierte la varilla para detener la presión interna. Esto detiene el flujo de inmediato. I
Paso 5: Alise el cordón
No deje que la línea fresca se asiente por mucho tiempo. Humedezca su dedo con agua o use una herramienta de goma. Coloque su dedo sobre la pasta. Deslícelo a lo largo de la línea con una presión ligera y uniforme. Esta acción presiona la pasta profundamente en la grieta.
Paso 6: Retire la cinta
Retire la cinta de pintor si la ha usado en los cinco a diez minutos siguientes. Debe quitar la cinta antes de que se seque sobre el sellador.
Ajustes de velocidad y presión en una herramienta inalámbrica
Los diales de velocidad variable son una característica especial de las herramientas eléctricas. Una pistola manual depende de la fuerza de su mano. Esa fuerza cambia cuando sus músculos se cansan. Una herramienta inalámbrica utiliza un motor para mantener la velocidad constante todo el día.
Cuando utilice la herramienta ONEVAN, ajuste el dial a 2 o 3. A alta velocidad, el motor empuja la pasta demasiado rápido. Esto crea un gran desorden y desperdicia su material. Una velocidad baja le da un control total.
Cómo calafatear diferentes partes de una ventana
Las ventanas tienen secciones distintas. Cada área requiere un enfoque específico.
- Marco a pared: esta es la gran brecha donde el marco exterior se une a su pared exterior o yeso. Elija su herramienta en un ángulo de 45 grados.
- Marco a vidrio: esta es la zona donde el panel de vidrio se une al marco. La gente llama a esta tarea trabajo de sellado de ventanas. Para sellar una ventana con una pistola de calafateo, use un producto bajo en COV y una mano firme. Sostenga la punta cerca del vidrio. Aplique una línea muy delgada para que el vidrio no se mueva.
- Alféizar a marco: el estante inferior se enfrenta a la lluvia y la nieve. Use silicona 100% aquí.
6. Errores comunes que debe evitar al calafatear ventanas con una pistola de calafateo inalámbrica
Los errores ocurren si se apresura. Lea sobre estos errores para poder evitarlos.
- Deja calafateo viejo: La nueva capa no se pegará. Se soltará en semanas.
- Se mueve demasiado rápido: La pasta se estira y se rompe. Esto deja agujeros para las corrientes de aire.
- Se mueve demasiado lento: La pasta se acumula en un enorme montón, y esto desperdicia material.
- Se olvidó de alisar: Un cordón sin alisar se ve mal y atrapa la suciedad más tarde.
- Trabaja con mal tiempo: Si trabaja por debajo de los 4 grados Celsius, la pasta se congela. Si trabaja por encima de los 32 grados Celsius, se vuelve líquida.
7. Limpieza y cuidado de la pistola de calafateo inalámbrica después de su proyecto
- Espere a que cure: No toque las líneas húmedas. Deje secar la silicona exterior durante 24 horas antes de la lluvia, y espere de dos a cuatro horas antes de pintar el látex en el interior.
- Busque agujeros: Revise sus juntas a la mañana siguiente. Ponga un poco de pasta extra en cualquier pequeño punto que se haya perdido.
- Limpie el marco: Frote la parte delantera y el cuerpo de su herramienta con un trapo mientras las manchas aún están húmedas.
- Selle el tubo: Guarde sus sobras bloqueando la boquilla con un clavo grande. Limpie la varilla de metal.
8. Por qué vale la pena invertir en una pistola de calafateo inalámbrica
Una herramienta inalámbrica resuelve problemas físicos reales que enfrenta la gente. El principal beneficio es una calidad uniforme en varias ventanas. Cuando la gente usa una pistola manual, la ventana uno se ve limpia porque sus músculos están frescos. Para la ventana diez, sus manos se cansan y tiemblan. Las últimas ventanas se ven mal. Una pistola inalámbrica ofrece la misma presión exacta desde la primera ventana hasta la última. Su calidad nunca disminuye.
También ahorra horas de tiempo. Una pistola de calafateo inalámbrica le permite sellar un marco largo con un solo movimiento suave. No tiene que detenerse cada dos pulgadas para hacer clic en una manija. Esta velocidad le permite terminar las tareas del hogar rápidamente para que pueda disfrutar de su fin de semana.
El dial de velocidad le permite ajustar el flujo a su nivel de comodidad. El sistema antigoteo mantiene su espacio de trabajo limpio. Muchos modelos también incluyen una luz LED brillante. Esta luz ilumina las esquinas oscuras debajo de los techos profundos para que pueda ver su trabajo con facilidad.
9. Conclusión
Puede sellar fácilmente sus marcos con una pistola de calafateo a batería para la comodidad de su hogar. Retire los sellos viejos con un cuchillo y alcohol. Luego, use su herramienta inalámbrica para aplicar hermosos cordones de silicona o látex. Su hogar se mantendrá cálido en invierno y fresco en verano.
10. Preguntas frecuentes
¿Puedo usar una pistola de calafateo inalámbrica para ventanas interiores y exteriores?
Sí. Puede usar una pistola de calafateo inalámbrica en ambas áreas si carga el tubo correcto.
¿Qué ajuste de velocidad debo usar para sellar ventanas?
Seleccione una velocidad baja, como la posición 2 o 3 del dial, porque los huecos de las ventanas son estrechos.
¿Cuánto dura el sellador de ventanas?
Un buen sellador de silicona en un marco limpio puede funcionar bien durante 10 a 15 años.
¿Necesito quitar todo el sellador viejo antes de usar una pistola inalámbrica?
Sí, debe limpiar todo el material viejo porque la nueva pasta no se adherirá a los sellos viejos.
¿Vale la pena una pistola de calafateo inalámbrica para una sola ventana?
Si le duele la mano, una pistola de calafateo a batería vale la pena para cualquier trabajo.
¿Puedo pintar sobre el sellador de una herramienta inalámbrica?
Puede pintar sobre látex acrílico, pero no sobre silicona 100%.