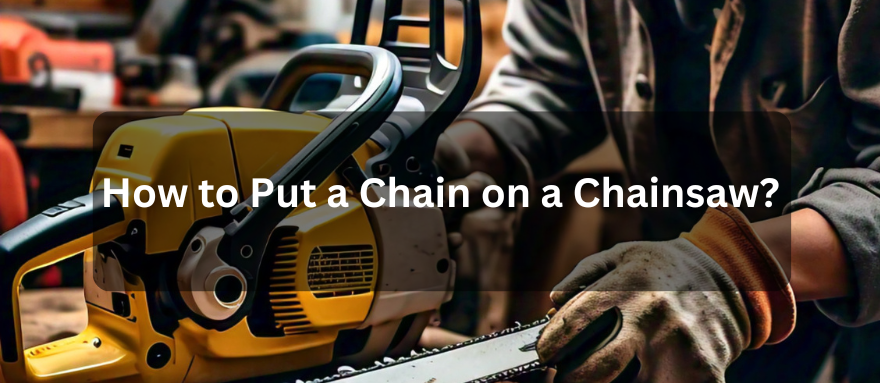
¿Sabes cómo los leñadores expertos y los aficionados al bricolaje cortan la madera con tanta perfección? Mantienen sus herramientas en perfecto estado. Por ejemplo, saber cómo poner una cadena en una motosierra es fundamental para mejorar el rendimiento de corte y garantizar la seguridad. Tu motosierra necesita una cadena afilada y bien sujeta. En esta guía, aprenderás el sencillo e importante proceso de poner una cadena en tu motosierra .
1. Entendiendo las cadenas de motosierra
Existen cinco tipos de cadenas para motosierras . Es fundamental comprender las especificaciones específicas de cada cadena. También es importante comprender la importancia de una tensión adecuada. Este conocimiento le permitirá elegir la cadena correcta y mejorará la seguridad durante el uso de la motosierra.
Tipos de cadenas de motosierra

Existen cinco tipos de cadenas para motosierras. Cada una está diseñada para realizar funciones diferentes.
Cadenas de bajo contragolpe (LK)
Estas cadenas ofrecen seguridad y reducen el contragolpe. Por lo tanto, las cadenas LK son ideales para principiantes gracias a sus características de seguridad y a la reducción del contragolpe, lo que las hace adecuadas para una amplia gama de aplicaciones, incluyendo espacios reducidos. Las cadenas LK ofrecen:
- Un diente de corte más pequeño
- Rendimiento de corte menos agresivo
- Tendencia reducida al retroceso
Cadenas de cincel completo (FC)
Las cadenas de cincel completas ejecutan eficazmente aplicaciones de corte pesado y de alto rendimiento. Cuentan con:
- Dientes de corte afilados y profundos
- Rendimiento de corte agresivo
- Mayor riesgo de contragolpe
Cadenas de semicincel (SC)
Las cadenas de semicincel logran un equilibrio entre las cadenas LK y FC, ofreciendo:
- Rendimiento de corte moderado
- Menos retroceso que las cadenas FC
- Mayor durabilidad que las cadenas LK
Cadenas de dientes salteados (ST)
Las cadenas de dientes salteados tienen dientes de corte espaciados, ideales para:
- Corte rápido y basto
- Tala de árboles de gran tamaño
- Vibración reducida
Cadenas desgarradoras
Las cadenas de corte están diseñadas específicamente para realizar cortes largos y rectos paralelos a la veta de la madera. Característica:
- Diseño de diente único
- Rendimiento de extracción eficiente
- Riesgo de unión reducido
Importancia de una tensión adecuada de la cadena
Una tensión adecuada de la cadena es fundamental para un rendimiento óptimo, la seguridad y la vida útil de la misma. Una tensión incorrecta puede provocar:
Problemas de cadena suelta
- Rendimiento de corte reducido
- Aumento de la vibración
- Riesgo de descarrilamiento de la cadena
- Desgaste prematuro
Riesgos de una cadena demasiado tensa
- Mayor desgaste en barras y piñones
- Vida útil reducida de la cadena
- Mayor riesgo de contragolpe
- Posible rotura de la cadena
Consecuencias de una tensión incorrecta
Una tensión incorrecta de la cadena puede provocar lo siguiente:
- Disminución de la productividad
- Aumento de los costes de mantenimiento
- Peligros de seguridad (retroceso, descarrilamiento)
- Vida útil de la cadena acortada
Si aprende correctamente y sigue los protocolos para mantener la tensión adecuada, facilitará su trabajo, aumentará la vida útil de la herramienta y garantizará la seguridad.
2. Cadenas Diferencias entre motosierras de gasolina, eléctricas con cable e inalámbricas

El tipo de cadena que incorporan las motosierras varía según su fuente de alimentación. A continuación, encontrará la diferencia entre motosierras con cable, de gasolina e inalámbricas .
Diferencia en el tipo y diseño de la cadena
El diseño de la cadena varía según las fuentes de energía para adaptarse a las capacidades y limitaciones de cada sierra.
Motosierras de gasolina:
Si planea realizar cortes intensivos, las cadenas de cincel completo son la mejor opción. Son más agresivas y están diseñadas para soportar altas RPM y torque sin esfuerzo. Sin embargo, debido a su rendimiento de corte agresivo, deberá afilar las cadenas de cincel completo con frecuencia para mantener una eficiencia de corte óptima.
Motosierras eléctricas con cable:
La seguridad es fundamental para quienes empiezan a trabajar. Por lo tanto, las motosierras eléctricas con cable incorporan cadenas semi-cinceladas. Estas cadenas optimizan las RPM más bajas, reducen la vibración y requieren un afilado menos frecuente.
Motosierras eléctricas inalámbricas
Muchas motosierras eléctricas inalámbricas utilizan cadenas de bajo contragolpe para un corte controlado. Estas cadenas están diseñadas para optimizar el rendimiento de corte y maximizar la vida útil de la batería, lo que requiere un afilado menos frecuente.
Diferencias de velocidad de la cadena
La velocidad de la cadena afecta el rendimiento de corte.
Motosierras de gasolina:
Alcance altas velocidades de cadena (hasta 112 km/h), ideal para cortes pesados, tala y troncos grandes. Sin embargo, esto requiere un mantenimiento más frecuente de la cadena.
Motosierras eléctricas con cable:
Funciona a velocidades de cadena más bajas (hasta 80 km/h), ideal para tareas más ligeras, poda y árboles pequeños. Esto reduce la tensión en la cadena y minimiza el mantenimiento.
Motosierras eléctricas inalámbricas:
Ofrece velocidades de cadena variables (hasta 96 km/h) según el voltaje de la batería. Esto equilibra el rendimiento para tareas de intensidad media y uso ocasional.
Diferencias en el mantenimiento de la cadena
Los requisitos de mantenimiento difieren según las fuentes de energía.
Motosierras de gasolina:
- Limpieza y lubricación periódicas
- Ajustes frecuentes de tensión
- Afilado de cadena más frecuente
- El reemplazo de barra y cadena es más común
Motosierras eléctricas con cable:
- Mantenimiento menos frecuente
- Limpieza y lubricación sencillas
- Afilado de cadena menos frecuente
- El reemplazo de barra y cadena es menos común
Motosierras eléctricas inalámbricas:
- Mantenimiento moderado
- Concéntrese en el cuidado de la batería
- Las necesidades de afilado de la cadena varían
- El reemplazo de la barra y la cadena es menos frecuente
Diferencias de compatibilidad de cadenas
No todas las cadenas son iguales: la compatibilidad es importante.
Motosierras de gasolina:
- Requiere cadenas específicas de alto rendimiento
- Compatibilidad limitada con cadenas de menor calidad
- Se recomienda instalación profesional.
Motosierras eléctricas con cable:
- Utilice cadenas estándar de bajo contragolpe
- Amplia compatibilidad con cadenas de recambio
- Fácil instalación y reemplazo
Motosierras eléctricas inalámbricas:
- Utilice cadenas de bajo contragolpe o de alto rendimiento
- Compatibilidad limitada con cadenas que no sean OEM
- Instalación recomendada por el fabricante
3. Preparación para la instalación de la cadena
Precauciones de seguridad (EPP)
La primera práctica común al operar una herramienta eléctrica es seguir los protocolos de seguridad. Por ejemplo, comience por usar gafas de seguridad para protegerse los ojos. Asimismo, la protección auditiva es importante para reducir el ruido. Use guantes y botas.
Herramientas importantes
Ahora, reúne tus herramientas. Consulta el manual de la motosierra para obtener instrucciones específicas. Asegúrate de tener una cadena nueva que se ajuste a tu sierra. Necesitarás un rompecadenas para quitar la cadena vieja. Consigue una llave inglesa o un dado para ajustar las tuercas de la barra. Ten listo un destornillador para el tensor de la cadena. Lleva una lima redonda o un afilador de motosierra para mantener la cadena afilada eficazmente. También necesitarás aceite para la barra y la cadena para lubricarlas, un trapo o toallas de papel para limpiar y un banco de trabajo estable.
Revise la motosierra y la cadena para detectar daños
Antes de la instalación:
- Revise rápidamente su motosierra y la cadena nueva. Examine la barra de la motosierra para detectar cualquier signo de daño o desgaste excesivo.
- Inspeccione la rueda dentada para detectar posibles signos de daño, incluidos dientes faltantes.
- Pruebe el tensor de cadena para asegurarse de que funciona.
- Compruebe que la cadena nueva no tenga eslabones rotos ni cortadores doblados antes de instalarla.
- Confirme que el paso, el calibre y la longitud de la cadena coincidan con los de su motosierra.
- Asegúrese de que los dientes de corte miren hacia adelante, en la dirección de rotación de la motosierra.
4. Guía paso a paso para instalar una cadena en una motosierra a gasolina
Paso 1: Retirada de la cadena vieja
Asegúrese de que la motosierra esté apagada y completamente fría. Para mayor seguridad, desconecte la bujía. Localice el panel lateral que cubre la espada y la cadena. Use una llave inglesa o de tubo para quitar las tuercas que sujetan este panel. Guarde las tuercas en un lugar seguro.
Con el panel quitado, verá la barra y la cadena. Empuje suavemente la barra hacia adelante. Esto aflojará la cadena. Levante con cuidado la cadena de la barra, empezando por arriba. Avance alrededor, prestando atención a los dientes afilados. Una vez que la haya quitado, guárdela en un lugar seguro para evitar accidentes. Revise la barra para ver si tiene grietas o desgaste antes de continuar.
Paso 2: Preparación de la nueva cadena
Coloque la cadena nueva sobre una superficie limpia. Compruebe que sea del tamaño y tipo correctos para su motosierra. Busque los eslabones de arrastre. Son las pequeñas pestañas metálicas en la parte inferior. Alinéelas con la ranura de la espada.
Asegúrese de que los dientes de corte estén orientados hacia adelante en la parte superior de la barra. Esto es fundamental para un funcionamiento correcto. Verifique la alineación y la dirección.
Paso 3: Instalación de la nueva cadena
Si la quitó, vuelva a colocar la espada guía en la motosierra. Sujétela firmemente. Comience a colocar la cadena nueva alrededor de la espada. Comience por arriba y vaya hacia abajo. Coloque cada eslabón de arrastre en la ranura de la espada. Asegúrese de que la cadena esté bien asentada alrededor del piñón.
Tire suavemente de la barra hacia la motosierra. Esto tensará la cadena. Apriete ligeramente las tuercas de la barra para fijarla, asegurándose de que la barra pueda moverse ligeramente para ajustar la tensión. No las apriete del todo todavía.
Paso 4: Ajuste de la tensión
Localice el tornillo tensor de la cadena. Gírelo para ajustar la cadena. Al separarla ligeramente de la barra, debería encajar en su lugar. Debería seguir teniendo un ligero movimiento. Una vez ajustada la tensión, apriete completamente las tuercas de la barra.
Paso 5: Comprobaciones de seguridad finales
Ahora, realice algunas comprobaciones de seguridad finales. Pruebe el freno de la cadena para asegurarse de que funciona. Verifique la tensión de la cadena una última vez. La cadena debe estar ajustada, pero aún debe poder moverse ligeramente.
5. Guía paso a paso para instalar una cadena en una motosierra eléctrica con cable
Paso 1: Desconexión de la fuente de alimentación
Como se mencionó anteriormente, garantice una seguridad completa. Primero, apague la motosierra con cable. Desconéctela de la fuente de alimentación. Posteriormente, mantenga el cable alejado para evitar tropiezos o reconexión accidental.
Paso 2: Retirada y preparación de la cadena
Localice la cubierta lateral que fija la barra y la cadena. Use un destornillador para quitar los tornillos que la sujetan. Retire la cubierta y déjela a un lado. Empuje suavemente la barra hacia adelante para liberar la tensión de la cadena.
Ahora, levante la cadena de la espada, trabajando de arriba hacia abajo. Revise la espada para ver si tiene grietas o daños. Si todo se ve bien, coloque la cadena nueva sobre una superficie limpia y asegúrese de que sea del tipo y tamaño correctos para su motosierra. Revise la cadena nueva para detectar cualquier problema visible.
Paso 3: Instalación de la cadena
Comience alineando la cadena con la parte superior de la espada. Asegúrese de que cada eslabón de arrastre encaje firmemente en la ranura de la espada. Baje por la espada, colocando cada eslabón con cuidado. Una vez alineada la cadena con la espada, colóquela alrededor del piñón.
Tire ligeramente de la barra hacia atrás para tensar la cadena. Sujete la barra firmemente y vuelva a colocar la cubierta lateral. Apriete ligeramente los tornillos o tuercas, pero no los apriete del todo todavía. Primero deberá ajustar la tensión.
Paso 4: Ajuste de la tensión
Localice el tornillo tensor de la cadena. Gírelo para ajustar la tensión. La cadena debería recuperarse al separarla ligeramente de la barra, pero aún con un ligero movimiento. Una vez que la tensión sea la correcta, apriete firmemente los tornillos o tuercas de la tapa lateral.
Paso 5: Prueba de la instalación
Después de asegurar la cadena:
- Vuelva a enchufar la motosierra.
- Enciéndalo para una breve prueba y compruebe el movimiento de la cadena. La cadena debe moverse con suavidad y mantenerse alineada con la barra.
- Si algo parece estar mal, apague el dispositivo y ajústelo según sea necesario.
6. Guía paso a paso para instalar una cadena en una motosierra eléctrica inalámbrica
Paso 1: Extracción de la batería
Primero, garantice su seguridad retirando la batería de la motosierra. Este paso garantiza que la motosierra esté completamente apagada. Guarde la batería en un lugar seguro para evitar que se encienda accidentalmente durante la instalación.
Paso 2: Extracción de la cadena vieja y preparación de la nueva
Antes de empezar, revise el panel lateral de la motosierra. Cubre la cadena y la espada. Una vez retirado el panel, empuje la espada hacia adelante para aflojar la cadena y luego levántela de arriba a abajo.
A continuación, deberá preparar la cadena nueva. Aquí tiene algunas opciones recomendadas de cadenas de repuesto para motosierras inalámbricas :
- Cadenas y guía para motosierra inalámbrica ONEVAN de 4/6 pulgadas
- Hecho de material duradero y de alta calidad.
- Compatible con múltiples longitudes de barra (verifique los parámetros para confirmar la compatibilidad).
- Los remaches tratados térmicamente refuerzan las conexiones de enlace.
- Alta resistencia al desgaste en todos los dientes de corte para una vida útil más larga.
- Presupuesto:
- Modelo: 4/6 pulgadas
- Material: acero
- Juego de cadenas y guías de acero para motosierra inalámbrica ONEVAN de 6/8 pulgadas
- Disponible en tamaños de 6 u 8 pulgadas.
- Incluye eslabones de cadena seguros y tratados térmicamente y cortadores de cadena resistentes.
- Presupuesto:
- Cadena de 8 pulgadas: 22 eslabones, 45 cortadores
- Cadena de 6 pulgadas: 18 eslabones, 37 cortadores
- Cadenas y placa guía ONEVAN de 16 pulgadas para sierra inalámbrica
- Cadena de alto rendimiento con remaches tratados térmicamente para mayor durabilidad.
- El diseño de baja vibración reduce la fatiga y la incomodidad del usuario.
- Fácil mantenimiento con dientes de corte afilados y duraderos.
- Presupuesto:
- Tamaño de la cadena: 56 eslabones
- Paso de cadena: 3/8
- Espesor de la placa guía: 4,3 mm
Paso 3: Instalación de la nueva cadena
Comience alineando la cadena nueva con la parte superior de la espada. Asegúrese de que cada eslabón de arrastre encaje firmemente en la ranura de la espada. Enrolle con cuidado la cadena alrededor de la espada y colóquela en el piñón. Tire ligeramente de la espada hacia atrás para tensar la cadena.
A continuación, vuelva a instalar el panel lateral y apriete parcialmente los tornillos. No los apriete del todo todavía; primero deberá comprobar la tensión de la cadena.
Paso 4: Finalización de la instalación
Después de instalar la cadena, vuelva a insertar la batería para prepararla para la prueba. Encienda la motosierra brevemente para comprobar que la cadena se mueve con suavidad alrededor de la espada. Si está demasiado floja o tensa, apáguela, retire la batería y ajuste la tensión según sea necesario.
7. Problemas comunes al colocar una cadena en una motosierra
Paso 1: Problemas de tensión de la cadena
Según la Asociación de Fabricantes de Motosierras, el 70 % de las fallas de las motosierras se deben a una tensión deficiente. Una cadena tensa hace que la motosierra consuma más fuerza. Además, puede desgastar rápidamente las piezas.
Para ajustar la tensión:
- Comprueba la cadena separándola ligeramente de la barra. Debería encajar en su sitio, pero aún con un poco de holgura.
- Localice el tornillo tensor, generalmente cerca del panel lateral. Gírelo para ajustar la tensión de la cadena.
- Pruebe la tensión de la cadena de nuevo y repita si es necesario. Asegúrese de mantener la cadena tensa, pero no demasiado. Una vez ajustada, apriete bien las tuercas de la barra.
Paso 2: La cadena no gira suavemente
Si nota que la cadena no gira con suavidad, puede deberse a problemas de alineación o tensión. Compruebe que la cadena esté correctamente asentada en la ranura de la barra guía y alrededor del piñón. La desalineación suele causar un movimiento irregular.
Para solucionar problemas de alineación y tensión:
- Apague la motosierra por completo y asegúrese de que sea seguro manipularla.
- Inspeccione la trayectoria de la cadena, asegurándose de que cada eslabón de transmisión encaje en la ranura de la barra guía.
- Reajuste la tensión utilizando el tornillo tensor si es necesario.
- Una vez que todo esté alineado y correctamente tensado, pruebe brevemente la motosierra. La cadena debe moverse con suavidad, sin resistencia ni tirones.
Paso 3: La cadena se sale de la barra
Una cadena que se sale de la barra suele estar demasiado floja o mal alineada. Esto puede ocurrir durante el uso si no se mantiene la tensión.
Para arreglar una cadena que patina:
- Afloje ligeramente las tuercas de la barra y ajuste la tensión de la cadena utilizando el tornillo tensor.
- Asegúrese de que la cadena se asiente correctamente en la barra guía y alrededor de la rueda dentada.
- Verifique nuevamente que la cadena no esté torcida y que cada eslabón esté colocado correctamente.
- Una vez que la tensión se sienta segura, vuelva a apretar completamente las tuercas de la barra.
8. Conclusión
En conclusión, ha aprendido a instalar una cadena en su motosierra. Esta habilidad es útil para un funcionamiento impecable. La selección y la tensión adecuadas de la cadena son dos elementos importantes para una excelente vida útil de la herramienta de corte. Siga atentamente las precauciones de seguridad. Además, los operadores deben priorizar el mantenimiento regular y seguir las técnicas adecuadas. Ahora está listo para abordar proyectos con confianza con una motosierra bien preparada.
9. Preguntas frecuentes
1. ¿Cuándo debo reemplazar las cadenas de mi motosierra?
La vida útil de una cadena de motosierra depende de tres factores. Primero, la frecuencia de uso, el mantenimiento y la calidad. Sin embargo, lo mejor sería reemplazarla:
- Cada 100-200 horas de uso intensivo
- Cada 500-600 horas de uso moderado
2. ¿Debo utilizar una cadena de otra marca?
Las cadenas incompatibles pueden:
- Rendimiento comprometido
- Aumenta el desgaste de tu sierra
- Garantías nulas
- plantean riesgos de seguridad
Además, debes leer el manual del propietario que viene con el dispositivo o consultar con el fabricante.
3. ¿Qué hacer si la cadena de mi motosierra se sale con frecuencia?
Es frustrante. ¡Deberías seguir estos pasos!
- Compruebe la tensión de la cadena: no debe estar ni demasiado floja ni demasiado tensa.
- Inspeccione la barra y la rueda dentada: límpielas o reemplácelas si están desgastadas.
- Verifique la compatibilidad de la cadena: verifique nuevamente la marca y las especificaciones.
- Consulte el manual: siga las instrucciones del fabricante.
- Considere ayuda profesional si los problemas persisten.
4. ¿Existen cadenas universales que se adapten a todas las motosierras?
Lamentablemente, no. Las motosierras tienen especificaciones únicas y no existen cadenas universales. Cada cadena está diseñada para:
- Tamaños de barras
- Tipos de ruedas dentadas
- Pasos de cadena
- Espesor del calibre
Las cadenas incorrectas pueden tener consecuencias como un rendimiento deficiente, daños o riesgos de seguridad. Elija siempre una cadena compatible.
5. ¿Cuáles son las señales de que mi cadena de motosierra necesita afilarse?
Aquí están las señales reveladoras:
- Rendimiento de corte lento
- Aumento de la vibración
- Cortes ásperos o desgarros
- Cadena "vibrante" o salta
- Desgaste visible en los dientes de corte
- Afile su cadena periódicamente para mantener:
- Corte eficiente
- Desgaste reducido
- Seguridad mejorada
- Mayor vida útil de la cadena

