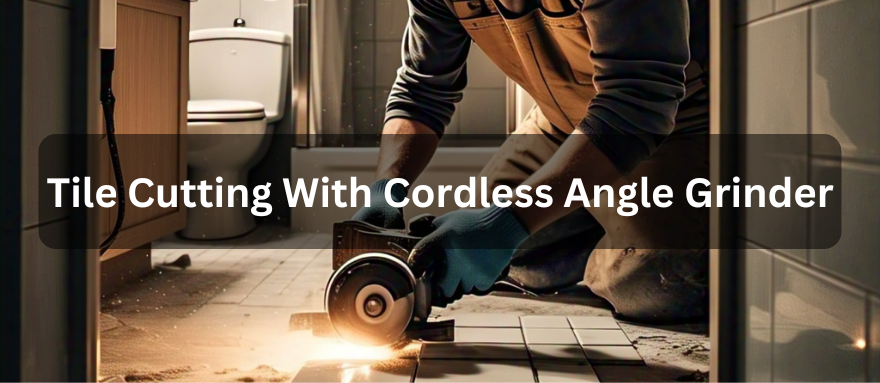
Trabalhar com azulejos pode ser muito desafiador, especialmente quando você não tem as ferramentas certas e precisa fazer cortes complexos. Embora as pessoas usem serras especializadas para azulejos, elas nem sempre estão acessíveis. Então, qual é a alternativa? Este guia ensina como usar uma esmerilhadeira angular sem fio para cortar azulejos com precisão e eficácia.
Principais insights do artigo:
- Noções básicas sobre moedores sem fio
- Tipos de disco para corte de ladrilhos
- Guia passo a passo para cortar ladrilhos
- Dicas para cortar ladrilhos
- Como evitar erros comuns?
1. Compreendendo a esmerilhadeira angular sem fio
Esmerilhadeiras angulares com fio ou pneumáticas eram ferramentas comuns no passado. Um grande problema com essas ferramentas era a impossibilidade de movimentação livre. Esmerilhadeiras angulares sem fio oferecem níveis de potência equivalentes. Ao mesmo tempo, você pode se movimentar livremente.
O que é uma esmerilhadeira angular sem fio?
A esmerilhadeira angular sem fio é uma ferramenta muito útil. Geralmente, é usada para lixar, cortar e polir superfícies. Se você observar seu design, verá um disco giratório. Por ser uma ferramenta alimentada por bateria , ela proporciona tranquilidade, especialmente em tarefas difíceis. Por outro lado, nas esmerilhadeiras com fio, você fica preso a um fio.
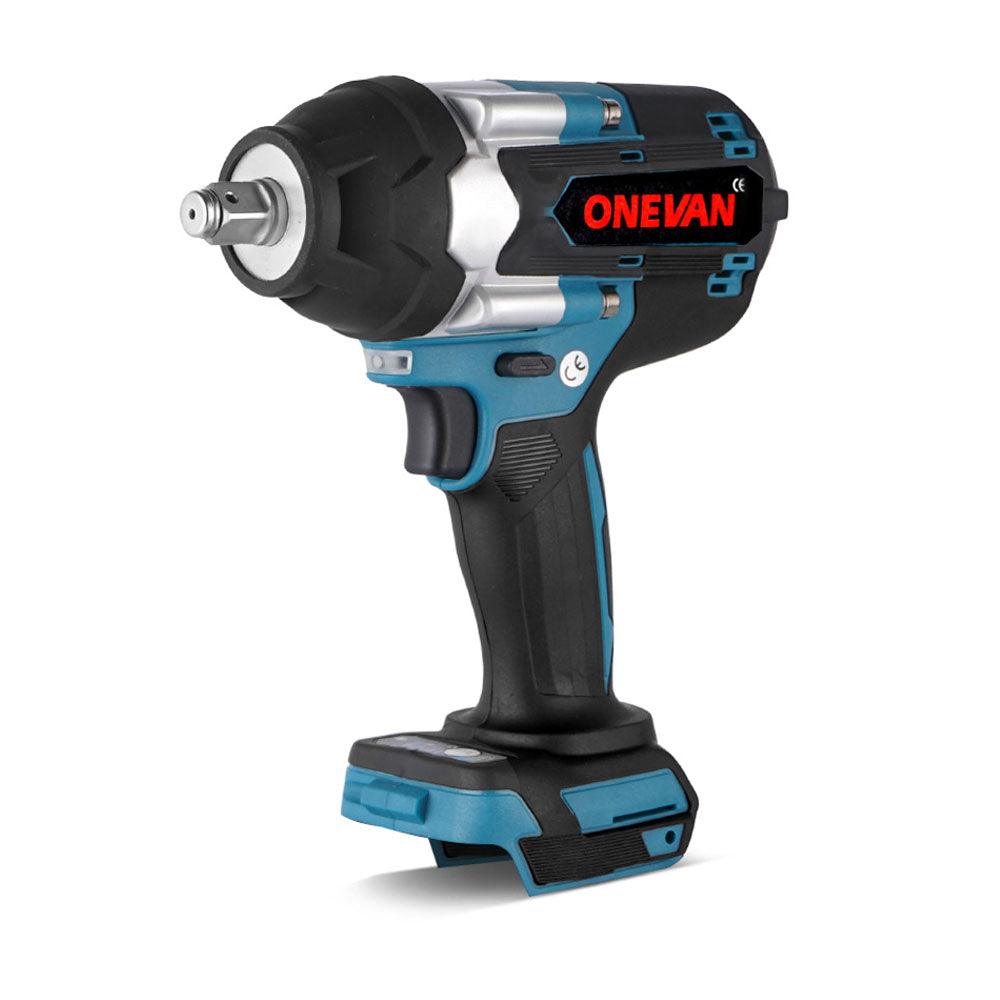
Produto recomendado: Esmerilhadeira angular sem fio ONEVAN de 125 mm para corte de ladrilhos
A Esmerilhadeira Angular ONEVAN de 125 mm sem fio e sem escovas oferece desempenho potente e múltiplas funções para o corte de azulejos. Quando usada com um disco diamantado de borda contínua, esta esmerilhadeira produz cortes suaves e precisos. A Esmerilhadeira Angular ONEVAN de 125 mm oferece múltiplos benefícios para o corte de azulejos. O motor de alto desempenho de 2000 W corta azulejos de cerâmica, porcelanato e pedra. Desfrute de movimentos irrestritos sem fios emaranhados. Você pode ajustar a velocidade através das 6 configurações de velocidade para obter cortes precisos de azulejos sem lascas. A empunhadura lateral aprimorada e o design fino e macio proporcionam controle superior, minimizando a fadiga das mãos em tarefas de corte prolongadas. O mecanismo de troca rápida permite trocar as lâminas em um segundo sem esforço, melhorando o desempenho.
Como usá-lo para cortar ladrilhos
Etapa 1: encaixe uma lâmina de diamante com aro contínuo de 125 mm (furo de 22,23 mm).
Etapa 2: ajuste para RPM mais baixo (cerca de 6000-8000) para um corte controlado.
Etapa 3: use uma régua de ponta reta para cortes precisos e retos.
Passo 4: Ao cortar porcelanato ou azulejos grossos , considere usar um método de corte úmido. Isso reduzirá a poeira e o superaquecimento.
Tipos de discos para corte de ladrilhos
O disco certo facilita o corte de azulejos e proporciona melhores resultados. Discos diferentes funcionam melhor para trabalhos diferentes, portanto, escolher o disco correto é essencial para cortes limpos e maior vida útil do disco.
1. Discos de corte diamantados
Discos de diamante são os mais comuns para ladrilhos.
Características:
Esses discos possuem diamantes na borda de corte, que cortam o azulejo. Discos diferentes têm grãos diferentes. O tamanho do grão indica a grossura dos diamantes. Grãos mais finos produzem cortes mais suaves, adequados para bordas acabadas.
Vantagens:
Discos de diamante:
- Corte limpo.
- Duram muito tempo.
- Corte muitos tipos de azulejos.
Corte seco vs. úmido
- Secagem: Fácil, sem necessidade de água. Produz pó.
- Úmido: Usa água — menos poeira. A água resfria o disco. Isso faz com que ele dure mais. O corte úmido é melhor para ladrilhos duros e ajuda a evitar lascas.
2. Discos de corte abrasivos
Discos abrasivos são mais baratos. No entanto, são inadequados para azulejos, pois produzem cortes grosseiros.
Características:
Estes discos são feitos de carboneto de silício e podem lixar azulejos com facilidade.
Vantagens: Custam menos.
Quando usar:
Discos abrasivos são adequados para azulejos macios ou trabalhos pequenos, se você não quiser gastar muito. Eles se desgastam rapidamente. Não são recomendados para a maioria dos trabalhos com azulejos, pois deixam bordas ásperas e podem lascar o azulejo facilmente.
3. Discos especiais
Alguns discos são feitos para trabalhos específicos.
Características: Estes discos são feitos de materiais específicos. Possuem designs ou materiais exclusivos.
a) Discos de ladrilho de vidro
Estes discos são para vidro. Eles têm granulação muito fina, evitam que o vidro se quebre e fazem cortes precisos em ladrilhos de vidro.
b) Discos de Porcelanato
A porcelana é muito dura, mas estes discos conseguem cortá-la. Eles têm uma ligação especial para segurar os diamantes, o que lhes permite cortar a porcelana sem quebrar.
c) Discos de ladrilho grossos
Esses discos são resistentes e podem cortar ladrilhos grossos. Eles também são mais grossos do que os discos comuns, o que os torna mais estáveis ao cortar materiais espessos.
Vantagens
Discos especiais são os mais indicados para suas funções específicas. Eles proporcionam cortes mais precisos e evitam danos ao piso.
Quando usar
Use estes discos para cortar vidro, porcelanato ou azulejos grossos. Eles proporcionam os melhores resultados. Usar o disco certo facilita o trabalho e evita desperdícios.
2. Preparando-se para cortar ladrilhos com uma esmerilhadeira angular sem fio
Preparar-se antes de cortar os azulejos é essencial. Com um espaço de trabalho bem preparado e as ferramentas certas, você pode causar um impacto significativo.
Reúna suas ferramentas e materiais
Você precisará destas coisas:
Esmerilhadeira angular sem fio
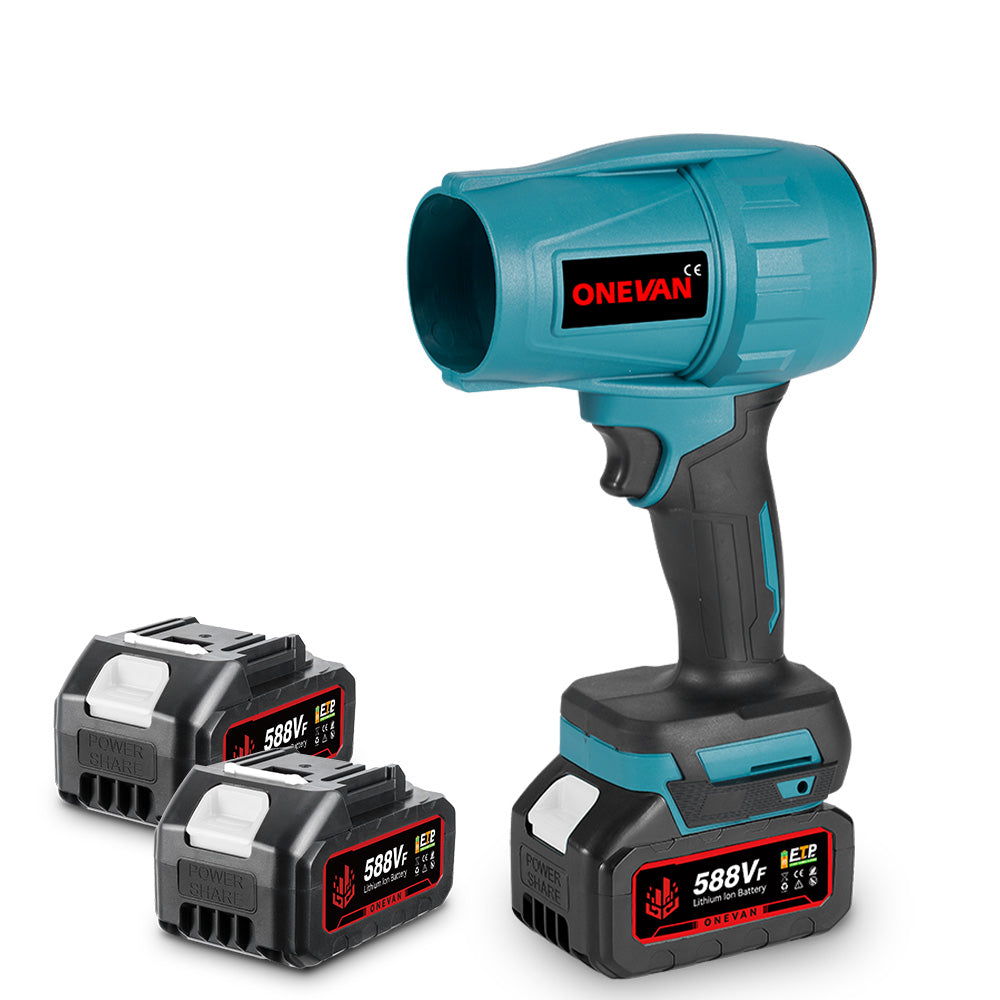
Esta é a ferramenta que gira o disco de corte. Certifique-se de que esteja carregada. Verifique a bateria antes de começar. Recomenda-se adquirir uma bateria extra. Você pode conferir uma variedade de baterias ONEVAN aqui: https://onevantool.com/collections/battery
Discos de corte
Escolha o disco certo para o seu piso. Discos diamantados geralmente são os melhores para a maioria dos trabalhos com pisos. É uma boa ideia ter discos extras para o caso de um deles ser danificado ou desgastado. A escolha do disco ideal para o tipo de piso é fundamental.
Grampos
Grampos seguram o azulejo enquanto você corta, o que é muito importante para a segurança. Use grampos grandes o suficiente para o seu azulejo. Grampos em C ou grampos de mola funcionam bem.
Fita métrica
Use isso para medir onde você precisa cortar. Verifique suas medidas antes de marcar o azulejo.
Lápis ou marcador
Marque a linha de corte no azulejo. Um lápis é bom para azulejos claros, enquanto um marcador é melhor para azulejos escuros.
Borda reta
Uma régua ajuda a criar uma linha de corte precisa. Uma régua de metal ou um pedaço de madeira funcionam bem.
Óculos de segurança
Óculos de segurança protegem você contra detritos e poeira. Não comece a cortar sem eles.
Proteção auricular
Esmerilhadeiras angulares são barulhentas. Protetores auriculares protegem sua audição. Use-os até mesmo para atalhos.
Luvas
Luvas protegem suas mãos. As bordas dos azulejos podem ser afiadas.
Máscara contra poeira
Cortar azulejos produz poeira. Uma máscara contra poeira impede a inalação de poeira; no entanto, um respirador oferece proteção superior, especialmente para trabalhos maiores.
Água para corte úmido
Se for cortar com água, certifique-se de que haja uma fonte de água disponível. Por exemplo, você pode usar um balde de água e uma esponja. Um sistema de bomba e bandeja é mais adequado para trabalhos maiores.
Serra molhada para azulejos
Embora este guia utilize uma esmerilhadeira angular, uma serra para azulejos tornará o corte úmido muito mais fácil e seguro. As serras para azulejos úmidos possuem um sistema de água integrado e uma plataforma de corte estável.
Precauções de segurança
Garantir a segurança é crucial ao usar ferramentas elétricas . Pense sempre na segurança antes de começar.
- Use óculos de segurança
- Use sempre proteção auricular
- Use sempre luvas
- Use uma máscara contra poeira
- Certifique-se de que o disco esteja conectado corretamente
- Nunca use um disco danificado
- Mantenha as mãos longe do disco giratório
- Não force o moedor
- Desligue o moedor ou remova a bateria antes de trocar o disco
- Mantenha a água longe do dispositivo
Preparando o espaço de trabalho
Um ambiente de trabalho limpo e seguro aumenta a eficiência do corte de azulejos.
Limpe a área
Remova qualquer coisa que possa atrapalhar. Você precisa de espaço para se movimentar.
Certifique-se de ter luz suficiente
Você precisa ver o que está fazendo, e uma boa luz evita erros.
Trabalhe em uma superfície estável, como uma bancada ou mesa
Não tente cortar ladrilhos no chão.
3. Guia passo a passo para cortar ladrilhos com uma esmerilhadeira angular sem fio
Você aprenderá a técnica de corte de ladrilhos usando uma esmerilhadeira angular sem fio. Siga estes passos para obter os melhores resultados. Comece praticando cortes em ladrilhos descartados para entender como a ferramenta funciona.
Etapa 1: Marque a linha de corte
A marcação precisa é fundamental. Uma boa marcação significa um bom corte. Não tenha pressa nesta etapa.
Meça com cuidado
Use sua fita métrica para encontrar onde precisa cortar. Confira suas medidas duas vezes. Errar é fácil, e você não quer estragar um azulejo. Meça duas vezes e corte uma vez.
Marque claramente
Use um lápis ou marcador para traçar a linha de corte. Um lápis funciona bem para azulejos claros, enquanto um marcador é melhor para azulejos escuros. Certifique-se de que a linha seja fácil de ver. Um marcador ou lápis de ponta fina fornecerá a linha mais precisa.
Use uma régua
Uma régua ajuda a criar uma linha precisa. Uma régua ou um pedaço de madeira funcionam bem. Certifique-se de que a régua esteja limpa e reta.
Etapa 2: Configurar a rebarbadora
Prepare o moedor antes de cortar. Certifique-se de que esteja em boas condições de funcionamento.
Encaixe o disco de corte
Siga as instruções do esmeril para fixar o disco. Certifique-se de que esteja firme. Um disco solto é perigoso. Escolha o disco certo para o seu piso. Discos diamantados geralmente são os melhores para a maioria dos trabalhos com pisos. Verifique se o disco está danificado antes de usá-lo.
Ajustar a posição da proteção
A proteção protege você do disco giratório. Ajuste-a para cobrir o máximo possível do disco, permitindo que você veja o que está cortando. A proteção deve ficar entre você e o disco.
Etapa 3: ajuste as configurações de profundidade (se aplicável)
Algumas esmerilhadeiras permitem ajustar a profundidade de corte. Este é um recurso valioso.
Consulte o manual da sua esmerilhadeira. Veja se ela possui ajuste de profundidade. Nem todas as esmerilhadeiras angulares sem fio possuem esse recurso.
Defina a profundidade
Se o seu esmeril tiver esse recurso, ajuste a profundidade para um pouco mais do que a espessura do azulejo. Isso evita cortes na superfície de trabalho. Não corte muito fundo.
Etapa 4: Posicione o ladrilho com segurança
O ladrilho precisa estar parado enquanto você corta. Movimentos podem causar erros e ferimentos.
Use grampos
Para sua segurança, use grampos para segurar o azulejo enquanto corta. Os grampos devem estar firmes e em quantidade suficiente para segurar o azulejo com firmeza.
Trabalhe em uma superfície estável
Uma bancada ou mesa é o ideal. Não tente cortar ladrilhos no chão ou em superfícies instáveis.
Apoie o ladrilho
Se o ladrilho for grande, você deve apoiá-lo para que não quebre. A melhor ideia é usar uma serra para ladrilhos maiores. Você também pode usar restos de madeira para apoiá-lo.
Etapa 5: Comece a cortar
Agora você está pronto para cortar. Tenha cuidado e vá com calma.
- Coloque seu equipamento de segurança. Primeiro, você deve providenciar óculos de proteção, proteção auricular, luvas e uma máscara contra poeira.
- Segure o moedor firmemente. Use as duas mãos. Mantenha uma boa pegada no moedor.
- Ligue o moedor. Ao ligá-lo, mantenha o disco afastado do piso. Isso evita que o moedor recue.
- Aproxime o disco lentamente do piso. Não force. Deixe o disco fazer o trabalho. Aplique uma leve pressão.
- Siga a linha marcada. Mantenha o moedor firme. Não o sacuda.
Técnicas para Cortes Retos
- Mantenha o moedor em movimento. Não pare no meio do corte. Um corte contínuo é mais limpo.
- Use uma régua como guia. Isso ajuda a manter o corte reto. Você pode prender a régua ao azulejo.
- Pratique. Cortes retos exigem prática. Não desanime se os seus primeiros cortes não forem perfeitos.
Técnicas para Cortes Curvos
- Mova a retificadora lentamente. Não tente fazer curvas muito rápido. Devagar e sempre é a chave.
- Pratique em pedaços de ladrilho. Cortes curvos são difíceis. Primeiro, pratique em pedaços de ladrilho para ter uma ideia de como a lixadeira se move.
- Considere usar uma serra molhada. Serras molhadas costumam ser melhores para cortes curvos. Elas oferecem mais controle.
Etapa 6: Finalizando o corte
Finalize o corte com cuidado. Não tenha pressa na última parte.
Diminua a velocidade quando chegar ao final.
Isso ajuda a evitar lascas. Tenha muito cuidado ao final do corte.
Desligue o moedor.
Espere o disco parar de girar antes de pousar o moedor. Não deixe o moedor de lado enquanto o disco ainda estiver girando.
Bordas ásperas suaves
Você pode usar uma pedra de amolar ou uma lixa especial para azulejos para alisar as bordas ásperas. Tome cuidado para não remover muito material. Apenas alise as bordas afiadas.
4. Dicas para cortar diferentes tipos de azulejos com uma esmerilhadeira angular sem fio
Diferentes tipos de ladrilhos requerem diferentes métodos de corte. Aqui estão algumas dicas para alguns tipos comuns. Saber o que o seu ladrilho precisa ajuda você a cortá-lo com precisão. Isso evita erros e desperdício de ladrilhos.
Azulejos de cerâmica
Azulejos cerâmicos são usados em paredes e pisos. São relativamente fáceis de cortar. Um disco diamantado ou um disco de borda contínua são uma boa escolha. O corte úmido é melhor para azulejos cerâmicos. A água resfria o disco e reduz a poeira. Faça cortes no azulejo antes de cortar. Isso ajuda a evitar lascas. Não force o corte. Deixe o disco fazer o trabalho. Tenha cuidado perto das bordas. Azulejos cerâmicos lascam facilmente.
Azulejos de porcelana
Porcelanatos são mais complexos que cerâmica. São densos e você precisa de uma abordagem única. Use um disco diamantado para porcelanato. Esses discos cortam materiais duros. Um disco com borda contínua ou segmentada é uma boa opção. O corte úmido é essencial. A porcelana esquenta ao ser cortada. A água resfria o disco, evitando que ele superaqueça. Vá com calma com porcelanato. É preciso paciência. Apoie bem o porcelanato. Porcelanatos costumam ser grandes. Podem quebrar.
Azulejos de pedra natural
Os tipos de ladrilhos de pedra natural variam. Mármore e granito são exemplos. Eles diferem em dureza. Escolha com cuidado. Use um disco diamantado para a pedra. O tipo de disco depende da pedra. Verifique as instruções do fabricante. O corte úmido geralmente é melhor. A água resfria o disco e reduz a poeira. Algumas pedras macias podem ser cortadas a seco. Verifique as instruções do fabricante. Tenha cuidado com pedras frágeis. Algumas pedras quebram facilmente. Teste primeiro em um pedaço de sucata.
Azulejos de vidro
Ladrilhos de vidro são lindos, mas também são difíceis de cortar. Lascam facilmente. Use um disco diamantado para vidro. Esses discos têm granulação fina, o que limita o lascamento. O corte úmido é essencial para vidro, pois a água resfria o disco, impedindo que o vidro se quebre. Vá devagar com o vidro. Ele precisa de um corte lento e constante. Faça cortes profundos no ladrilho e vários cortes. Isso guia o corte. Use um alicate para ladrilhos para cortes menores. Eles dão mais controle.
5. Evitando erros comuns ao cortar ladrilhos com uma esmerilhadeira angular sem fio
Cortar azulejos com uma esmerilhadeira angular sem fio requer atenção. Muitos erros comuns podem danificar seus azulejos. Conhecer esses erros ajuda a evitá-los.
Usando lâminas inadequadas
Usar a lâmina errada é um grande erro. Azulejos diferentes precisam de lâminas diferentes. Uma lâmina para azulejos de cerâmica não funcionará bem em porcelanato. Use a lâmina certa para o seu tipo de azulejo. Lâminas diamantadas costumam ser a melhor escolha. Verifique a embalagem da lâmina. Ela indicará para que serve.
Marcação insuficiente das linhas de corte
Linhas mal marcadas levam a cortes feios. Meça duas vezes e corte uma vez. Use um lápis ou marcador apontado. Uma régua ajuda a fazer linhas retas. Verifique suas marcações duas vezes. Certifique-se de que estejam claras. Marque com calma. Vale a pena.
Estabilização inadequada de ladrilhos
Os azulejos devem ser mantidos imóveis durante o corte. Se eles se moverem, você pode cometer um erro. Use grampos para segurar o azulejo. Trabalhe em uma superfície estável — uma bancada é o ideal. Azulejos grandes precisam de suporte extra. Eles podem quebrar se não forem apoiados.
Aplicando Força Excessiva
Não force a lixadeira. Deixe a lâmina fazer o trabalho. Pressionar com muita força pode quebrar o azulejo e danificar a lâmina. Aplique uma pressão suave. Mantenha a lixadeira em movimento. Se estiver difícil de cortar, verifique a lâmina. Ela pode estar cega.
Alinhamento ruim da lâmina
A lâmina deve estar reta. Uma lâmina torta pode emperrar. Isso pode ser perigoso. Verifique a lâmina antes de começar. Certifique-se de que esteja fixada corretamente. Siga as instruções do amolador.
Esquecendo as precauções essenciais de segurança
A segurança é primordial. Use sempre óculos de proteção. Eles protegem seus olhos. Use proteção auricular também. Esmerilhadeiras angulares são barulhentas. Uma máscara contra poeira protege seus pulmões. O pó de azulejo é prejudicial. Luvas protegem suas mãos.
Ignorando os níveis da bateria
Cortar azulejos se torna frustrante quando a bateria acaba no meio do processo. Certifique-se de que a bateria tenha carga suficiente antes de começar a trabalhar, mantendo uma bateria extra disponível. Você evita interrupções durante o trabalho, o que acelera a conclusão das suas tarefas.
Acelerando o processo de corte
Cortar azulejos exige paciência e atenção aos detalhes. Não tenha pressa. Leve o tempo necessário para fazer cortes precisos. A pressa leva a erros. Também pode ser perigoso.
6. Solução de problemas comuns ao cortar ladrilhos com uma esmerilhadeira angular sem fio
Ladrilhos lascados ou rachados
Lascas são um problema comum, especialmente em azulejos duros. Use a lâmina certa. Uma lâmina para porcelanato funciona melhor do que uma para cerâmica. Faça cortes no azulejo antes de cortá-lo. Isso ajuda a evitar lascas. Não force o corte; deixe a lâmina fazer o trabalho.
Cortes irregulares
Cortes irregulares produzem uma aparência ruim e criam dificuldades na hora de encaixar os azulejos. Uma régua ajudará você a fazer cortes retos. Não pare a lixadeira enquanto o corte estiver em andamento. Use pedaços de azulejo para praticar a operação da lixadeira.
Lâmina superaquecida
As lâminas podem superaquecer, danificando-as e rachando o azulejo. Cortar com água ajuda, pois a água resfria a lâmina. Não pressione com muita força; deixe a lâmina fazer o trabalho. Se a lâmina esquentar, pare de cortar e deixe-a esfriar.
Bateria de curta duração
As baterias que alimentam os moedores sem fio acabam se esgotando. Certifique-se de que sua bateria esteja totalmente carregada e pronta para uso, mantendo outra bateria disponível como reserva. Isso evita que você pare e ligue novamente. Operar o moedor com força aumentará seu consumo de energia.
Travamento ou parada da lâmina
Uma lâmina emperrada é perigosa. Ela pode fazer com que o esmeril recue. Certifique-se de que a lâmina esteja reta. Uma lâmina torta pode emperrar. Não force o corte. Se a lâmina emperrar, pare de cortar. Verifique a lâmina. Certifique-se de que seja a lâmina correta para o ladrilho.
Acúmulo de poeira
A poeira produzida durante o corte de azulejos obstrui a visibilidade e representa sérios riscos à saúde pulmonar. Proteja seus pulmões usando uma máscara contra poeira. O corte com água ajuda, pois reduz a poeira. Certifique-se de trabalhar em uma área com boa circulação de ar e com as janelas abertas sempre que possível.
7. Conclusão
Usar uma esmerilhadeira angular sem fio para cortar ladrilhos exige preparação e atenção cuidadosa. Selecione a lâmina de desbaste adequada ao tipo de ladrilho utilizado. Use marcações claras para as linhas de corte e certifique-se de que o ladrilho permaneça fixo durante o corte. Sempre use equipamentos de proteção, como proteção para os olhos e ouvidos, luvas e máscara contra poeira, ao praticar em ladrilhos descartados. Dê tempo à lâmina para cortar sem forçar demais a esmerilhadeira.
8. Perguntas frequentes
Posso usar qualquer disco de corte na minha esmerilhadeira angular sem fio?
Não, por segurança, você deve usar discos que correspondam ao tamanho e à classificação de RPM do seu moedor. Sempre consulte o manual do seu moedor para obter as especificações de compatibilidade dos discos e nunca use discos danificados ou desgastados.
Como sei quando trocar o disco de corte?
Substitua o disco quando notar desgaste visível, rachaduras ou lascas, ou quando o corte se tornar menos eficiente e exigir mais pressão. Se o disco emitir ruídos estranhos ou vibrar durante o uso, substitua-o imediatamente.
Você pode cortar a borda do ladrilho?
Isso pode ser feito, mas é preferível cortar os ladrilhos ao ar livre devido à poeira gerada. Ao cortar em ambientes internos, certifique-se de que haja coleta de pó adequada, proteção respiratória e ventilação e fluxo de ar adequados.
Que outros materiais posso cortar com uma esmerilhadeira angular?
Dependendo do tipo de disco, as esmerilhadeiras angulares podem cortar metais, concreto, pedras, tijolos e argamassa. Certifique-se de combinar o material do disco com as suas necessidades de corte — discos diamantados para alvenaria, discos abrasivos para metal, etc.
Como faço para obter uma borda limpa nos cortes do meu azulejo?
Marque a linha de corte com clareza usando um disco de corte diamantado. Comece com um corte raso e, em seguida, corte em toda a profundidade. Você também deve mover a retificadora lenta e firmemente, com o disco fazendo o trabalho por você, em vez de forçá-lo.
Posso usar uma esmerilhadeira angular sem fio para outros projetos "faça você mesmo"?
Com certeza! Além de cortar, você pode usá-lo para lixar soldas, remover ferrugem, polir metais e afiar ferramentas, bastando trocar para o acessório apropriado para cada tarefa.