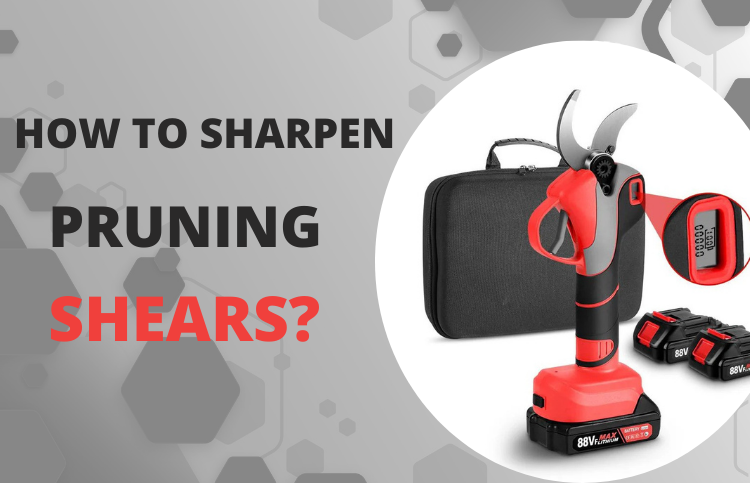
Tesouras de poda são essenciais para o cuidado do jardim. A poda é um processo vital para a saúde das plantas. Ao remover folhas e galhos secos, você pode impactar significativamente a distribuição e o equilíbrio dos hormônios de crescimento na planta.
Para isso, você precisa de uma ferramenta afiada. Além disso, a poda confere um formato atraente ao jardim. É uma prática obrigatória para manter a saúde geral das plantas. Da mesma forma, assim como a poda é essencial para a saúde das plantas, afiar regularmente a tesoura é crucial para manter sua eficácia e garantir a máxima produtividade.
Mas a questão é como afiar uma tesoura de poda. Ferramentas de jardinagem são vulneráveis ao corte, mas como fazer a manutenção delas?
É por isso que é necessário afiá-las com frequência. O artigo abaixo ajudará você a entender os diferentes tipos de tesouras de poda, incluindo as sem fio , e as etapas essenciais para afiá-las!
1. Para que servem as tesouras de poda?
O corte preciso evita danos a plantas delicadas, como ervas aromáticas e flores decorativas. A tesoura de poda permite fazer esses cortes com precisão, garantindo que as plantas estejam saudáveis e cresçam adequadamente. Esta lâmina afiada remove folhas mortas e pequenos galhos sem danificar a planta.
Além disso, as tesouras de poda são ideais para criar arranjos florais devido à sua precisão de corte. Você pode ajustar os caules com precisão para dar às plantas uma aparência única.
Manutenção de Bonsai
Tesouras de poda são necessárias durante a manutenção do bonsai devido à precisão necessária para moldar e manter essas pequenas árvores. Tesouras de poda facilitam esse trabalho, pois os bonsai precisam de podas regulares para manter seu tamanho e forma. Com elas, é possível cortar galhos e folhas finos com precisão, melhorando assim a saúde e a aparência geral do bonsai.
Essas tesouras podem ser usadas para podar e pinçar, o que ajuda a remover brotos e folhas indesejados e estimula o crescimento adequado da planta.
Cuidados com plantas de interior
Tesouras de poda são uma ferramenta indispensável ao lidar com plantas de interior. Samambaias, filodendros e suculentas, entre outras plantas, se beneficiam de podas regulares que eliminam as partes mortas e estimulam a formação de novas folhagens. Você pode acessar facilmente as áreas que precisam de corte com grande precisão com tesouras de poda sem fio .
Além disso, usar essas ferramentas regularmente ajuda a manter as plantas de interior controláveis para que não cresçam descontroladamente, ocupando espaços desnecessários.
O papel das tesouras afiadas na melhoria da saúde das plantas
As tesouras de poda desempenham um papel crucial na manutenção da flora saudável:
Cortes Limpos: As lâminas afiadas da tesoura de poda ajudam a manter cortes limpos e precisos nas plantas. Dessa forma, você pode lidar facilmente com os danos ao tecido vegetal. Ao mesmo tempo, também ajuda a planta a se recuperar rapidamente. Dessa forma, as plantas se recuperam e gastam menos energia na recuperação, promovendo saúde e vigor geral.
Risco reduzido de doenças: Tesouras cegas podem esmagar os caules, impossibilitando o corte preciso. Em última análise, as chances de doenças são maiores. Diversas doenças de plantas podem penetrar facilmente nos caules, causando patógenos. Tesouras afiadas reduzem esse risco, pois permitem cortes precisos.
Selecionando a tesoura de poda apropriada para manutenção ideal da lâmina
Cuidar de árvores e arbustos no seu jardim não é apenas um trabalho, mas uma arte completa. Não se trata apenas do apelo estético de copas bem aparadas; a principal tarefa do jardineiro é manter as plantas saudáveis. Brotos jovens que não dão frutos ou galhos secos quebrados pelo vento são apenas o peso extra que impede a árvore de se desenvolver plenamente.
Esses galhos indesejados são chamados de podas e precisam ser removidos periodicamente por meio de poda. Para fazer isso de forma eficiente e sem danificar a árvore, você precisa da habilidade de um jardineiro experiente e de uma tesoura de poda devidamente selecionada.
2. Diferentes tipos de tesouras de poda
Vários possuem mecanismos e designs de lâminas diferentes para atender a usos e tipos de plantas específicos. Aqui está um relato detalhado dos mais comuns, com foco em seus aspectos técnicos, aplicações e requisitos de afiação:
Tesouras de poda bypass
Mecanismo : Este podador funciona como uma tesoura, pois possui duas lâminas: uma bigorna plana e uma lâmina de desvio afiada e chanfrada. A lâmina de desvio desliza pela bigorna para fazer um corte preciso. Este podador pode cortar confortavelmente caules e galhos vivos com cerca de 2,5 cm de diâmetro.
Caso de uso : Os podadores bypass são os mais versáteis, pois cortam de forma limpa e incluem:
A poda geral inclui a poda de folhas mortas, flores e outros crescimentos indesejados em arbustos, rosas, plantas com flores e pequenas árvores frutíferas.
Tirar mudas verdes: Colocar novas plantas cortando caules saudáveis.
Colheita de vegetais e frutas: Colha delicadamente frutas e vegetais, como tomates, pimentões e ervas.
Afiação : Cada uma das lâminas deve ser afiada periodicamente para garantir um corte suave. A lâmina de desvio deve ser afiada no ângulo de bisel correto, que normalmente varia de 15° a 20°. Nesse caso, você pode usar uma pedra de amolar de granulação fina. Se isso não for feito, pode ser aconselhável amolar levemente a superfície superior da bigorna com uma pedra para eliminar quaisquer rebarbas que possam interferir no processo de corte.
Tesouras de poda de bigorna
Mecanismo : Ao contrário das tesouras de poda bypass, as tesouras de poda de bigorna possuem um mecanismo que envolve o esmagamento de galhos entre uma lâmina afiada e uma bigorna plana. A lâmina afiada corta o galho enquanto a bigorna exerce uma força contrária sobre ele, dando-lhe suporte. Esse tipo de esmagamento funciona melhor em galhos mortos ou secos, tornando-os menos propensos a danos em caso de corte impreciso.
Caso de uso: Tesouras de poda de bigorna são ideais para podar flores murchas.
Poda de galhos secos ou mortos : remoção de galhos mortos, doentes ou quebrados de arbustos e árvores (galhos de até 1-1,5 polegadas de diâmetro).
Poda pesada : corte de galhos mais densos e complexos que podem ser difíceis de manejar com tesouras de poda de desvio.
Afiação: A lâmina da tesoura de poda de bigorna deve ser afiada com uma pedra de amolar ou uma placa de afiação diamantada no ângulo de bisel adequado. Às vezes, é aconselhável afiar levemente a superfície da bigorna para eliminar rebarbas ou irregularidades que possam dificultar o processo de corte.
Tesouras de poda com catraca
Mecanismo : Tesouras de poda com catraca são tesouras de poda bypass com dispositivos de catraca. Esses dispositivos permitem cortar galhos mais grossos em etapas. Pequenas partes do galho são cortadas a cada aperto no cabo. Portanto, exigem apenas um pouco de força física para alguns cortes, tornando-as adequadas para quem tem pouca força ou realiza grandes trabalhos de poda.
Caso de uso : Tesouras de poda com catraca são ótimas pelos seguintes motivos:
Poda de galhos grandes : galhos grossos de grande diâmetro (até 5 a 7,5 cm) em arbustos e árvores podem ser podados.
Poda repetitiva : muitos cortes devem ser feitos de uma só vez, o que pode causar fadiga nas mãos, portanto, os tipos de poda bypass devem ser evitados.
Usuários com força limitada nas mãos: O mecanismo de catraca torna isso possível, pois o corte se torna mais fácil, exigindo menos energia nas mãos.
Afiação : Tesouras de poda com catraca e tesouras de poda bypass têm requisitos de afiação semelhantes. Ambas as lâminas de corte — a lâmina bypass e a bigorna — requerem afiação periódica para garantir uma operação eficiente. A lâmina bypass tem o fio no ângulo correto, enquanto uma afiação leve pode melhorar a superfície da bigorna.
Observação: alguns podadores de catraca de última geração podem ter um mecanismo de desvio que pode ser desengatado para uma única ação de corte em galhos mais finos.
Tesouras de poda elétricas com fio
Mecanismo: Tesouras elétricas com fio economizam esforço na hora de podar galhos pesados ou trabalhos de aparagem mais complexos. Normalmente, elas utilizam lâminas reciprocantes ou de desvio, acionadas por um motor elétrico.
Caso de uso: Tesouras de poda elétricas com fio são eficientes devido ao seu poder de corte;
Poda pesada: corte de galhos grandes (7,5 a 10 cm de diâmetro) de árvores e arbustos.
Profissionais de paisagismo: lidando com eficiência com grandes trabalhos de poda em ambientes profissionais.
Manutenção de pomares : Poda de galhos de árvores frutíferas.
Afiação: Tesouras de poda elétricas geralmente vêm com lâminas substituíveis. Afiar essas lâminas geralmente requer ferramentas especializadas ou assistência profissional devido à complexidade do conjunto motor e lâmina. Eles podem ser adquiridos de várias fontes e satisfarão economicamente as necessidades de usuários ocasionais.
Tesouras de poda sem fio
Tesouras de poda elétricas sem fio são portáteis e possuem um motor alimentado por bateria . Elas geralmente utilizam a mesma ação de lâmina (desvio ou reciprocante) que as tesouras de poda elétricas com fio.
Casos de uso : Essas instalações têm algum controle entre potência e portabilidade que as torna adequadas para:
• Pode galhos moderadamente pesados em arbustos e árvores de até 5 a 6 cm de diâmetro.
• Grandes proprietários de jardins: Para trabalhar em tarefas de poda na propriedade sem a limitação de um fio.
• Poda simples: semelhantes aos podadores de desvio, esses dispositivos podem ser usados para a maioria dos trabalhos comuns de poda diária com menos fadiga no pulso.
Afiação : Os modelos sem fio geralmente usam lâminas de reposição, assim como os modelos com fio. A melhor solução pode ser usar lâminas de reposição disponíveis. No entanto, alguns modelos de ponta podem permitir a remoção da lâmina para afiação com ferramentas específicas. Consulte o manual do fabricante para obter instruções adequadas de manutenção e afiação para o seu modelo de podador sem fio .
3. Como afiar tesouras de poda?
Lembre-se de afiar sua tesoura de poda se quiser um jardim bonito e saudável. Para fazer isso com segurança e sem danificar a tesoura, siga os passos abaixo.
Etapa 1: Limpeza das lâminas Vamos reunir suprimentos como água com sabão, uma escova macia e um pano limpo para começar.
Limpeza completa: lave a escova em água com sabão e esfregue para remover qualquer sujeira de ambos os lados da lâmina. É fundamental prestar atenção aos detalhes ao limpar as fendas entre as lâminas e as dobradiças, pois elas podem acumular seiva ou partículas de sujeira.
Enxágue e seque: use um pano limpo para secar qualquer umidade resultante do enxágue com água limpa para evitar ferrugem.
Algumas tesouras de poda possuem lâminas removíveis ou mecanismos de desvio que são fáceis de remover para limpeza antes de afiar. Consulte o manual do usuário para verificar se o seu modelo pode ser desmontado.
Cuidado: Não force a separação da tesoura se ela não foi projetada para ser desmontada, pois isso pode causar danos.
Grampo ou morsa: se sua tesoura puder ser desmontada ou se você tiver um modelo com lâmina removível, prenda a lâmina que deseja afiar em um torno ou morsa.
Posicionamento: Coloque a lâmina plana com a borda chanfrada voltada para baixo. Para tesouras de desvio, a borda chanfrada é o lado cortante da lâmina, enquanto para tesouras de bigorna, a borda chanfrada deve ficar apoiada na superfície plana da bigorna.
A melhor técnica de afiação varia de acordo com sua experiência, familiaridade com diferentes ferramentas e a nitidez desejada. Aqui está uma análise mais detalhada de cada método.
Esmerilhadeira de bancada: afia rapidamente, mas requer mais prática e controle para evitar superaquecimento ou danos à lâmina. É recomendada para usuários experientes que se sentem confortáveis com ferramentas elétricas .
Lima: Este método atinge um bom equilíbrio entre facilidade de uso e eficácia. A lima diamantada proporciona um bom equilíbrio entre velocidade de afiação e controle.
Pedra: As pedras de amolar proporcionam excelente controle de afiação e um fio extremamente afiado, embora levem mais tempo para aprender e dominar do que as pedras de amolar a óleo, que produzem pontas afiadas usando métodos tradicionais antigos. Alternativamente, as pedras de amolar a água são usadas com água como lubrificante, o que as distingue das pedras de amolar a óleo, que requerem óleo para manter uma superfície de afiação lisa.
Dremel: Oferece afiação rápida semelhante à de uma esmerilhadeira de bancada, mas é preciso ter cuidado para não superaquecer ou danificar a lâmina. É ideal para usuários experientes e familiarizados com ferramentas rotativas.
Erros comuns:
Independentemente da sua escolha de técnica, há alguns erros comuns que você pode cometer durante a afiação:
Superaquecimento da lâmina: O calor excessivo pode danificar a têmpera da lâmina, reduzindo sua capacidade de manter o fio. Para evitar o superaquecimento, use movimentos leves e, periodicamente, mergulhe a lâmina em água (exceto pedras de óleo).
Ângulo de afiação incorreto: Mantenha o ângulo de chanfro definido inicialmente na sua tesoura, normalmente entre 20 e 30 graus. Identifique o ângulo de chanfro da sua tesoura (geralmente entre 20 e 30 graus) e mantenha-o durante todo o processo de afiação.
Aplicação desigual de pressão: Aplicar pressão desigual pode resultar em uma superfície de corte imperfeita, resultando em baixo desempenho de corte. Sempre use movimentos suaves e uniformes para obter resultados impecáveis.
Para afiar tesouras de poda, é essencial conhecer o ângulo de chanfro da lâmina. Esse ângulo varia de 20 a 30 graus e afeta o contato da lâmina com a superfície de corte. Conhecer esse ângulo permite mantê-lo durante a afiação para obter o melhor desempenho.
Aqui estão algumas maneiras de descobrir qual é o seu ângulo de chanfro:
Consulte o Manual do Usuário: As instruções do fabricante para seu modelo específico de tesoura de poda podem listar o ângulo de chanfro.
Use um transferidor: Se o manual não fornecer um ângulo, use um transferidor. Feche e alinhe a borda plana do transferidor com a parte plana da lâmina. Alinhe a linha central do transferidor com a linha central da tesoura. Em seguida, meça perpendicularmente entre a superfície plana da lâmina e a borda afiada em ângulo.
Agora que identificamos qual método é mais adequado para você e quais ferramentas você precisa para seu processo de afiação, vamos ver como fazer isso em etapas:
Afiação com uma esmerilhadeira de bancada:
Use equipamento de proteção individual : certifique-se de usar óculos de segurança e luvas resistentes a cortes.
Ajuste a velocidade do moedor para que ela fique média o suficiente para lidar com o esmerilhamento de metal.
Segure a lâmina firmemente de modo que sua parte chanfrada fique voltada para a roda de esmerilhamento.
Mantenha o ângulo de afiação definido. Mantenha os ângulos de chanfro estabelecidos durante todas as etapas de afiação. Em movimentos uniformes, escove suavemente a roda de afiação, mantendo contato apenas nas bordas.
Lâmina fria : Mergulhe a ponta na água ocasionalmente para mantê-la fria. Repita e vire: Afie novamente um lado, vire a lâmina e repita o mesmo procedimento, usando os mesmos ângulos.
Usando uma pedra para afiar:
Equipamento de segurança : Lembre-se de usar óculos de segurança e luvas feitas de material à prova de cortes.
Prepare a pedra : Se usar uma pedra de amolar, adicione algumas gotas de óleo de amolar na superfície. Com pedras de amolar de água, não há necessidade de óleo.
Prenda a tesoura : prenda a tesoura em um torno ou segure-a firmemente.
Manter o ângulo : Mantenha o ângulo do chanfro colocando a lâmina plana contra a superfície molhada de uma pedra de óleo ou contra a própria pedra, caso seja uma pedra d'água.
Movimentos circulares : usar pequenos movimentos circulares e aplicar pressão moderada permitirá que você passe sua lâmina por todo o comprimento do fio de corte sem problemas.
Vire e repita : depois de várias passagens em um lado, vire a lâmina e siga o mesmo procedimento no outro lado, mantendo um movimento e ângulo semelhantes.
Afiação : Mude para o lado de granulação fina para afiar depois de usar a granulação grossa para afiar (caso use pedras combinadas). Isso resulta em um fio mais fino que corta melhor. Use menos força ao afiar.
Afiação de ferramentas rotativas Dremel:
Óculos de segurança protegerão seus olhos de detritos voadores.
Luvas resistentes a cortes : use luvas projetadas para resistir a cortes para minimizar o risco de cortes acidentais.
Ferramenta rotativa Dremel : escolha uma com velocidades variáveis e um disco de afiação de diamante ou um acessório de pedra de amolar.
Morsa de metal (opcional) : Tesouras de fixação podem ajudar na estabilidade durante a afiação, embora isso nem sempre seja necessário.
Outras opções : Se você não tiver as ferramentas recomendadas, considere estas alternativas: Use uma haste de afiação de cerâmica como substituto das limas diamantadas, embora possa exigir um uso mais frequente para manter o fio afiado. Como alternativa, em caso de emergência, você pode usar uma superfície plana, como um tijolo, como último recurso para afiar, mas esteja ciente de que isso é menos eficaz e pode não proporcionar os melhores resultados.
Etapa 7: verifique a nitidez! É crucial testar o fio da lâmina antes de concluir o processo de afiação. Aqui estão algumas maneiras:
Teste do Papel: Segure uma das pontas de uma folha de papel e tente cortá-la com a lâmina afiada. Uma lâmina bem afiada cortará a folha sem esforço.
Teste do Polegar (Cuidado): Tenha cuidado com este método! Deslize suavemente a unha do polegar pela parte de trás (não afiada) perto do fio da lâmina. Uma faca bem afiada deve ser ligeiramente áspera na parte de trás, mas não o suficiente para cortar você.
A afiação pode causar o aparecimento de pequenas rebarbas metálicas no lado oposto, que não está afiado. Essas rebarbas podem interferir no corte suave. Veja como se livrar delas:
Use a pedra: Passe levemente o lado não afiado da lâmina no lado de granulação fina da pedra de amolar, em algumas passadas, para remover quaisquer rebarbas, se estiver usando uma pedra de amolar.
Fita de couro (opcional): para dar às suas facas um fio extremamente polido, afie-as em couro tratado com composto de afiação, arrastando em cada direção várias vezes.
Recoloque-as no lugar, se aplicável: Aqueles que removeram suas tesouras de poda antes de afiá-las devem remontá-las cuidadosamente, seguindo as instruções do fabricante da marca.
Aplique lubrificante: espalhe um pouco de material lubrificante (como WD-40) com moderação nas peças móveis e na direção da dobradiça para evitar ferrugem e garantir uma operação suave.
Caso o corte seja áspero ou exija mais esforço, a lâmina precisa ser afiada. Você também pode recuar e dar mais algumas passadas leves na pedra ou lima, mantendo o ângulo com cuidado.
Etapa 11: Limpe e armazene adequadamente Limpeza: use um pano limpo para remover quaisquer partículas metálicas ou lubrificantes restantes.
Armazene adequadamente: guarde sua tesoura de poda afiada em um local seco e seguro, longe da luz solar direta. Considere usar um coldre ou bainha para proteger as lâminas, evitando que fiquem cegas muito cedo.
4. Conclusão
Ao podar frutas ou plantas em geral, é fundamental fazer cortes limpos e precisos para que elas possam cicatrizar e crescer mais rápido. Para isso, usar as ferramentas certas com lâminas bem afiadas é crucial. Portanto, a manutenção regular é frequentemente negligenciada. Geralmente, as pessoas não afiam as lâminas. É uma operação simples que, se realizada regularmente, preserva o fio e permite que você tenha sempre ferramentas de poda afiadas .
5. Perguntas frequentes
1. Como afiar tesouras de poda em casa?Existem dois métodos principais para afiar tesouras de poda em casa:
- Uma lima diamantada com diferentes grãos (grossa, fina, extrafina).
- Usando uma pedra de amolar (requer mais prática).
- Desmonte a tesoura (se possível) para facilitar a afiação.
- Limpe bem as lâminas.
- Prenda a lâmina em um torno.
- Usando uma lima diamantada, siga o ângulo do chanfro da lâmina e faça movimentos suaves na direção contrária a você.
- Comece com uma granulação grossa para tesouras negligenciadas e depois passe para granulações mais finas para um acabamento polido.
- Remova as rebarbas da borda passando a lima ao longo do lado plano da lâmina.
- Remonte a tesoura e teste-a.
2. Qual é a melhor lima para afiar tesouras de poda?
A melhor lima para afiar tesouras de poda é a lima diamantada. As limas diamantadas são práticas de usar, estão disponíveis em vários grãos e duram muito.
3. O que posso usar para afiar tesouras de jardim?
Você pode usar os métodos mencionados acima para afiar tesouras de poda em sua tesoura de jardim. Limas diamantadas e pedras de amolar também são opções adequadas.
4. Como afiar uma lâmina de poda?
Afiar uma lâmina de poda é o mesmo que afiar uma tesoura de poda.
5. Como afiar tesouras de lâmina?
Você pode afiar tesouras de lâmina da mesma forma que afia tesouras de poda. Para isso, siga os passos anteriores, mantendo a ferramenta de afiação no ângulo correto em relação ao bisel da lâmina.
6. Como afiar uma lâmina cega em casa?
Existem duas maneiras principais de afiar uma lâmina cega em casa:
- Você pode incorporar uma lima diamantada com diferentes grãos (grossa para lâminas cegas).
- Usando uma pedra de amolar (requer imersão e técnica adequada).
7. O papel alumínio afia as lâminas?
Não, papel-alumínio não é recomendado para afiar lâminas. Pode danificar o fio e deixá-lo irregular.
8. A lixa afia uma lâmina?
Não é recomendado usar lixa para afiar lâminas, pois ela pode não afiar com eficiência e deixar a superfície arranhada.
9. Como afiar uma lâmina sem um amolador?
Se você não tiver uma lima diamantada ou pedra de amolar, uma haste de cerâmica é uma boa alternativa para manter o fio da sua tesoura afiado. Use movimentos leves seguindo o ângulo do chanfro. Como alternativa, é recomendável levar sua tesoura a um profissional para afiá-la.
10. Você deve empurrar ou puxar uma lâmina ao afiar?
Independentemente do método utilizado, a segurança do operador é primordial. Você deve sempre afastar a ferramenta de afiação de você. Isso evita que ela escorregue e cause danos.

