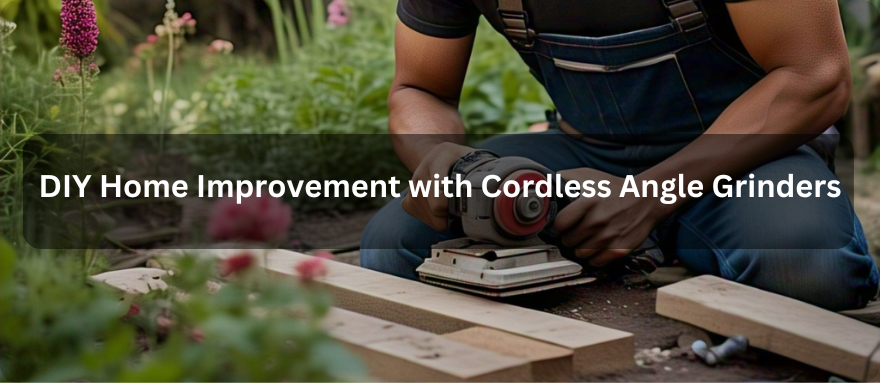
Você anda brincando com uma esmerilhadeira angular sem fio ultimamente e acha ela ótima para dar um up no quintal? Esta ferramenta elétrica sem fio é um faz-tudo — corta, esmerilha, lixa, o que você quiser. Você pode cortar metal, alisar madeira ou até mesmo polir pedras. A melhor parte? Sem fio! Assim, você não precisa ficar procurando um plugue ou arrastando um cabo de extensão pela grama. Eu a tenho usado para consertar algumas cadeiras velhas do pátio e afiar minhas ferramentas de jardinagem, e é tão fácil de pegar e levar para onde eu precisar. Uma mudança radical para pequenos projetos em casa!

1. Esmerilhamento de pátio usando uma esmerilhadeira angular sem fio
Cenário 1: Alisamento de superfícies de pátio de concreto
Use sua rebarbadora sem fio para deixar seu pátio mais bonito, corrigindo diferentes problemas de superfície.
Comece limpando bem a superfície do seu pátio. Remova toda a sujeira e detritos. Use equipamentos de segurança: óculos de proteção, máscara contra poeira e luvas de trabalho. Escolha um disco de desbaste diamantado para sua esmerilhadeira angular sem fio. Trabalhe em pequenas seções de cerca de 60 cm x 60 cm. Segure a esmerilhadeira plana contra a superfície. Mova-a lentamente em círculos sobrepostos. Não pressione com muita força, pois isso pode causar superaquecimento ou danos à ferramenta. Deixe a ferramenta fazer o trabalho. Limpe o pó à medida que avança. Continue verificando a lisura da superfície com a mão. Faça várias passadas, se necessário.
Ao alisar seu pátio de concreto, a esmerilhadeira angular sem fio ONEVAN de 125 mm facilita o trabalho. Comece com uma velocidade baixa para áreas irregulares. A alça lateral ajuda a manter o controle. Mude para velocidades mais altas para o alisamento final. O recurso anti-sobrecarga da ferramenta permite que você trabalhe por mais tempo sem preocupações. Seu protetor contra faíscas protege você contra pedaços de concreto projetados. Quando precisar de potência extra, a potência de 2000 W lida até mesmo com as superfícies de concreto mais difíceis.
Cenário 2: Removendo tinta ou revestimentos antigos de pisos de pátio
Primeiro, teste o revestimento antigo para ver se ele contém chumbo. Se houver, chame um profissional. Se for seguro, use uma escova de arame tipo copo na sua esmerilhadeira angular sem fio. Comece em um canto do pátio. Trabalhe em linhas retas. Mantenha a esmerilhadeira em movimento constante. Não fique muito tempo no mesmo local; em vez disso, certifique-se de que o revestimento saia em tiras. Aspire ou varra os resíduos com frequência. Alguns pontos difíceis podem precisar de várias passadas. Depois de remover todo o revestimento, limpe bem a superfície.
Cenário 3: Lixamento de lajes irregulares do pátio
Marque os pontos altos com giz e, em seguida, prossiga com o lixamento. Coloque seu equipamento de segurança. Use um acessório de disco diamantado. Comece pelo ponto mais alto. Trabalhe em movimentos circulares para fora. Verifique seu progresso frequentemente com um nível. Vá devagar para evitar lixar muito fundo. Limpe a poeira entre as passadas. Teste a superfície com um nível longo em várias placas. Continue lixando até que todas as placas estejam uniformes. Finalize alisando as irregularidades.
Cenário 4: Moldando e redimensionando pavimentos para projeto de pátios
Prepare uma superfície de trabalho estável, como uma mesa resistente. Marque as linhas de corte com um lápis. Use uma lâmina diamantada própria para alvenaria. Fixe a peça com firmeza. Comece o corte lentamente para criar um sulco. Em seguida, faça passadas constantes pela peça. Não force a lâmina. Deixe-a cortar em um ritmo ideal. Resfrie a lâmina com água se notar que ela está superaquecendo ou descolorindo. Após o corte, alise as bordas ásperas. Teste o encaixe da peça antes de cortar mais.
Cenário 5: Limpeza de ferrugem de móveis de metal para pátio
Comece com uma escova de aço. Coloque óculos de segurança e luvas. Primeiro, remova a ferrugem solta com a mão. Segure a lixadeira em um leve ângulo contra a superfície enferrujada. Mova em apenas uma direção. Não pressione com muita força. Troque de lugar com frequência para evitar danificar o metal. Limpe pequenas áreas de cada vez. Limpe a superfície para verificar o progresso. Use lixas mais finas para o acabamento. Após remover toda a ferrugem, aplique primer antiferrugem e tinta.
Dicas de segurança para todos os cenários:
- Use sempre proteção para os olhos, proteção auricular e máscara contra poeira
- Mantenha as duas mãos no moedor
- Trabalhe em uma área bem ventilada
- Certifique-se de que a área de trabalho esteja livre de pessoas e animais de estimação.
- Desconecte ou remova a bateria ao trocar os acessórios
- Faça pausas regulares para evitar a fadiga
- Limpe e faça a manutenção do seu moedor após cada uso
- Guarde seu moedor em um local seco e seguro
Lembre-se de ler o manual do seu moedor antes de iniciar qualquer projeto. Tenha baterias extras carregadas e à mão. Mantenha todos os acessórios limpos e em boas condições.
2. Reparo de cercas metálicas e design personalizado
Conserte e atualize sua cerca de metal usando uma rebarbadora sem fio para cortar, alisar e polir.
Cenário 1: Corte de painéis de cerca de metal danificados para substituição
Uma esmerilhadeira angular sem fio facilita cortes e acabamentos suaves, ajudando você a consertar e estilizar sua cerca de metal.
Primeiro, meça cuidadosamente a seção danificada. Marque as linhas de corte com um marcador brilhante. Coloque luvas de trabalho grossas e uma proteção facial. Use um disco de corte de metal na sua esmerilhadeira angular sem fio. Apoie o painel para que ele não se mova. Comece a cortar pela borda externa. Mantenha a esmerilhadeira reta e firme. Mova-se em um ritmo uniforme pelo metal. Não tenha pressa - deixe o disco fazer o trabalho. Peça a alguém para segurar o painel firmemente para evitar que ele caia. Após o corte, lime as bordas afiadas. Teste o encaixe do novo painel antes de instalá-lo.
Cenário 2: Suavização de juntas soldadas em armações de cerca
Comece com um disco flap grosso na sua lixadeira. Limpe primeiro a área da solda. Segure a lixadeira em um leve ângulo em relação à solda. Mova-a para frente e para trás ao longo da linha de solda. Não pressione com muita força. Continue verificando a lisura da superfície com a mão enluvada. Troque para um disco com granulação mais fina para obter uma lisura melhor. Limpe o pó metálico entre as passadas. Trabalhe até que a solda se misture com o metal ao redor. Finalize com a granulação mais fina para um visual profissional.
Cenário 3: Aparar postes de cerca para ajustar alturas
Use um nível para marcar a altura correta em todos os postes. Faça uma linha de corte com um marcador. Use um disco de corte de metal. Comece com uma ranhura rasa ao redor de todo o poste. Isso ajuda a manter o corte reto. Corte lenta e uniformemente. Verifique sempre se o corte está nivelado. Peça a um ajudante para apoiar o poste. Após o corte, alise a borda superior com um disco de desbaste. Remova todas as bordas afiadas. Teste a altura novamente com um nível.
Cenário 4: Removendo ferrugem e tinta velha de cercas de metal
Comece com uma escova de arame tipo copo. Teste primeiro em uma pequena área. Trabalhe em seções de cerca de 60 cm de largura. Mova a lixadeira firmemente sobre a superfície. Não permaneça no mesmo local por muito tempo. Limpe a ferrugem solta e pinte com frequência. Verifique se há pontos que não foram pintados. Use uma escova de arame mais fina para áreas mais detalhadas. Limpe bem todas as superfícies após o lixamento. Aplique primer antiferrugem imediatamente para evitar ferrugem nova. Use uma boa máscara contra poeira. Poeira de tinta velha pode ser prejudicial.
Cenário 5: Polimento de superfícies metálicas para uma aparência finalizada
Comece com o metal limpo e sem ferrugem que deseja polir. Use um acessório para polimento com disco de polimento. Comece com uma granulação média. Trabalhe em linhas retas e sobrepostas. Mantenha a lixadeira em movimento constante. Não pressione com força – deixe o disco fazer o trabalho. Limpe a superfície entre as granulações. Troque para discos mais finos gradualmente. Continue verificando o brilho. Finalize com o disco mais fino para obter o máximo brilho. Limpe a superfície final com um pano macio.

3. Projetos de ferramentas de jardim faça você mesmo usando uma esmerilhadeira angular sem fio
Crie ferramentas e decorações de jardim personalizadas com o poder versátil de uma esmerilhadeira angular sem fio.
Cenário 1: Construindo caixas de madeira para plantio
Faça suas próprias ferramentas e decorações de jardim usando uma rebarbadora sem fio para cortar e moldar materiais.
Comece com madeira resistente às intempéries, como cedro ou sequoia. Planeje o tamanho da caixa e corte as peças no comprimento desejado. Use a esmerilhadeira angular sem fio com um disco de lixa para alisar todas as bordas cortadas. Trabalhe no sentido dos veios da madeira. Mova a esmerilhadeira com firmeza para evitar ranhuras. Mude para uma granulação mais fina para um acabamento mais liso. Arredonde os cantos afiados por segurança. Lixe as bordas internas onde a terra tocará. Limpe todo o pó de madeira entre as lixas. Após a montagem, lixe as áreas ásperas. Adicione furos de drenagem usando a esmerilhadeira com um pequeno disco de corte. Finalize com um lixamento final leve para um visual profissional.
Cenário 2: Criando pás de jardim personalizadas
Comece com uma chapa de metal resistente para a lâmina. Desenhe o formato da pá com um marcador. Use um disco de corte de metal para cortar o formato básico. Trabalhe lentamente em torno das curvas. Alise todas as bordas cortadas com um disco de desbaste. Modele o ângulo da lâmina cuidadosamente. Crie uma leve curva para facilitar a escavação. Faça furos para a montagem do cabo. Alise todas as bordas que tocarão o solo. Teste o peso e o equilíbrio. Adicione suportes para a montagem do cabo, se necessário. Finalize com um revestimento antiferrugem.
Cenário 3: Afiação de lâminas de enxada de jardim
Primeiro, limpe bem a lâmina da enxada. Prenda-a firmemente em um torno. Use um disco de desbaste específico para metal. Segure o desbaste no mesmo ângulo do fio original. Faça passadas suaves e uniformes ao longo da lâmina. Não deixe o metal esquentar demais. Verifique seu progresso com frequência. Mantenha o ângulo original da lâmina. Trabalhe em ambos os lados igualmente. Teste o fio cuidadosamente com uma mão enluvada. Faça os retoques finais com um disco de granulação mais fina. Finalize removendo quaisquer rebarbas.
Cenário 4: Corte e modelagem de treliças de metal
Escolha um metal resistente, porém leve, para sua treliça. Desenhe seu padrão com um marcador. Primeiro, corte linhas retas com um disco de corte para metal. Aplique pressão constante e uniforme. Corte curvas em pequenas seções. Alise todas as bordas cortadas. Arredonde os cantos vivos. Certifique-se de que todas as juntas se encaixem bem. Crie pontos de montagem para a instalação. Teste todas as conexões. Adicione toques decorativos com a lixadeira. Alise as ásperas. Finalize com tinta antiferrugem.
Cenário 5: Criando estacas decorativas para jardim
Comece com hastes de metal ou chapas planas. Planeje seus projetos cuidadosamente. Corte as peças no comprimento certo com um disco de corte de metal. Modele as pontas decorativas usando diferentes acessórios de polimento. Crie padrões lixando cuidadosamente as superfícies. Marque os pontos para inserção no solo. Alise todas as bordas cuidadosamente. Adicione furos para pendurar plantas, se necessário. Crie ranhuras no projeto para suporte adicional das plantas. Lustre as peças acabadas com uma almofada de polimento. Aplique uma camada de proteção contra intempéries.
4. Conclusão
Começar projetos DIY ao ar livre com uma esmerilhadeira angular sem fio pode transformar seu espaço externo e economizar dinheiro. Comece com projetos simples para aumentar sua confiança. Experimente alisar uma pequena área de concreto ou consertar uma cadeira de jardim enferrujada. À medida que você se acostumar com sua esmerilhadeira, passe para projetos maiores.
Lembre-se de que todo profissional começa como iniciante. Dedique tempo para aprender as técnicas adequadas. Seu primeiro projeto pode não ser perfeito, mas cada um aprimorará suas habilidades.
5. Perguntas frequentes
É seguro usar uma esmerilhadeira angular sem fio para projetos ao ar livre?
Sim, esmerilhadeiras angulares sem fio são seguras se você seguir as regras básicas de segurança. Use sempre proteção para os olhos e luvas de trabalho e mantenha crianças e animais de estimação longe da sua área de trabalho.
Como faço a manutenção da minha rebarbadora sem fio?
É aconselhável limpar a sua esmerilhadeira após cada utilização. Antes de iniciar o trabalho, verifique se os discos apresentam desgaste. Mantenha as baterias carregadas e guarde a ferramenta em local seco.
Como escolher o disco de desbaste certo para minha esmerilhadeira angular sem fio?
Combine o disco ao seu material — discos de metal para metal, discos de alvenaria para concreto. Da mesma forma, verifique se o tamanho do disco corresponde à sua retificadora. Certifique-se de que a classificação de velocidade do disco corresponda à sua ferramenta.
Qual é o melhor método para fazer a manutenção da minha rebarbadora sem fio?
Limpe as saídas de ar regularmente para evitar o acúmulo de poeira. Mantenha todos os acessórios organizados e protegidos. Substitua as peças desgastadas imediatamente.
Como evito o superaquecimento ao usar uma esmerilhadeira angular sem fio?
Faça pausas regulares durante trabalhos longos. Não force a ferramenta – deixe-a trabalhar em seu próprio ritmo. Mantenha as aberturas de ventilação livres de poeira.
Existem técnicas específicas para fazer cortes curvos com uma esmerilhadeira angular sem fio?
Faça pequenos cortes seguindo a linha marcada. Mova-se lenta e firmemente. Use as duas mãos para melhor controle.
É melhor usar uma esmerilhadeira angular sem fio para projetos de reforma da casa ou uma versão com fio?
Moedores sem fio oferecem maior mobilidade e praticidade para projetos domésticos . São adequados para a maioria das tarefas "faça você mesmo", enquanto as versões com fio são mais indicadas para trabalhos mais longos.