A circular saw is a vital tool. It offers great versatility in woodworking. Many projects need accurate angle cuts. This includes framing, flooring, and cabinetry. This guide provides a comprehensive approach. Learn to cut angles effectively. Get the knowledge to choose the right saw. Execute accurate angle cuts every time.
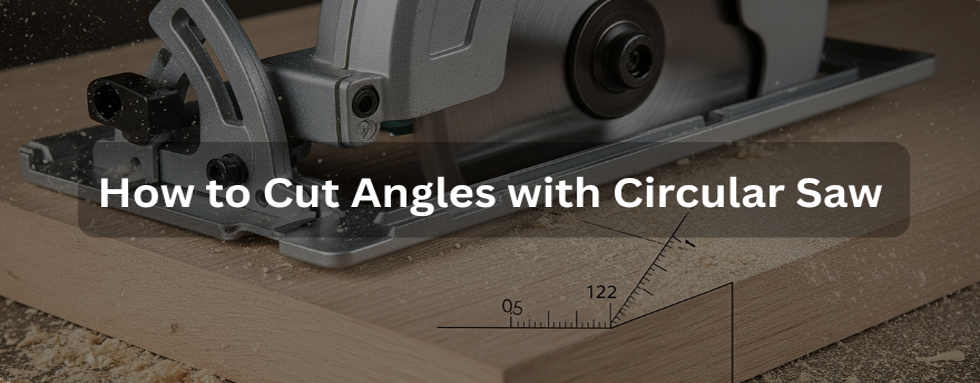
1. Can a Circular Saw Cut Angles?
Understanding the Capabilities of Circular Saws to Cut Angles
Can a circular saw cut angles? Yes, it can. This is a common question. A circular saw can cut at an angle. It handles more than straight cuts. You can make angle cuts with a circular saw. This capability greatly expands your project options, allowing for intricate designs in framing, cabinetry, and other woodworking tasks.
Features That Allow Cutting Angles
The adjustable base is key. It's also called the shoe or footplate. This base pivots. You can tilt the saw's blade. This creates an angle relative to the material. This feature is called bevel adjustment. It helps you adjust the circular saw angle. The ONEVAN 180mm 7 Inch Brushless Cordless Circular Saw, for example, features an adjustable bevel cutting angle ranging from 0° to 45° for precise cuts. You can easily cut a 45-degree angle with a circular saw. Some advanced models offer micro-adjustments. This means even greater precision.
Common Angle Cuts Made with Circular Saws
Your circular saw is capable of making many common cuts.
90-Degree Angle Cuts
Achieving a perfect 90-degree angle with a circular saw is a basic skill. It ensures flush joints. Shelving and simple framing use these. You will often cut a right angle with a circular saw.
45-Degree Angle Cuts
This angle is very common. Knowing how to cut a 45-degree angle with acircular saw is essential. It creates mitered corners. Picture frames, door casings, and baseboards use this.
Other Angled Cuts (e.g., 60 degrees)
You might need other angles. How to cut 60-degree angle with a circular saw helps with hexagonal shapes. It works for specific roof pitches.
Bevel Cuts vs. Miter Cuts
Understand the difference. A bevel cut tilts the blade through the material's thickness. A miter cut involves tilting the saw blade at an angle and moving it across the material’s width to create angled cuts, typically used for joining two pieces at a corner. Your circular saw primarily makes bevel cuts when you adjust the angle of the circular saw. For miter-like cuts, use a guide to ensure accuracy. Or clamp the material at an angle.
How to Adjust the Bevel for Angled Cuts
Adjusting the bevel is simple.
- Locate the Adjustment: Find the bevel adjustment lever or knob. It is on your saw model. A DeWalt circular saw usually has it on the front or side.
- Loosen It: Unlock the bevel adjustment by flipping the lever or turning the knob counter-clockwise, depending on your saw model, before proceeding to tilt the saw base.
- Tilt the Base: Gently tilt the saw's shoe to the desired angle. Align the indicator with your desired angle. Scales show common angles. Use an angle finder for custom angles.
- Secure It: Tighten the lever or knob firmly. This is crucial for safety. It ensures cut accuracy. A loose setting can cause the blade to shift. Always double-check before cutting.
2. Common Applications for Angle Cuts and Materials
How to cut angles with a circular saw opens many possibilities. You can work on various projects. You can cut many materials.
Applications in Carpentry and Framing
Framing
Structural frames need angle cuts. Framing uses precise angles. This ensures strong walls and roofs. Learning how to cut angles in wood with a circular saw is key. It creates strong, interlocking joints. Think about birdsmouth cuts for rafters. Or angled studs for vaulted ceilings. Good angles prevent weakness.
Cabinetry
Building custom cabinetry needs high precision, especially for seamless boxes. Angle cuts are vital for flush corners. They create professional-looking joints. Make angle cuts with a circular saw for face frames. It elevates your finished pieces.
Trim Work
Installing trim, skirting, and crown molding demands accuracy. For a perfect corner, cut trim angles with a circular saw. Use a 45-degree angle for inside and outside corners. Crown molding might need compound angles. Precise cuts reduce gaps. They give a clean, professional finish.
Suitable Materials for Angle Cutting
A circular saw cuts angles in many materials. The blade type matters greatly.
Plywood
This is a common material. Circular saws cut plywood well. Use a fine-tooth blade for cleaner edges, especially for visible parts.
MDF (Medium-Density Fiberboard)
Ideal for cabinetry. It works for paint-grade trim. MDF cuts easily, but it produces fine dust that can pose respiratory hazards. Always use appropriate dust collection systems and wear a respirator when cutting MDF.
Hardwood
Oak, maple, or cherry are hardwoods. Use a sharp, carbide-tipped blade. A high tooth count (60-80 teeth) is generally recommended for minimizing tear-out in hardwoods. It gives clean cuts. Hardwoods are dense. Use a slower, steady feed rate.
Softwood
Pine, spruce, and fir are softwoods. They are common for framing. They are easier to cut. A good blade prevents splintering, especially when used at a perfect 45-degree angle with a circular saw.
Composite Materials
Some circular saws cut these. Use the right blade. With the appropriate blade designed for non-ferrous metals, you can effectively cut aluminum angles with a circular saw. Always wear eye and hearing protection. The ONEVAN 180mm Brushless Cordless Circular Saw is capable of cutting a wide range of materials. You can easily cut solid wood, PVC, MDF, plywood, stone, and ceramic tiles.
3. Techniques for Cutting Angles with a Circular Saw
Achieving precise angle cuts needs good preparation. Then, careful execution. Follow these steps. You will cut an angle with a circular saw accurately. You will cut safely.
Preparation Steps for Angle Cutting
Step 1: Clear the Work Area Safety comes first. No obstructions should be in your way. A cluttered area is dangerous. Ensure enough space to move.
Step 2: Gather the Required Tools and Safety Gear. Have all tools ready.
- Circular Saw: Ensure it's clean. The blade must be sharp. It needs to be right for the material. All adjustments must move freely. Know how to change the angle on the DeWalt circular saw.
- Measuring Tape: For accurate layout.
- Pencil: To mark cut lines.
- Speed Square or Combination Square: Use this for precise 45 and 90-degree lines.
- Clamps: Essential for securing material. Never hold material by hand.
- Straight Edge Guide (Optional): This improves precision, especially for long, accurate angled cuts.
- Safety Glasses: Always wear them. Protect your eyes.
- Hearing Protection: Use for long work. Use when cutting dense materials.
- Dust Mask/Respirator: Critical for MDF or fine dust.
-
Gloves: Some individuals prefer wearing gloves for a better grip. Ensure they don't hinder saw control.
How to Cut 45-Degree Angle with a Circular Saw
This is a key skill. Many search how to cut a 45-degree angle with a circular saw.
Step 1: Mark the Cutting 45-degree Angle Line
Measure your material precisely. Use a speed square or protractor. Draw a clear, sharp 45-degree line. It must extend across the width.
Step 2: Set the 45 Degrees Bevel Angle
Unlock the bevel adjustment. Tilt the saw base. Align the indicator with the 45-degree mark. Lock it firmly. Double-check the setting. It must not shift. This prepares your saw. It's how to adjust the circular saw angle for 45 degrees.
Step 3: Position the Material and Secure It
Place your workpiece on a stable surface. Sawhorses or a workbench work well. Position the waste side off the edge. This allows the blade to pass freely. Use at least two clamps. Secure the material firmly. It must not move during the cut. For a precise 45-degree angle cut with a circular saw, no movement is allowed.
Step 4: Start Cutting 45 Degrees
Cutting Process:
- Align the Blade: Match the blade's cutting path (kerf) with your line. Keep the blade on the waste side.
- Start the Saw: With the blade clear, depress the trigger to activate the saw. Let the saw reach full speed.
- Enter the Cut: Firmly and steadily pushing the saw into the material, applying sufficient pressure to ensure effective cutting without forcing the tool.
- Maintain Steady Pressure: Apply consistent pressure. Let the saw cut. Don't force it. Maintain constant forward motion.
- Follow the Line: Watch the marked line. Guide the saw along it. Keep the saw's base firmly against a guide when in use.
- Keep the saw's base firm against a guide if used.
- Complete the Cut: Push until the blade exits the material.
Cutting Tips:
- Use a Guide: Clamp a straight edge. Or use a circular saw guide. This makes cleaner, straighter 45-degree cuts, especially on longer boards.
- Support the Cut-Off: Near the end of the cut, ensure that the cut-off piece is adequately supported to prevent it from binding or falling prematurely, which could cause splintering or injury.
- Blade Selection: Use a fine-tooth blade (e.g., 60-tooth ATB). It gives cleaner edges. This is important for visible 45-degree angle cuts.
The ONEVAN 125mm Brushless Cordless Circular Saw features a 1000W brushless motor and a no-load speed of 10800 rpm. This tool gives ample power for clean, efficient cuts.
How to Cut 60-degree Angle with a Circular Saw
This cut uses similar steps. It needs a careful angle setting.
Step 1: Mark the Cutting 60-degree Angle Line
Mark your 60-degree angle precisely. Use a protractor. Or a combination square set to 60 degrees.
Step 2: Set the 60 Degrees Bevel Angle
Unlock the bevel adjustment. Set the saw's base to a 60-degrees. Not all saws tilt this far. Check your saw's manual. You may need a different tool otherwise.
Step 3: Adjust the Material Position
Place the material on your workbench. Align the marked line with the blade path. Clamp it securely from both ends. No shifting must occur. Ensure the cut-off piece falls freely or is supported.
Step 4: Execute the 60 Degrees Cut
Cutting Process:
- Confirm the blade is clear.
- Start the saw to full speed.
- Push slowly and steadily. Follow your line.
- Maintain firm grip and control.
Cutting Tips:
- Blade Clearance: At steeper angles, check for clearance. Ensure the motor or battery pack clears the material.
- Slower Feed Rate: For steeper bevels, feed at a slower rate. This gives cleaner cuts. It reduces motor strain.
- Check Angles: Use a digital angle finder. Verify your saw's setting. Do this before and after cutting.
How to Cut 90-degree Angle with a Circular Saw
This is a fundamental skill. Knowing how to cut a 90-degree angle with a circular saw is essential. It's a straight crosscut or rip cut.
Step 1: Mark the Cutting 90-Degree Angle Line
Draw a perfect 90-degree line. Use a speed square or framing square. Extend the line fully for accuracy. This is how to cut a right angle with a circular saw.
Step 2: Set the 90 Degrees Bevel Angle
Set your saw's bevel adjustment to 0 degrees, ensuring that the blade is perfectly perpendicular to the base for accurate 90-degree cuts.
Step 3: Position the Material Correctly
Place the material on a stable surface. Ensure the cutting line is clear below. Clamp the material securely. Clamp both sides of the cut if possible.
Step 4: Make the 90 Degrees Cut
- Cutting Process:
- Align the blade with the waste side of your line.
- Start the saw.
- Push smoothly and steadily through.
- Keep the saw's base flat.
- Cutting Tips:
- Use a Crosscut Guide: For perfect 90-degree cuts, use a clamped straight edge. Or a dedicated circular saw crosscut jig. This ensures a straight line.
- Full Blade Engagement: Ensure the blade fully clears the material. This prevents binding. It stops kickback.
How to Cut Compound Angles with a Circular Saw
Compound angles are more complex. They combine a bevel and a miter angle. A miter saw usually does this. You can achieve basic compound angles with a circular saw. Use guides and careful setup.
Step 1: Understand the Compound Angle
A compound angle refers to a cut that is angled in two ways. The blade tilts (bevel). The saw cuts across at an angle (miter). This is for crown molding. Or complex roof rafters. You need both bevel and miter settings. Use online calculators or charts for help.
Step 2: Mark the Cutting Line
Mark your cutting line precisely. Indicate both miter and bevel aspects. Draw reference lines on the face and edge.
Step 3: Set the Bevel Angle
Set the bevel angle on your circular saw first. This is the blade's tilt. Lock it firmly.
Step 4: Position the Material and Set the "Miter" Aspect
This is difficult with a handheld circular saw. You can't set a true miter. Instead, you position the material. It needs to be at the miter angle relative to the saw's path.
- Use a Miter Box: For small pieces, a manual miter box can provide accurate angles and stability, allowing for cleaner cuts with a circular saw.
- . Place the material inside. Use your circular saw to make the bevel cut.
- Clamp a Fence at an Angle: For larger pieces, clamp a straight edge or fence. Position it across your material. Set it at the miter angle. Your circular saw will come into contact with this. This needs a careful layout.
Step 5: Execute the Compound Cut
- Cutting Process:
- Align the saw with your lines. Align with your chosen guide.
- Start the saw to full speed.
- Push slowly and deliberately. Maintain both the bevel angle and guide position.
- This cut needs extreme focus. It needs control.
- Cutting Tips:
- Practice on Scrap: This is vital. Compound cuts are hard. Practice until you are comfortable. Be consistent.
- Take Shallow Passes: For thick material or tricky angles, make multiple passes to ensure a smooth finish. Gradually increase depth. This reduces strain. It improves cut quality.
- Support Everywhere: Support the material fully. Support both sides of the cut. The waste piece should not bind or fall early.
4. Common Mistakes When Cutting Angles with a Circular Saw
Even experienced users make mistakes. Knowing these helps you avoid them. It ensures safer, more accurate results.
Mistake 1: Incorrect Angle Settings
This is a common cause of bad cuts.
Always double-check your saw's angle setting using a digital angle finder or a protractor for precise measurements before making your cuts. Do this before every cut. Don't rely only on the saw's scale. Use an external angle finder. Or a reliable protractor. Verify the exact angle. This is critical for important joints. After setting, ensure the lock lever is fully tightened. A small shift ruins the piece.
Mistake 2: Not Securing Material Properly
Moving material is very dangerous. It causes inaccurate cuts.
Always use clamps. Secure your material firmly. Use a stable work surface. Never try to hold material by hand. For longboards, use multiple clamps. Ensure clamps don't block the saw path. Use non-slip mats for extra stability.
Mistake 3: Poor Tool Maintenance
A dull blade or dirty saw performs poorly. It is also unsafe.
Regularly inspect your saw blade. Check for dullness or damage. A dull blade causes tear-out. It creates burning. It strains the motor. Replace worn blades quickly. Keep your saw clean. Especially the bevel adjustment. This ensures smooth, accurate changes. Check the power cord for any signs of wear, fraying, or damage before each use to ensure safe operation of the saw.
Mistake 4: Rushing the Cut
Impatience leads to errors. It increases kickback risk.
Take your time. Let the blade reach full speed. Do this before entering the material. Maintain a slow, steady, and consistent feed rate, and ensure that the cutting depth is set appropriately for the material to avoid binding and ensure clean cuts. Do this through the entire cut. Forcing the saw causes kickback. It leads to binding. It creates poor cut quality. Let the saw's motor and blade work. Listen to the motor. If it sounds strained, you're pushing too fast.
Mistake 5: Ignoring Safety Protocols
Safety is critical. Never overlook it.
- Always wear PPE: Safety glasses, hearing protection, and a dust mask are a must.
- Keep hands clear: Stay away from the blade's path.
- Support material correctly: Ensure the cut-off piece won't pinch the blade. It must not fall early.
- Never cut freehand: Always use a guide or clamps.
- Unplug the saw: Always unplug the saw when changing blades or making adjustments, and ensure that the blade has come to a complete stop to prevent accidental starts.
- Be aware of kickback: This happens when the blade binds. The saw lurches back. Prevent it with sharp knives. Support material properly. Maintain steady feed. If it binds, release the trigger immediately.
5. Conclusion
Mastering how to use acircular saw to cut angles is a vital skill. It boosts your project capabilities from basic framing to intricate trim work. Making angled cuts with a circular saw brings precision. It achieves professional results. Understand your saw's features. Practice proper setup and techniques. Avoid common mistakes. You will achieve accurate, clean, and safe angle cuts. Practice is key. Start with scrap material. Take your time. Prioritize safety. Your circular saw will become an even more indispensable tool.
6. FAQs
Can I cut angles with a circular saw?
No, not all circular saws can cut angles. Most modern saws can, thanks to an adjustable base for bevel cuts. Always check your specific saw for this bevel adjustment lever before you start.
What is the best angle for cutting trim?
The best trim angle depends on the corner. For standard 90-degree corners, two 45-degree angle cuts make an impeccable miter joint. For crown molding, you will often need more complex compound angles.
How do I maintain my circular saw for optimal performance?
Maintaining a circular saw is very easy. For example, start by keeping your saw well for best results. Keep the blade sharp to prevent splintering and motor strain. Similarly, it is beneficial to clean your saw, including the bevel adjustment, on a regular basis. Subsequently, do not forget to check the cord for damage.
Are there any special blades for cutting angles?
No specific "angle" blades exist. However, a fine-tooth blade with 60 or more teeth provides much cleaner cuts, especially at angles. Therefore, always match the blade type to your material for optimal performance and safety.